

Oh, bagels. When done right, they’re so simple, yet so satisfying and delicious. Both my husband and I are huge fans of these carby, doughy rings of goodness, and since great bagels aren’t as easy to come by in LA, we always have to get our fix when back in NY. And yes, I did see the recent (albeit controversial!) New York Times article claiming that the best bagels are in California. I agree, you can definitely find good bagels on the West Coast. However, I think the big difference is that you can’t just walk out of your apartment and grab a delicious bagel down the block like you can so easily in many neighborhoods of New York City. Plus that New York water has to play a part, right?!
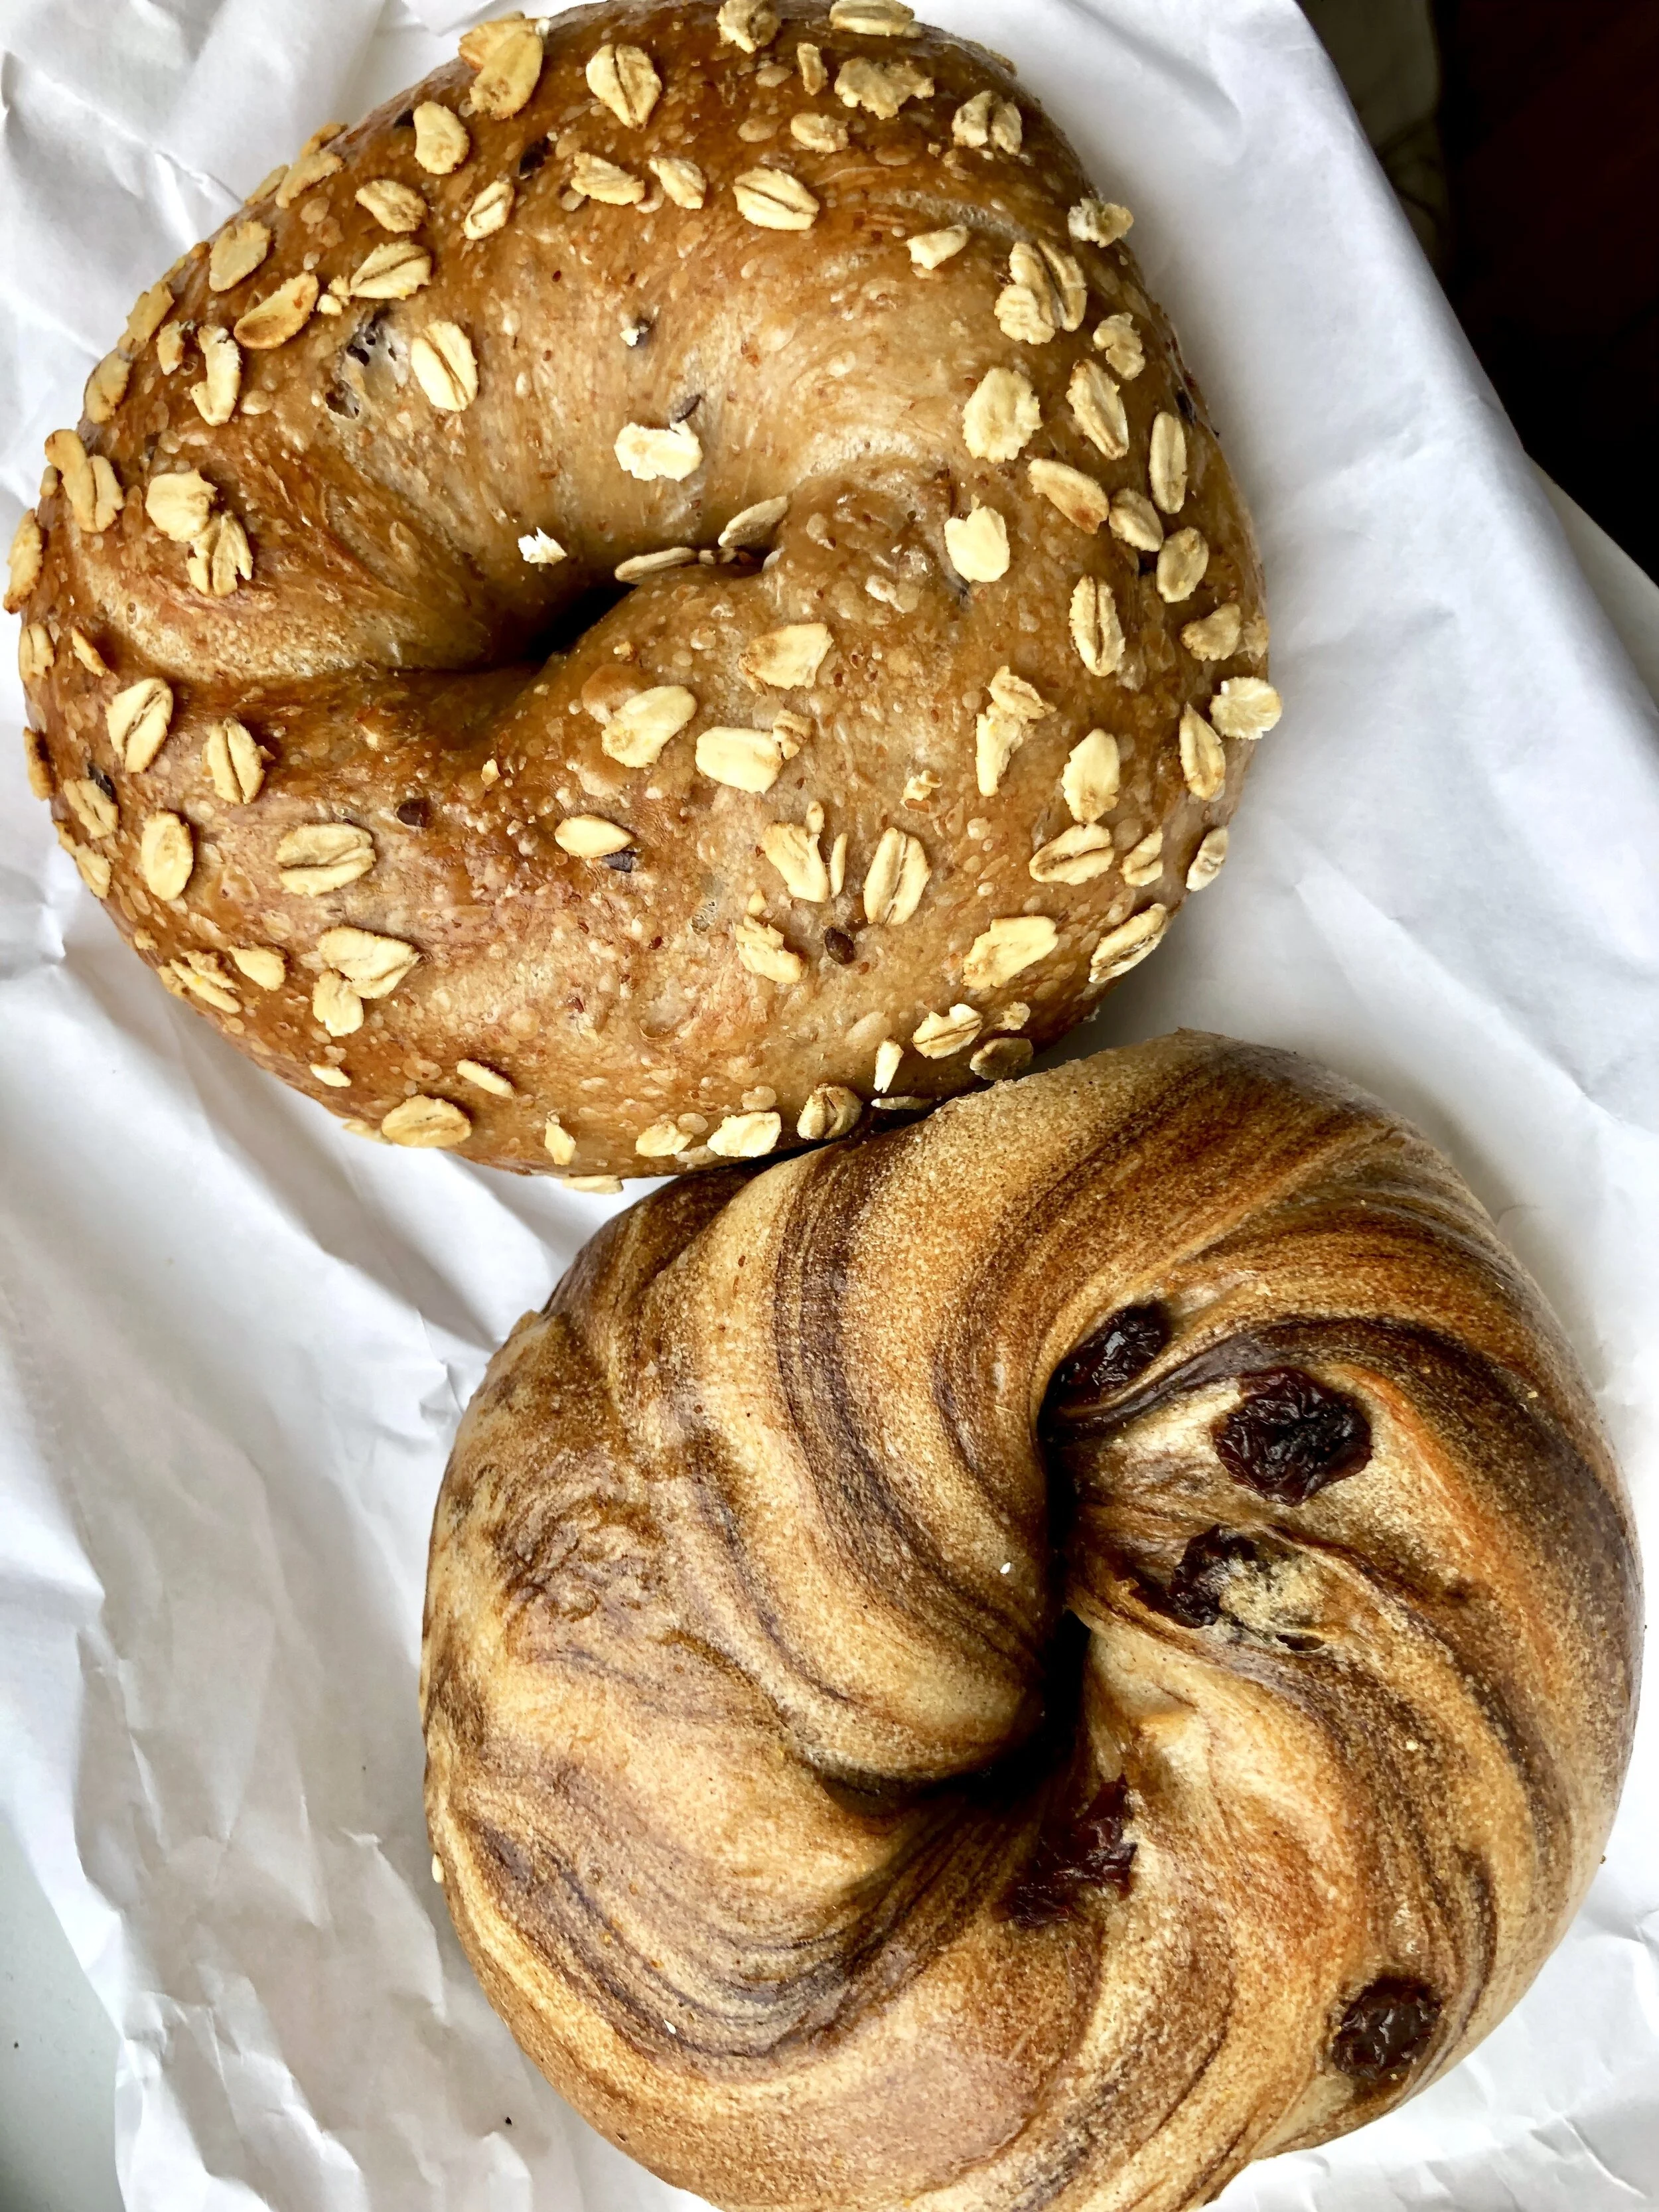
Anyway, Bagelsmith was our go-to neighborhood spot when we lived in Williamsburg, Brooklyn. It’s simple, no frills, but always busy for a reason. Bagels are baked fresh throughout the day, and they have pretty much every flavor you could want. Not to mention endless options for schmears and toppings! For breakfast, I love a whole wheat everything with egg, avocado, fresh veggies, and hot sauce. But the sweet tooth in me also loves a cinnamon raisin bagel (how pretty is that swirl though?) schmeared with almond butter! Just depends on my mood I guess! The hubby’s order is typically what he calls a “double double double” – double sausage, double egg, double cheese on an everything bagel, and loaded with sriracha when eaten. Plus another everything bagel with sun-dried tomato cream cheese for later. The boy can eat! We always get a few bagels to take home as well, and then you can fix them up however you like. The more the merrier!


classic fudge brownies
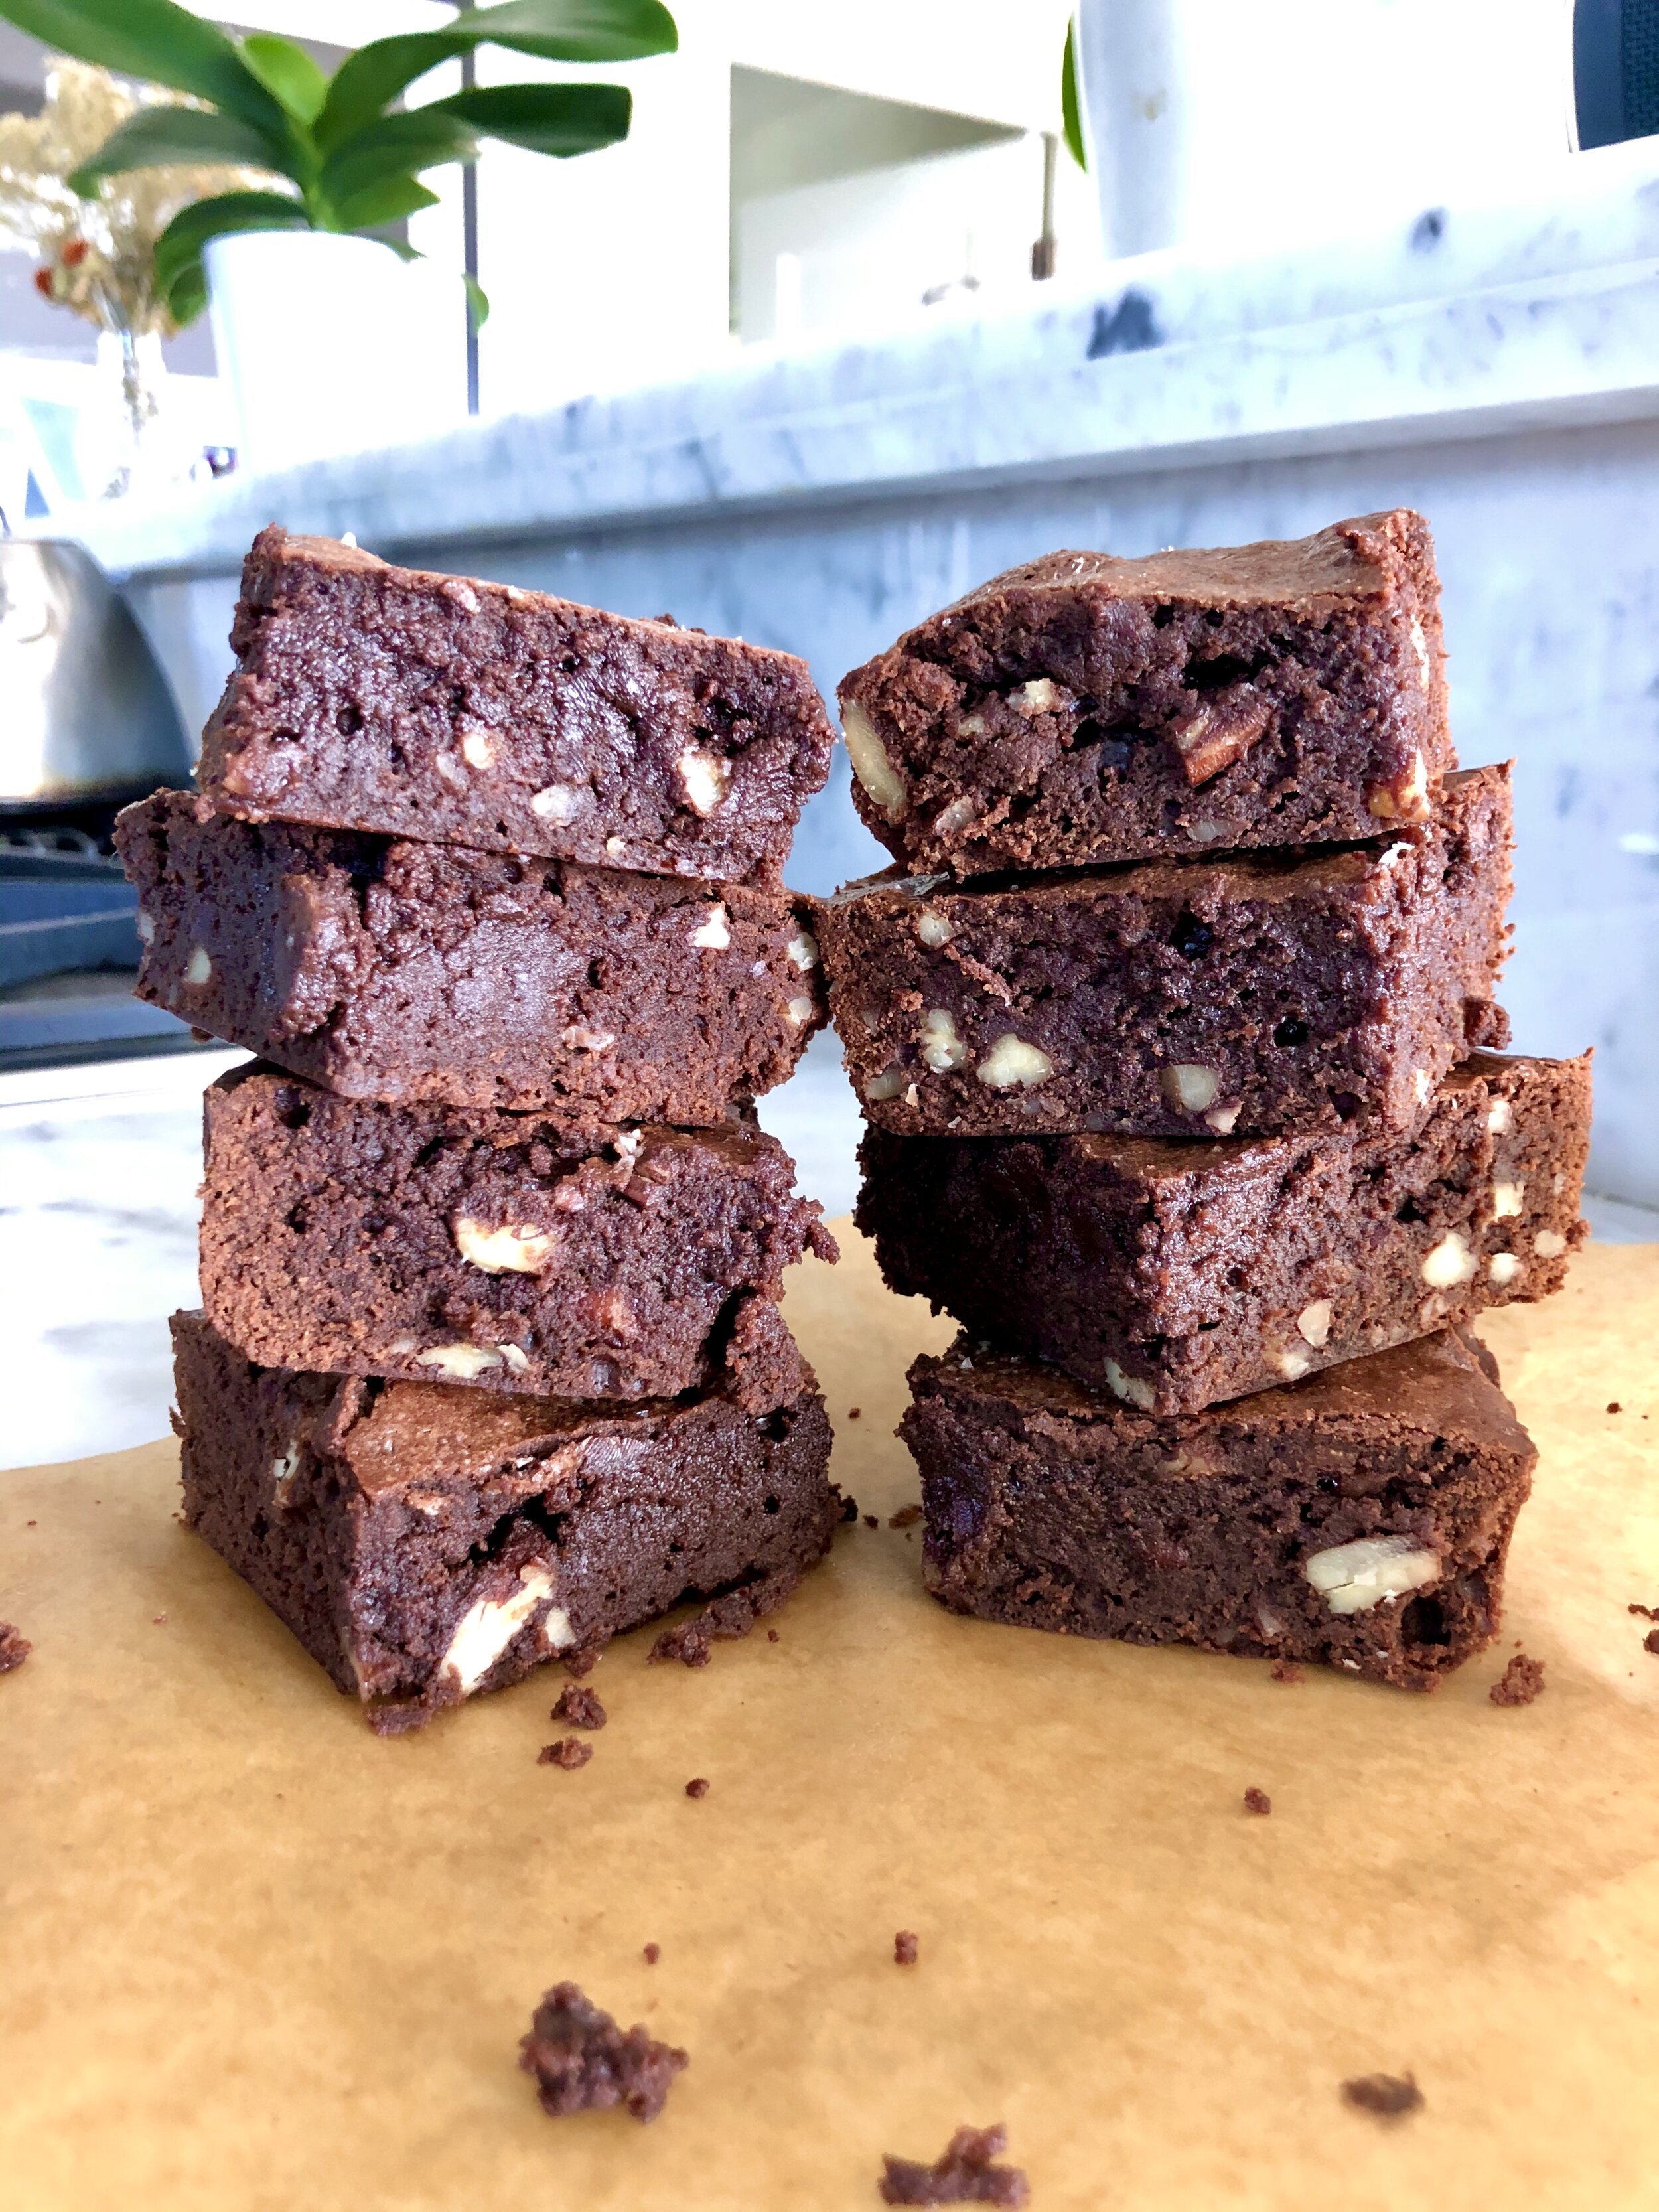

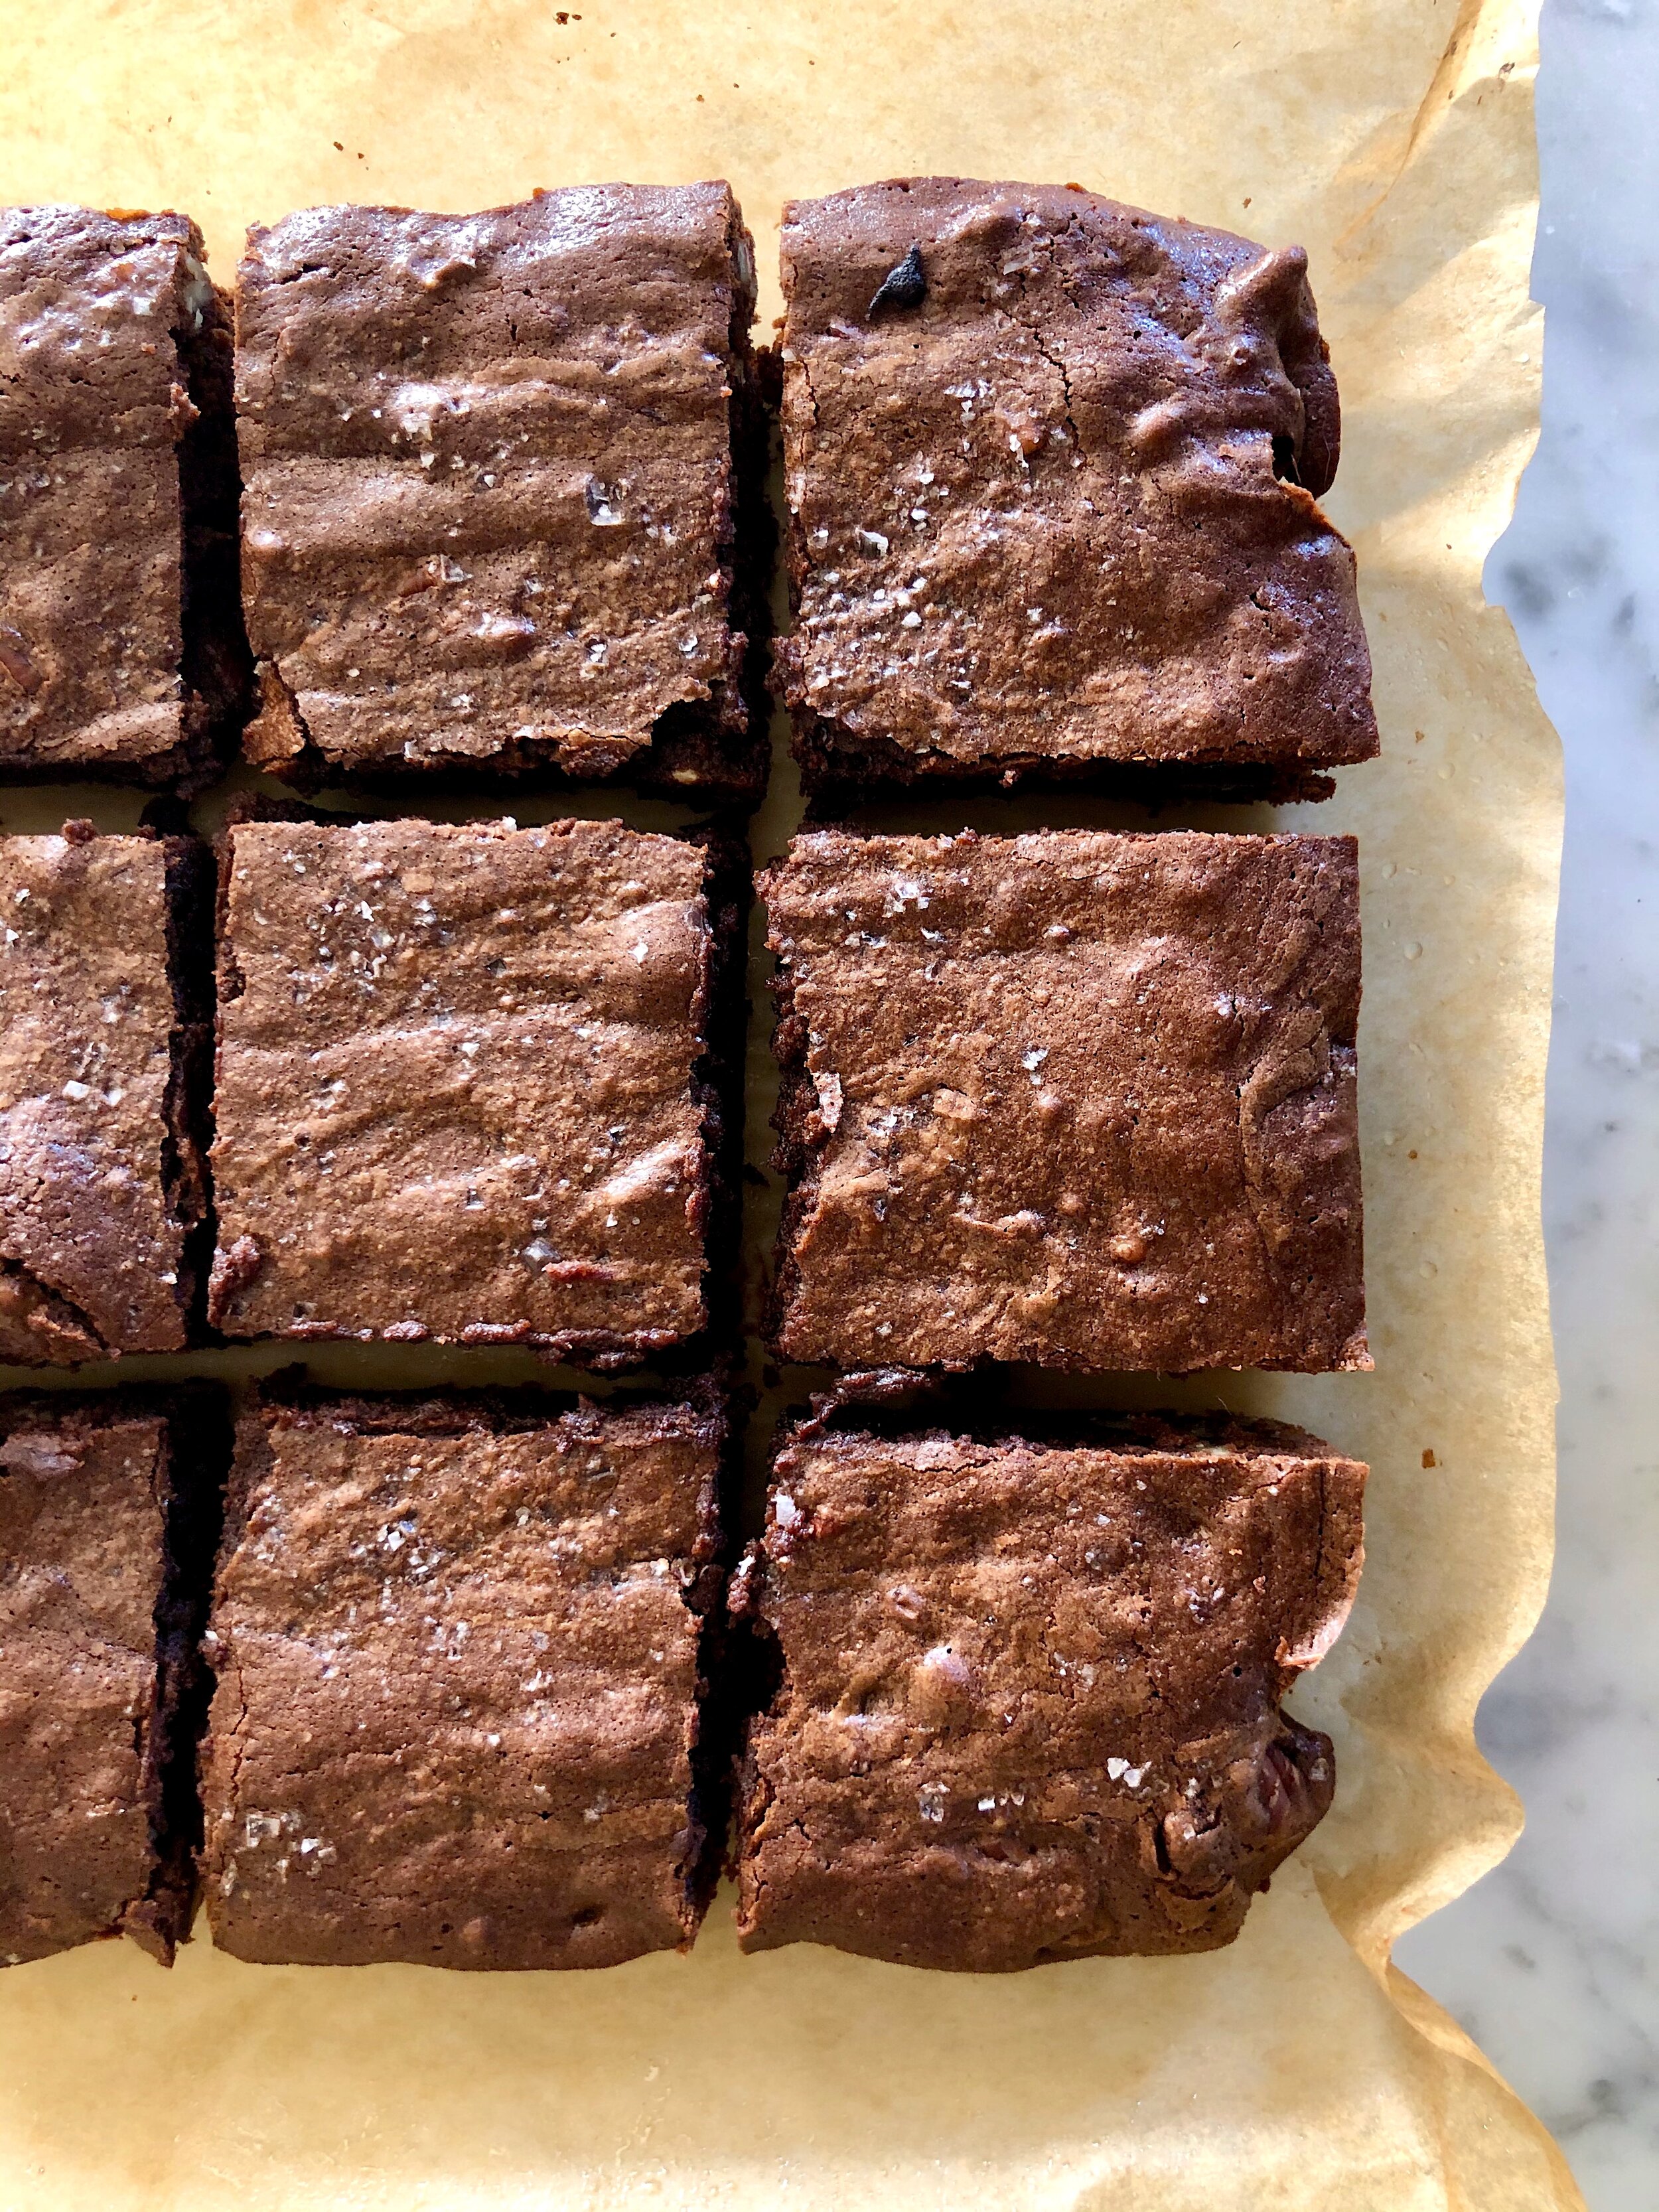
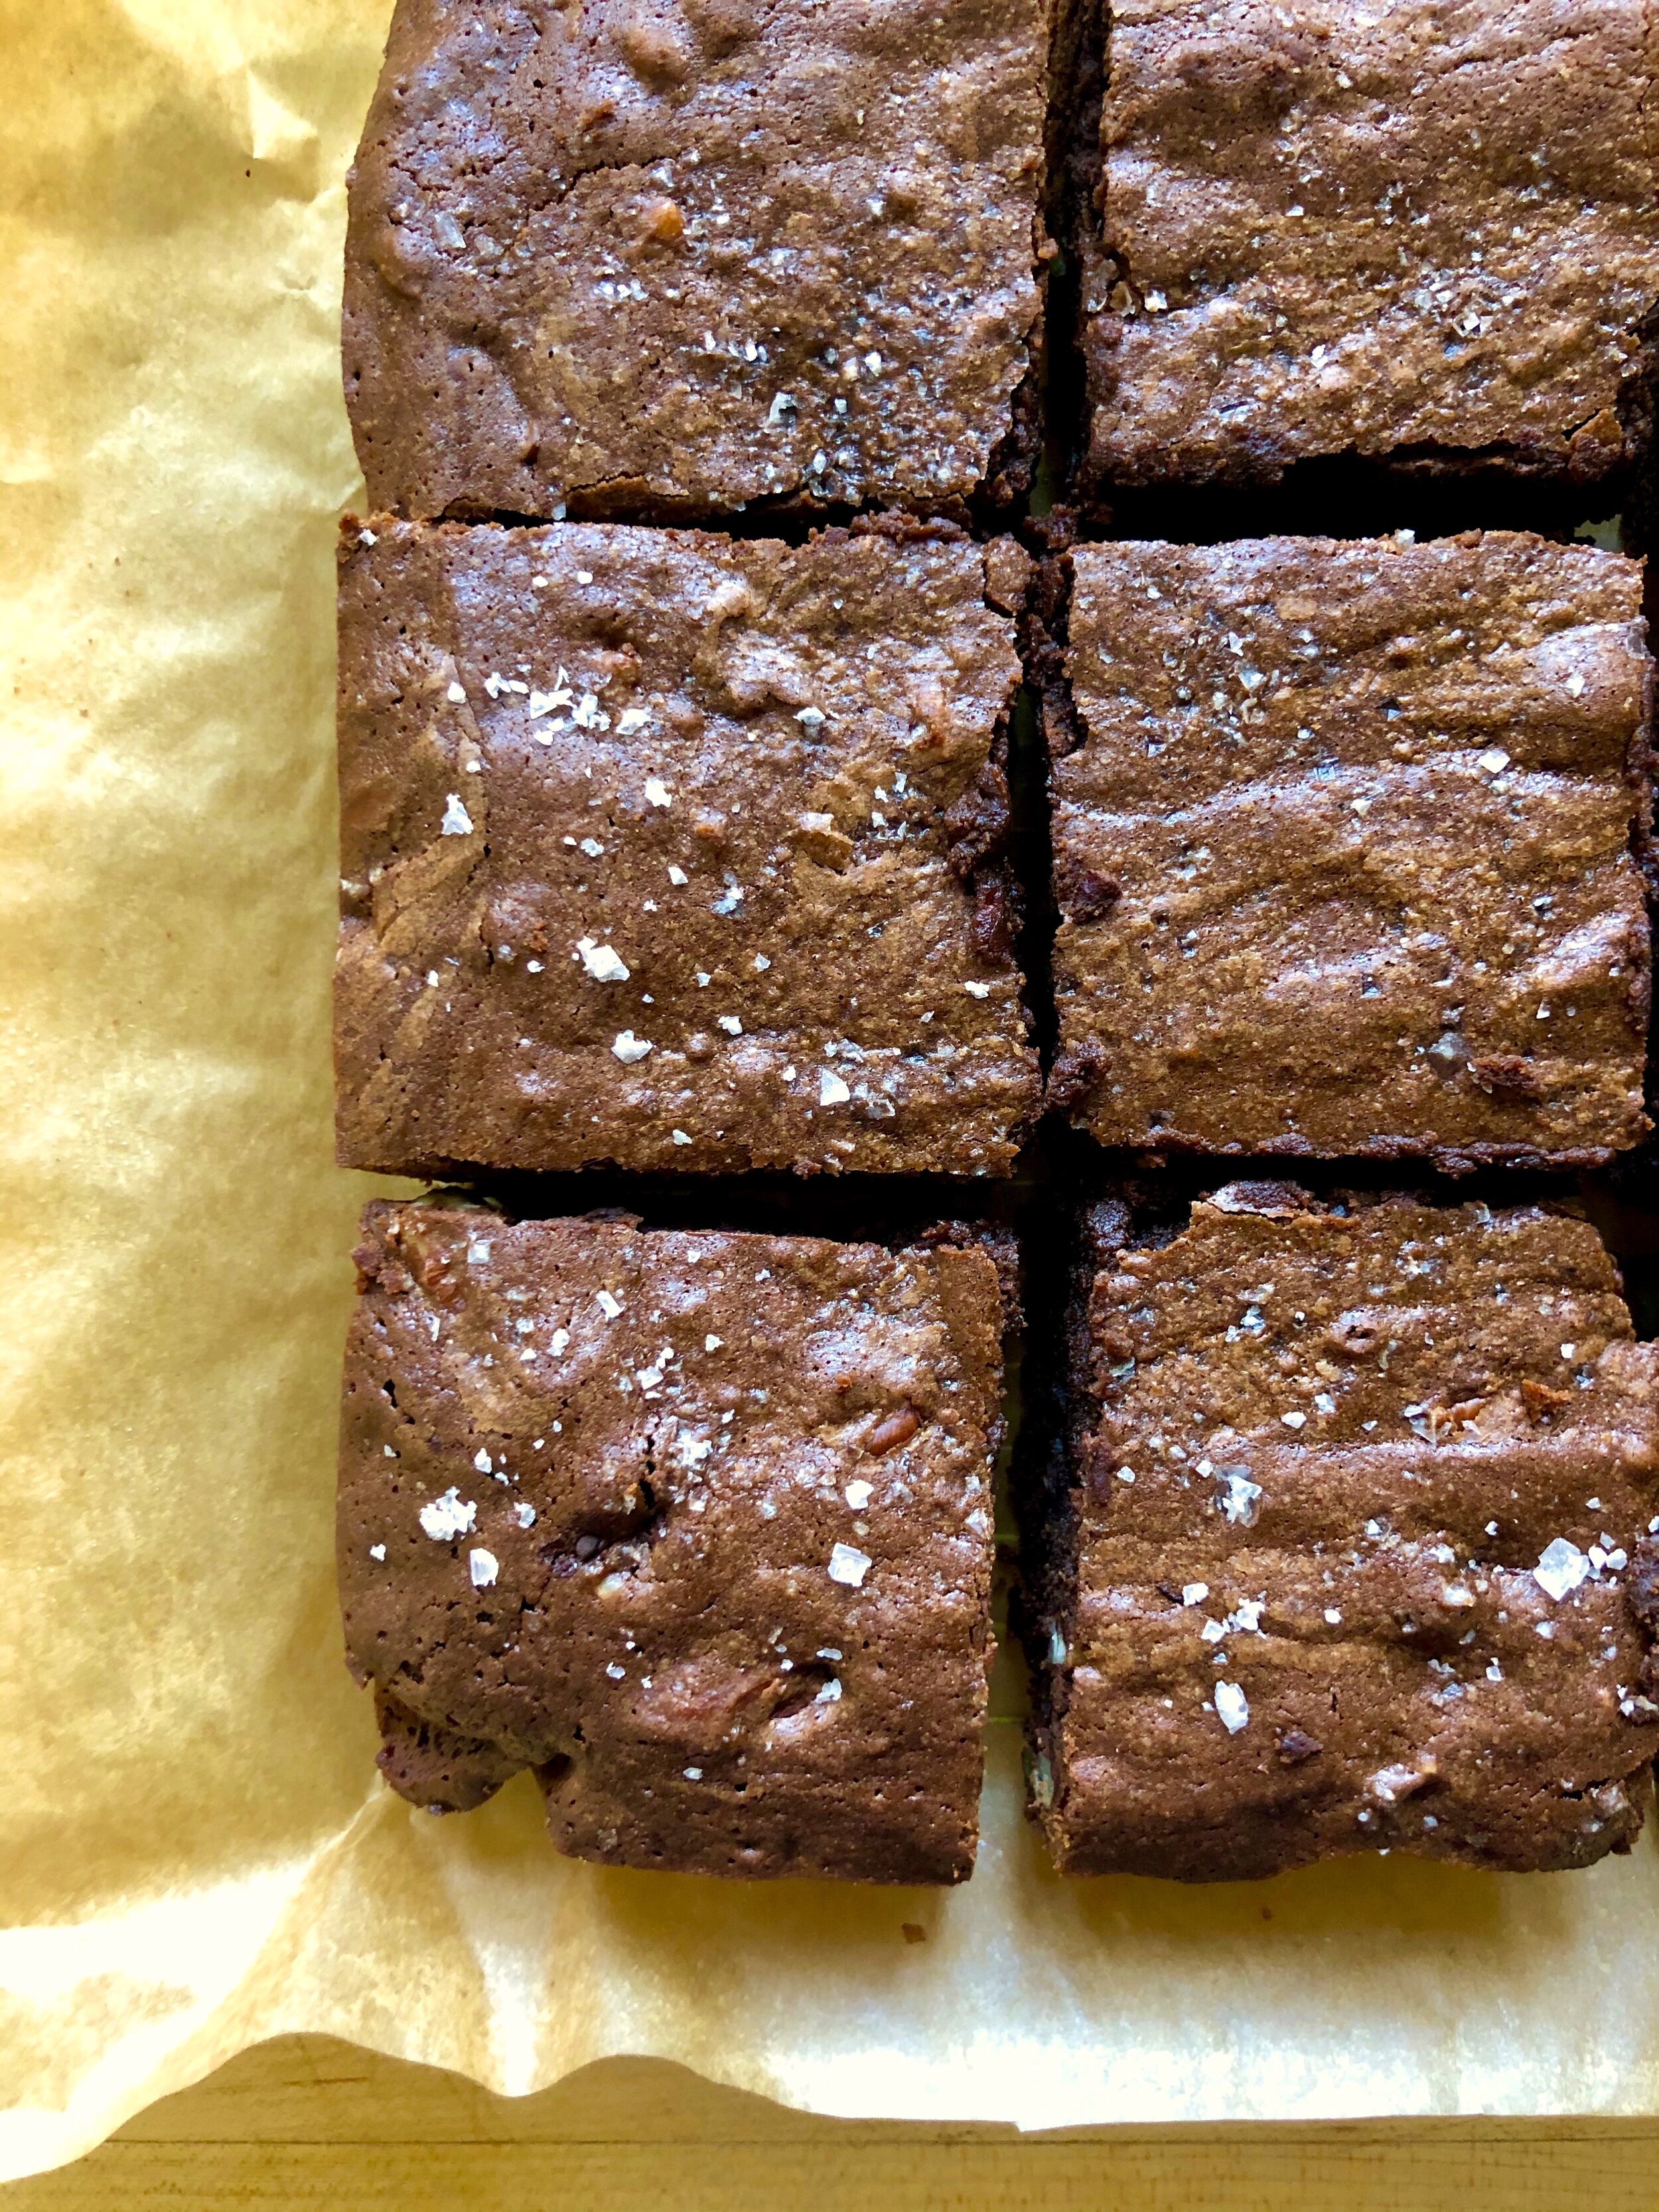
There is not much better than a super rich and decadent brownie. I prefer mine with a chewy, fudgy, almost-raw batter consistency as opposed to one that is cake-like, and I’m happy to say these fit the bill perfectly. Use high quality chocolate, like Guittard, Valrhona, or Ghirardelli, if possible. One tip for making sure your brownies get that beautiful, shiny, and crackly top- whisk the sugars into the warm, melted chocolate mixture. This allows the sugar to rise to the top while baking, and creates the perfect crackly top over a deliciously fudgy interior. Also, you’ll notice I use no leavener (baking soda or powder) in this recipe. Most fudgy brownies don’t need it, but if you prefer a slightly airier, cakey brownie, then you can add 1/4 tsp of baking soda. These are a classic staple in my household, and I love whipping up a batch whenever the chocolate craving hits!


Classic Fudge Brownies:
3/4 cup unsalted butter
5 oz. bittersweet chocolate, finely chopped
3 oz. unsweetened chocolate, finely chopped
3/4 cup cane sugar
1/2 cup dark brown sugar
3 large eggs
2 teaspoons pure vanilla extract
1 tbsp brewed coffee (optional)
3/4 cup all-purpose flour
2 tbsp Dutch-process cocoa powder
1/2 teaspoon flakey sea salt (like Maldon), plus extra for topping
optional mix-ins: 1/2 cup toasted walnuts, toasted coconut, peanut butter chips, etc
Preheat the oven to 350° F. Line a 9-inch square pan with parchment paper, allowing for extra to come up over the sides. Nonstick spray (or butter) both the pan and the parchment paper.
In a saucepan, melt the butter with both chocolates over low heat, stirring occasionally. Remove from the heat, whisk in both sugars until dissolved and mixture is grainy. Add in eggs, vanilla and coffee (if using), whisking until frothy. Fold in flour, cocoa powder, and salt until just combined. Lastly, add any mix-ins, if desired.
Pour the batter into the prepared pan and smooth the surface. Sprinkle extra salt over the batter. Bake for about 30 minutes, until the edges are set but the center is still a bit soft. You may test with a cake tester, and be careful not to overbake! Lift the brownies from the pan using the loose ends of parchment paper, and allow to cool completely. Cut the brownies into squares and enjoy! Store in an air-tight container at room temperature or in the refrigerator. Makes 9 large brownies.
*Adapted from Chewy Fudge Brownies by NYT Cooking, Extra Nutty Dark Chocolate Fudge Brownies by Joy the Baker, and Ultimate Brownies by Handle the Heat.
Useful Tools:

* This post may contain affiliate links. If you buy something through one of these links, it won’t cost you a penny more, but I’ll earn a small commission. This allows me to continue to generate content for you, and helps keep the site up and running. Thanks for your support!


healthy zucchini bread


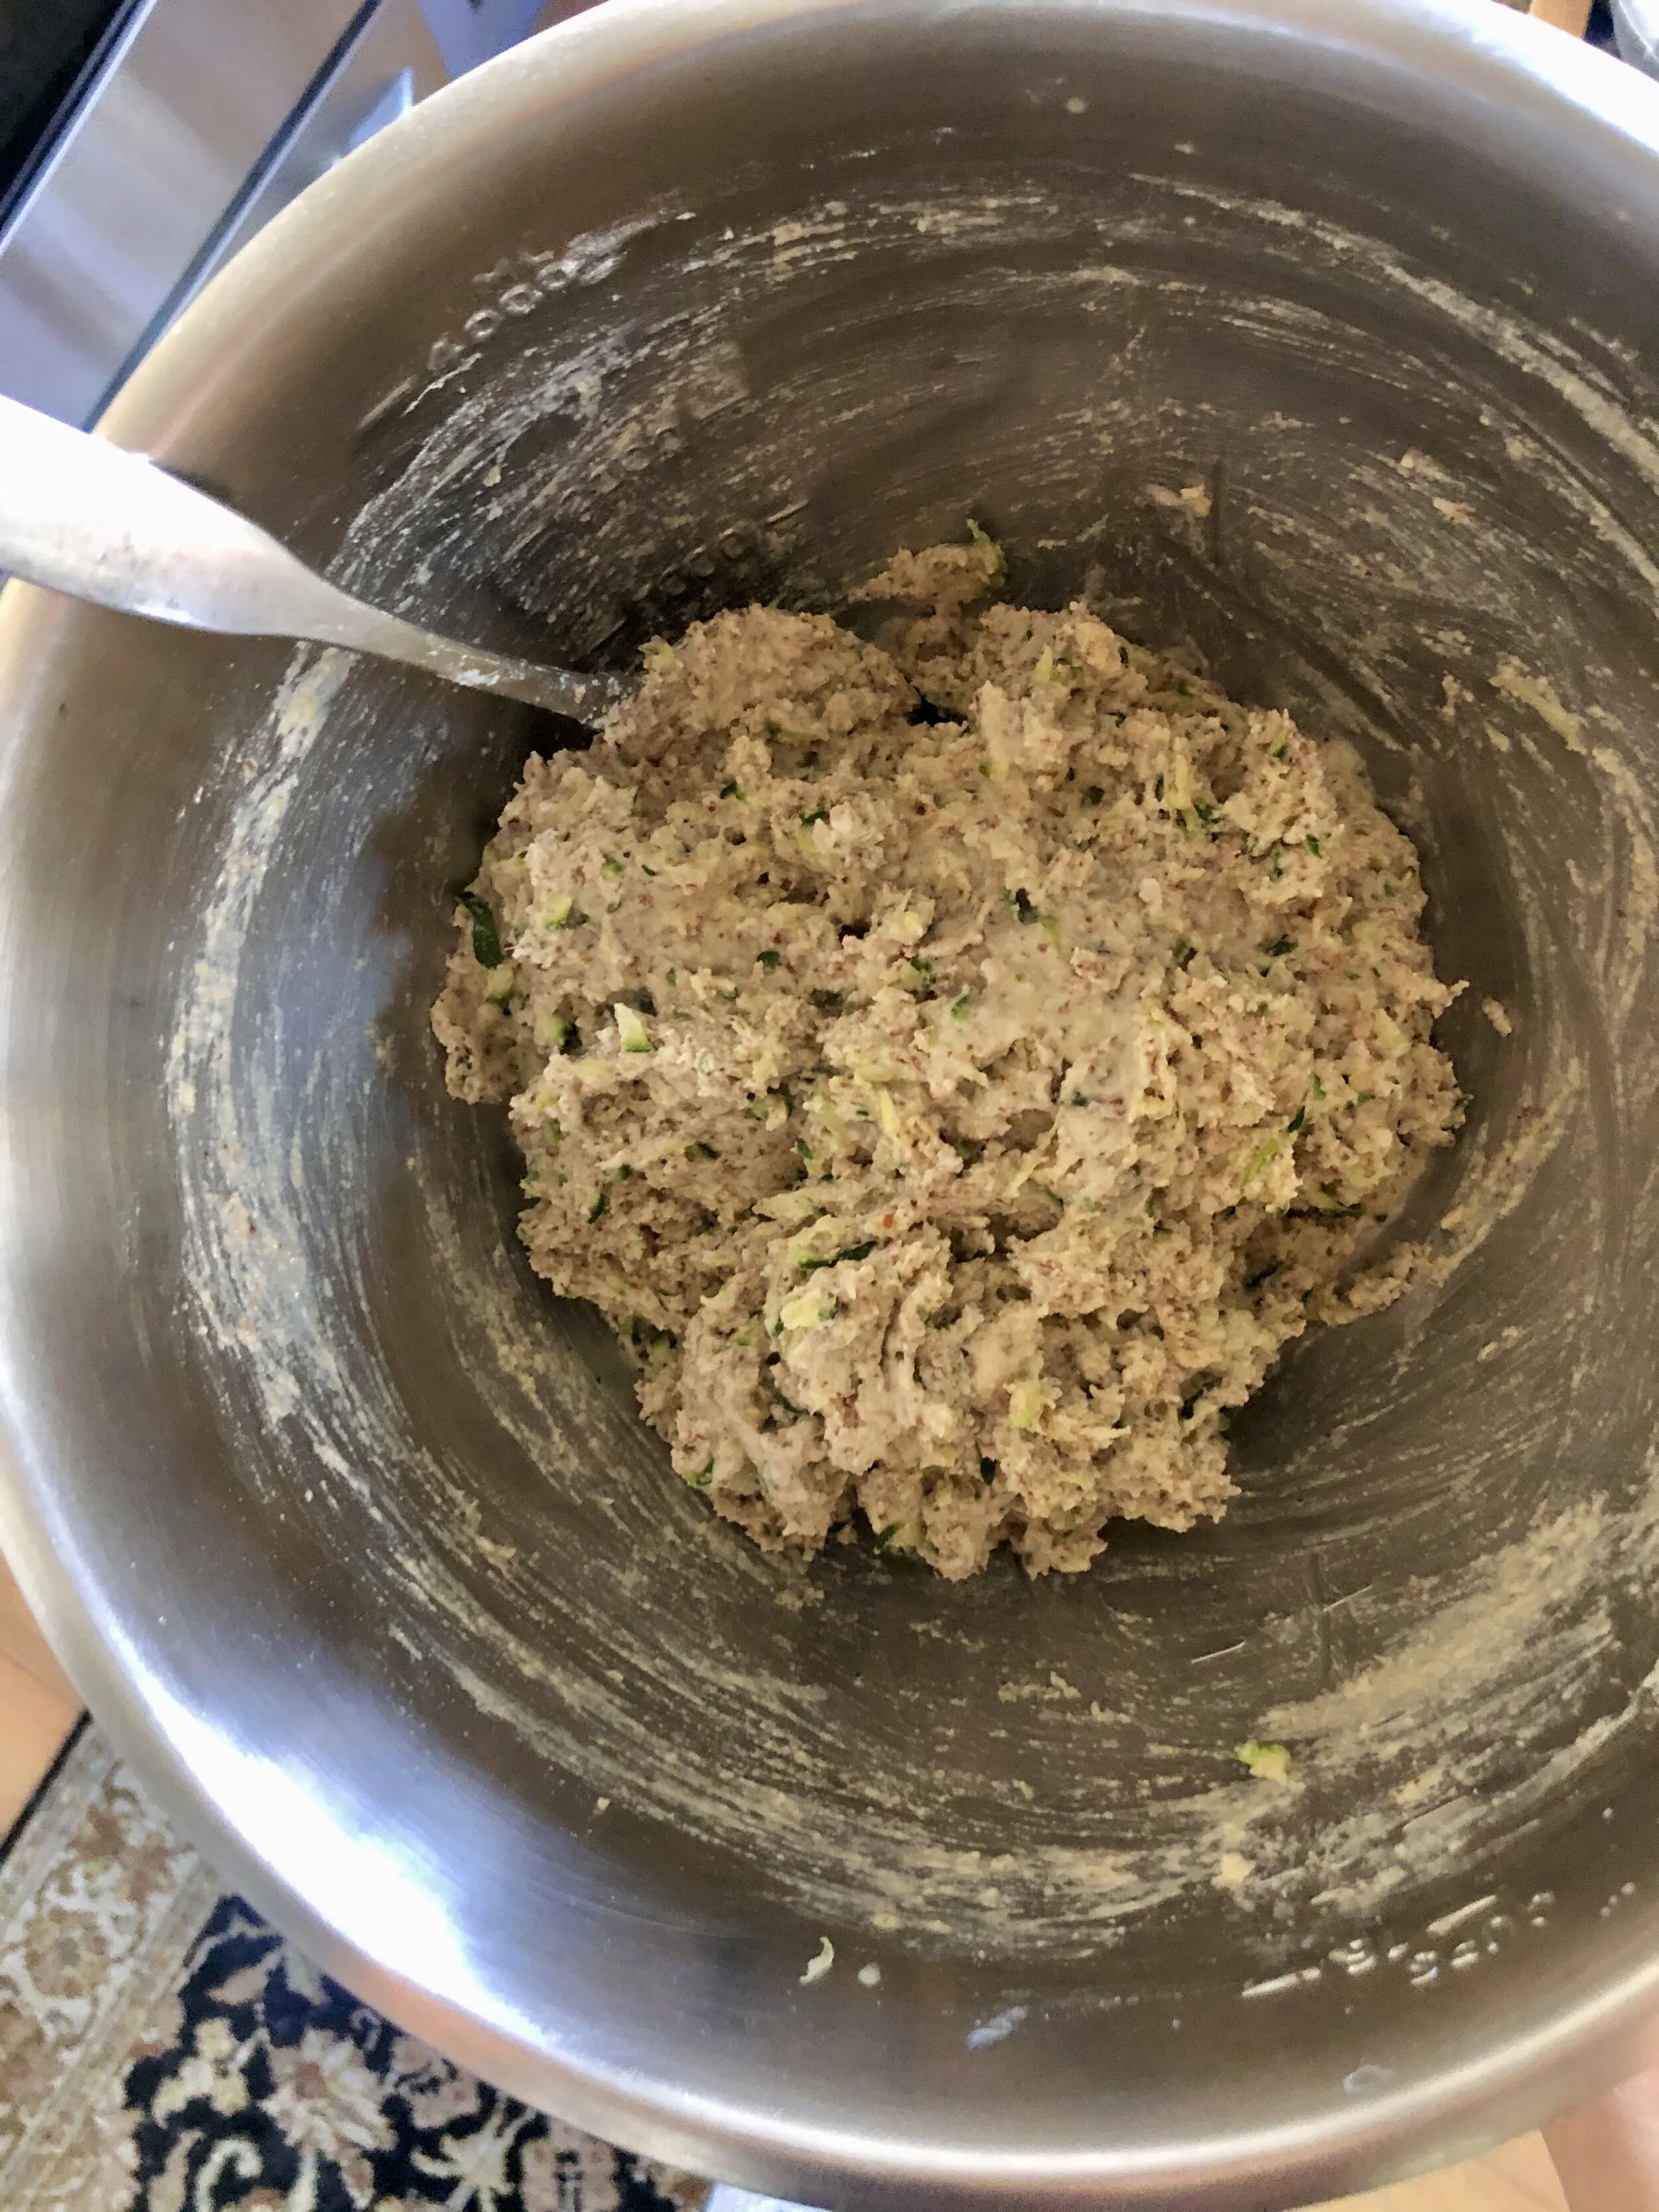
It’s that time of year when zucchini squash are abundant, and I have to say, I’m not mad about it. While it’s common to use zucchini in savory meals like fired up on the grill alongside some meat, or turned into zoodles (aka zucchini noodles), they also make a wonderful baking ingredient! When grated and drained of their moisture, you can add this green veggie to countless baked good without compromising flavor. It’s such a clutch way to sneak in an extra serving of veggies for toddlers, or any picky eater for that matter! There are tons of zucchini bread recipes out there, and just like banana bread, you can make it as healthy or as sinful as you desire. This version is hearty and nutrient-packed, not too sweet, but still super delish thanks to ingredients like banana, flaxseed, almond flour, and (duh) zucchini. You can do a mix of flours like I did, or stick to one, but I find using a combo of both heartier and lighter flours is a nice way to balance things out. I went with a gluten-free version here (paleo if you sub out the brown rice flour as well), but feel free to use whole grain flours if you prefer. I typically do! I should note, since it’s sweetened just with banana, this bread is not overwhelmingly sweet. Make sure to use super ripe bananas, or if you prefer things on the sweeter side, you can opt to add a touch of maple syrup. I find once I add various toppings (fig jam, perhaps?), it’s sufficiently sweet for my tastes. Not to mention the citrus zest (use a microplaner) really adds a nice little kick. Mix-ins are another must in my book- they make for such great texture- so feel free to add in whatever your heart desires. Toasted nuts, raisins, shredded coconut, or even chocolate chips would all be tasty here. I kept things a bit simple this time, as I wanted my one year old to be able to dig in without any choking hazards ;) I’ll take a slice toasted and spread with a generous smear of nut butter, please. Yum!
Healthy Zucchini Bread:
1 cup mashed banana (about 2 medium bananas)
2 cups grated zucchini, excess moisture drained (about 2 medium zucchini)
3 large eggs
1/4 cup melted coconut oil
1 tsp pure vanilla extract
1 tsp citrus zest (orange, lemon, or lime!)
2 cups flour (I did a mix of almond, coconut & brown rice)
1/2 cup ground flaxseed
1 tsp baking powder
1/4 tsp baking soda
1 tsp ground cinnamon
1/4 tsp ground nutmeg
1/4 tsp kosher salt
1/2 cup preferred mix-ins (walnuts, raisins, coconut, chocolate chips etc)


Preheat oven to 350 degree. Line a loaf pan with parchment paper, and add a bit of coconut oil or nonstick spray. In a large bowl whisk together banana, zucchini, eggs, coconut oil, vanilla extract & citrus zest until smooth. In a separate bowl, combine flours, flaxseed, baking powder, baking soda, cinnamon, nutmeg & salt. Then mix dry ingredients into wet until just incorporated. If your batter is super thick, you may thin it out a bit with 1/4-1/2 cup almond milk. Stir in any desired mix-ins. Add batter to loaf pan and bake for 45-55 minutes (or until cake tester comes out clean). Allow the bread to cool a few minutes before removing it from the pan with the ends of the parchment. Place it on a cooling rack to cool completely. Slice and enjoy with your preferred spread- butter, nut butter, or marmalade are all great choices!
*Adapted from The Best Paleo Zucchini Bread by RachL Mansfield.


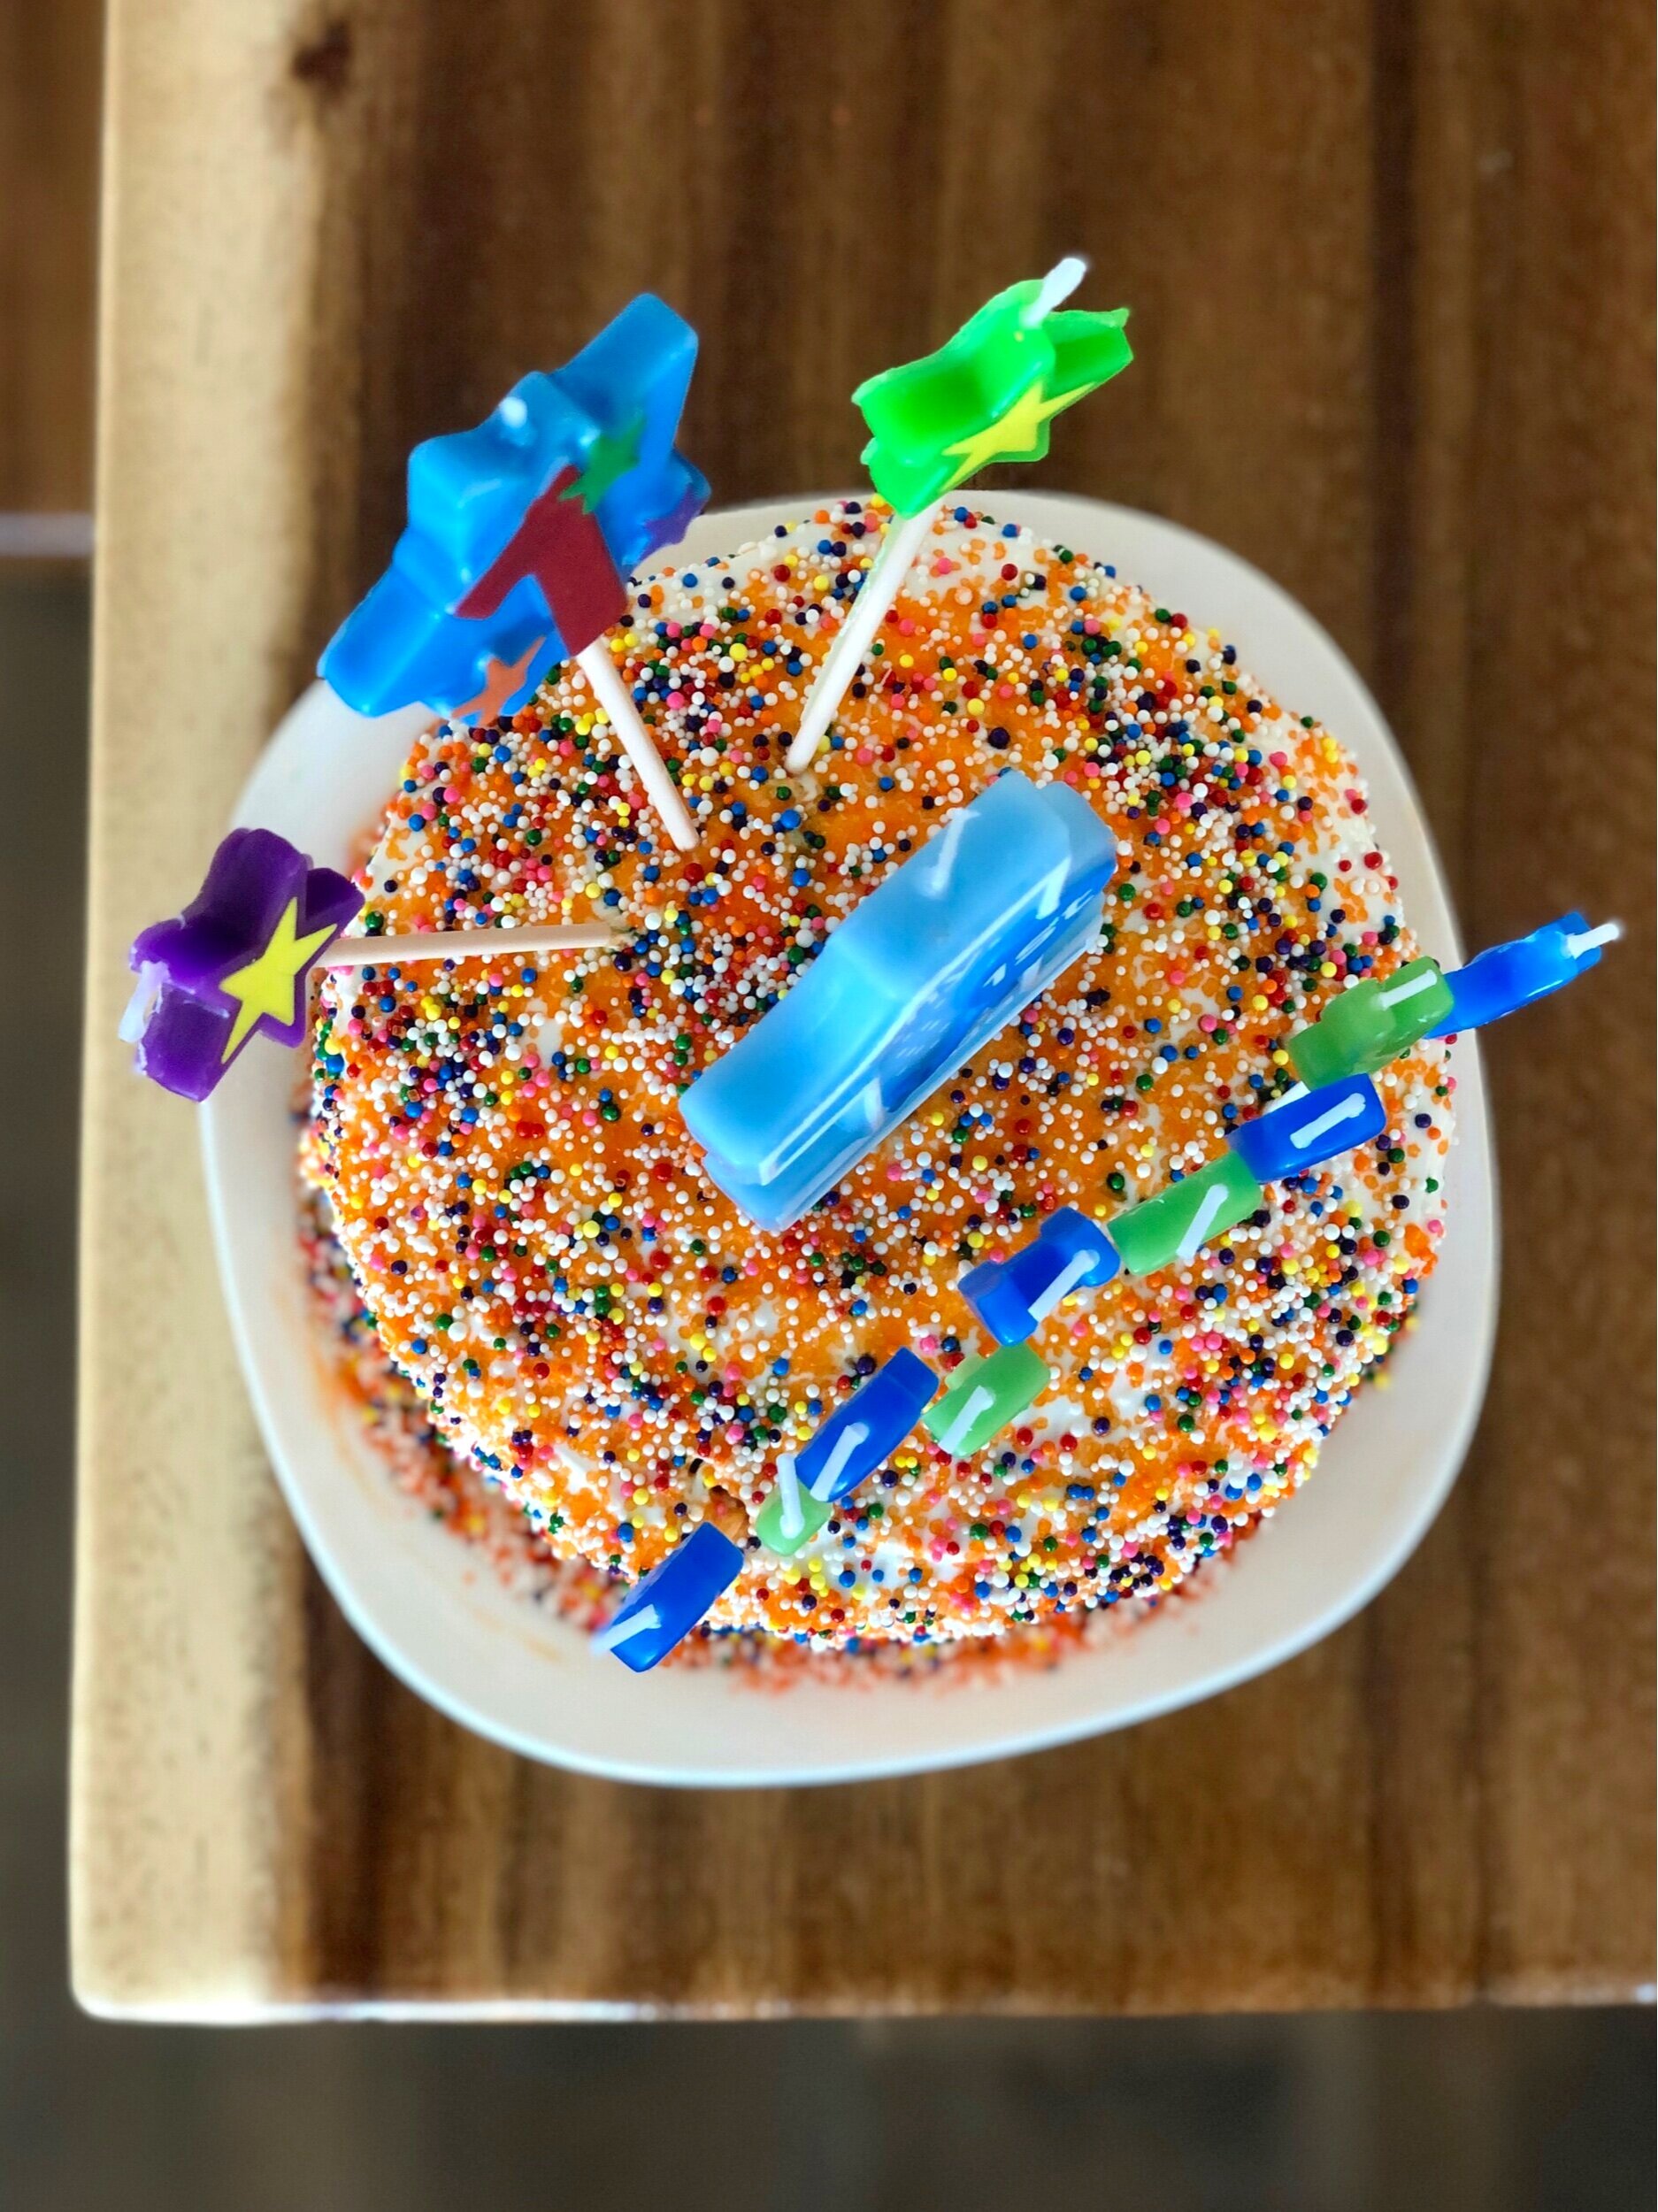
first birthday smash cake


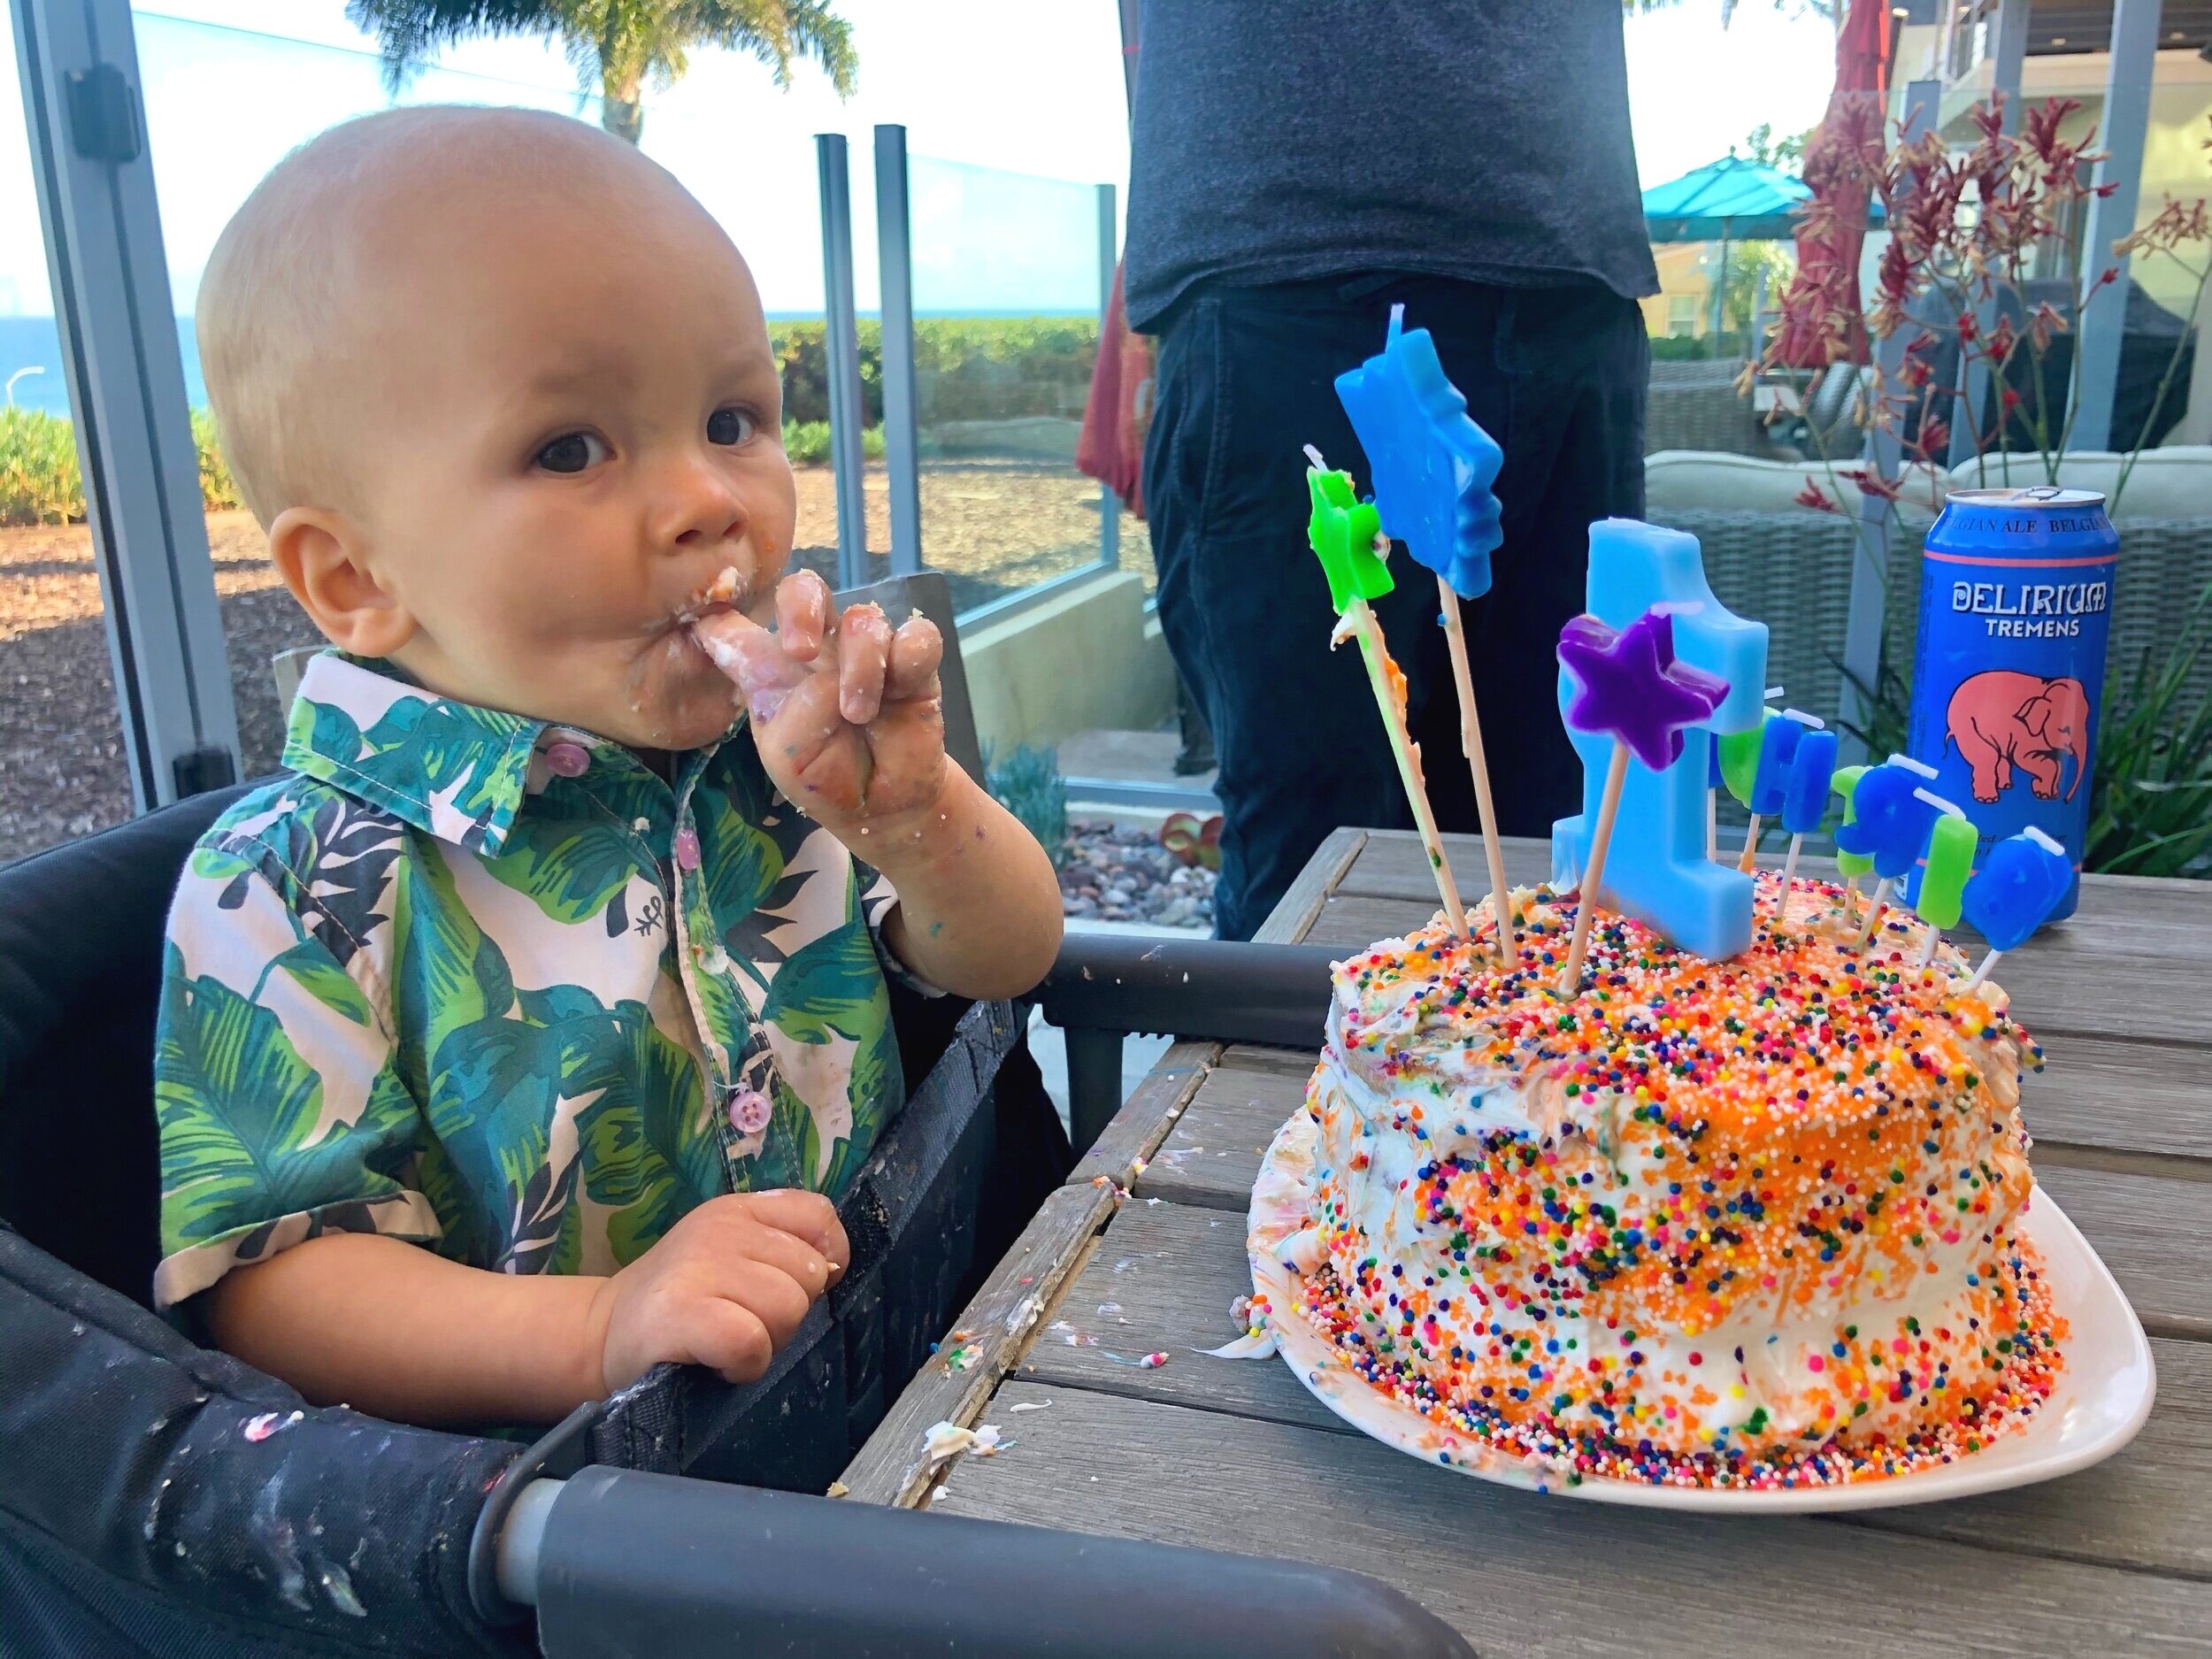
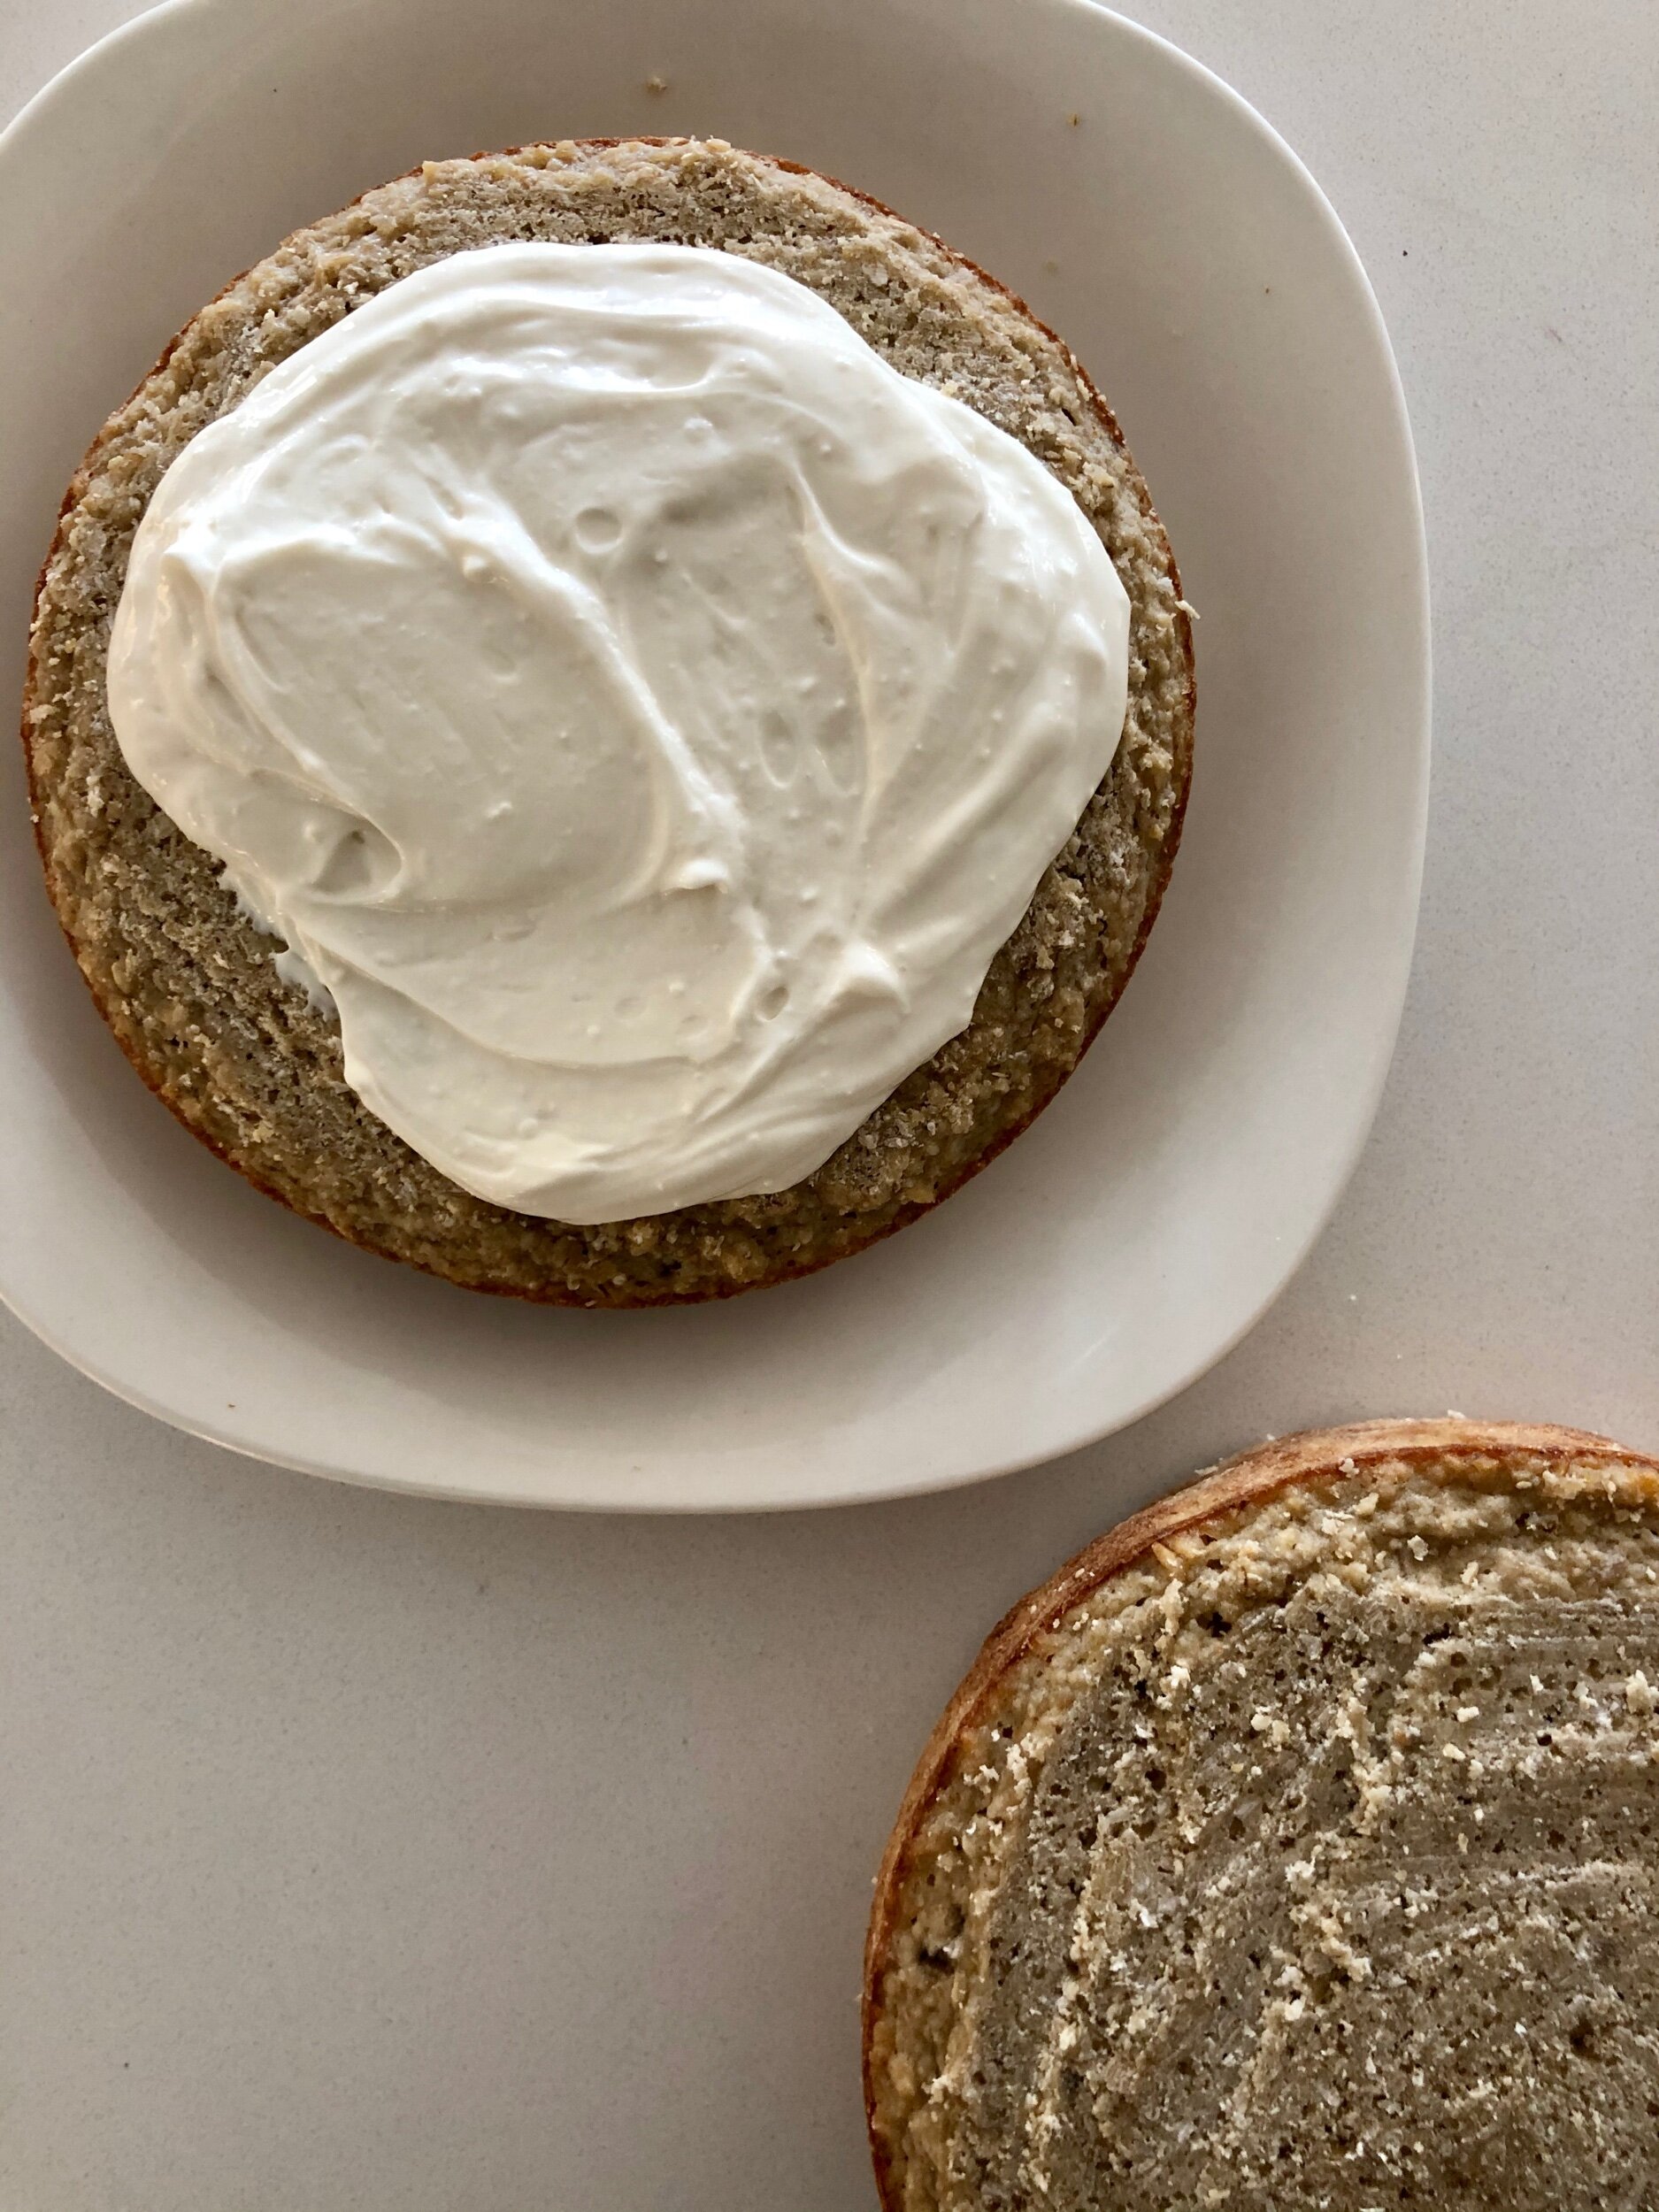
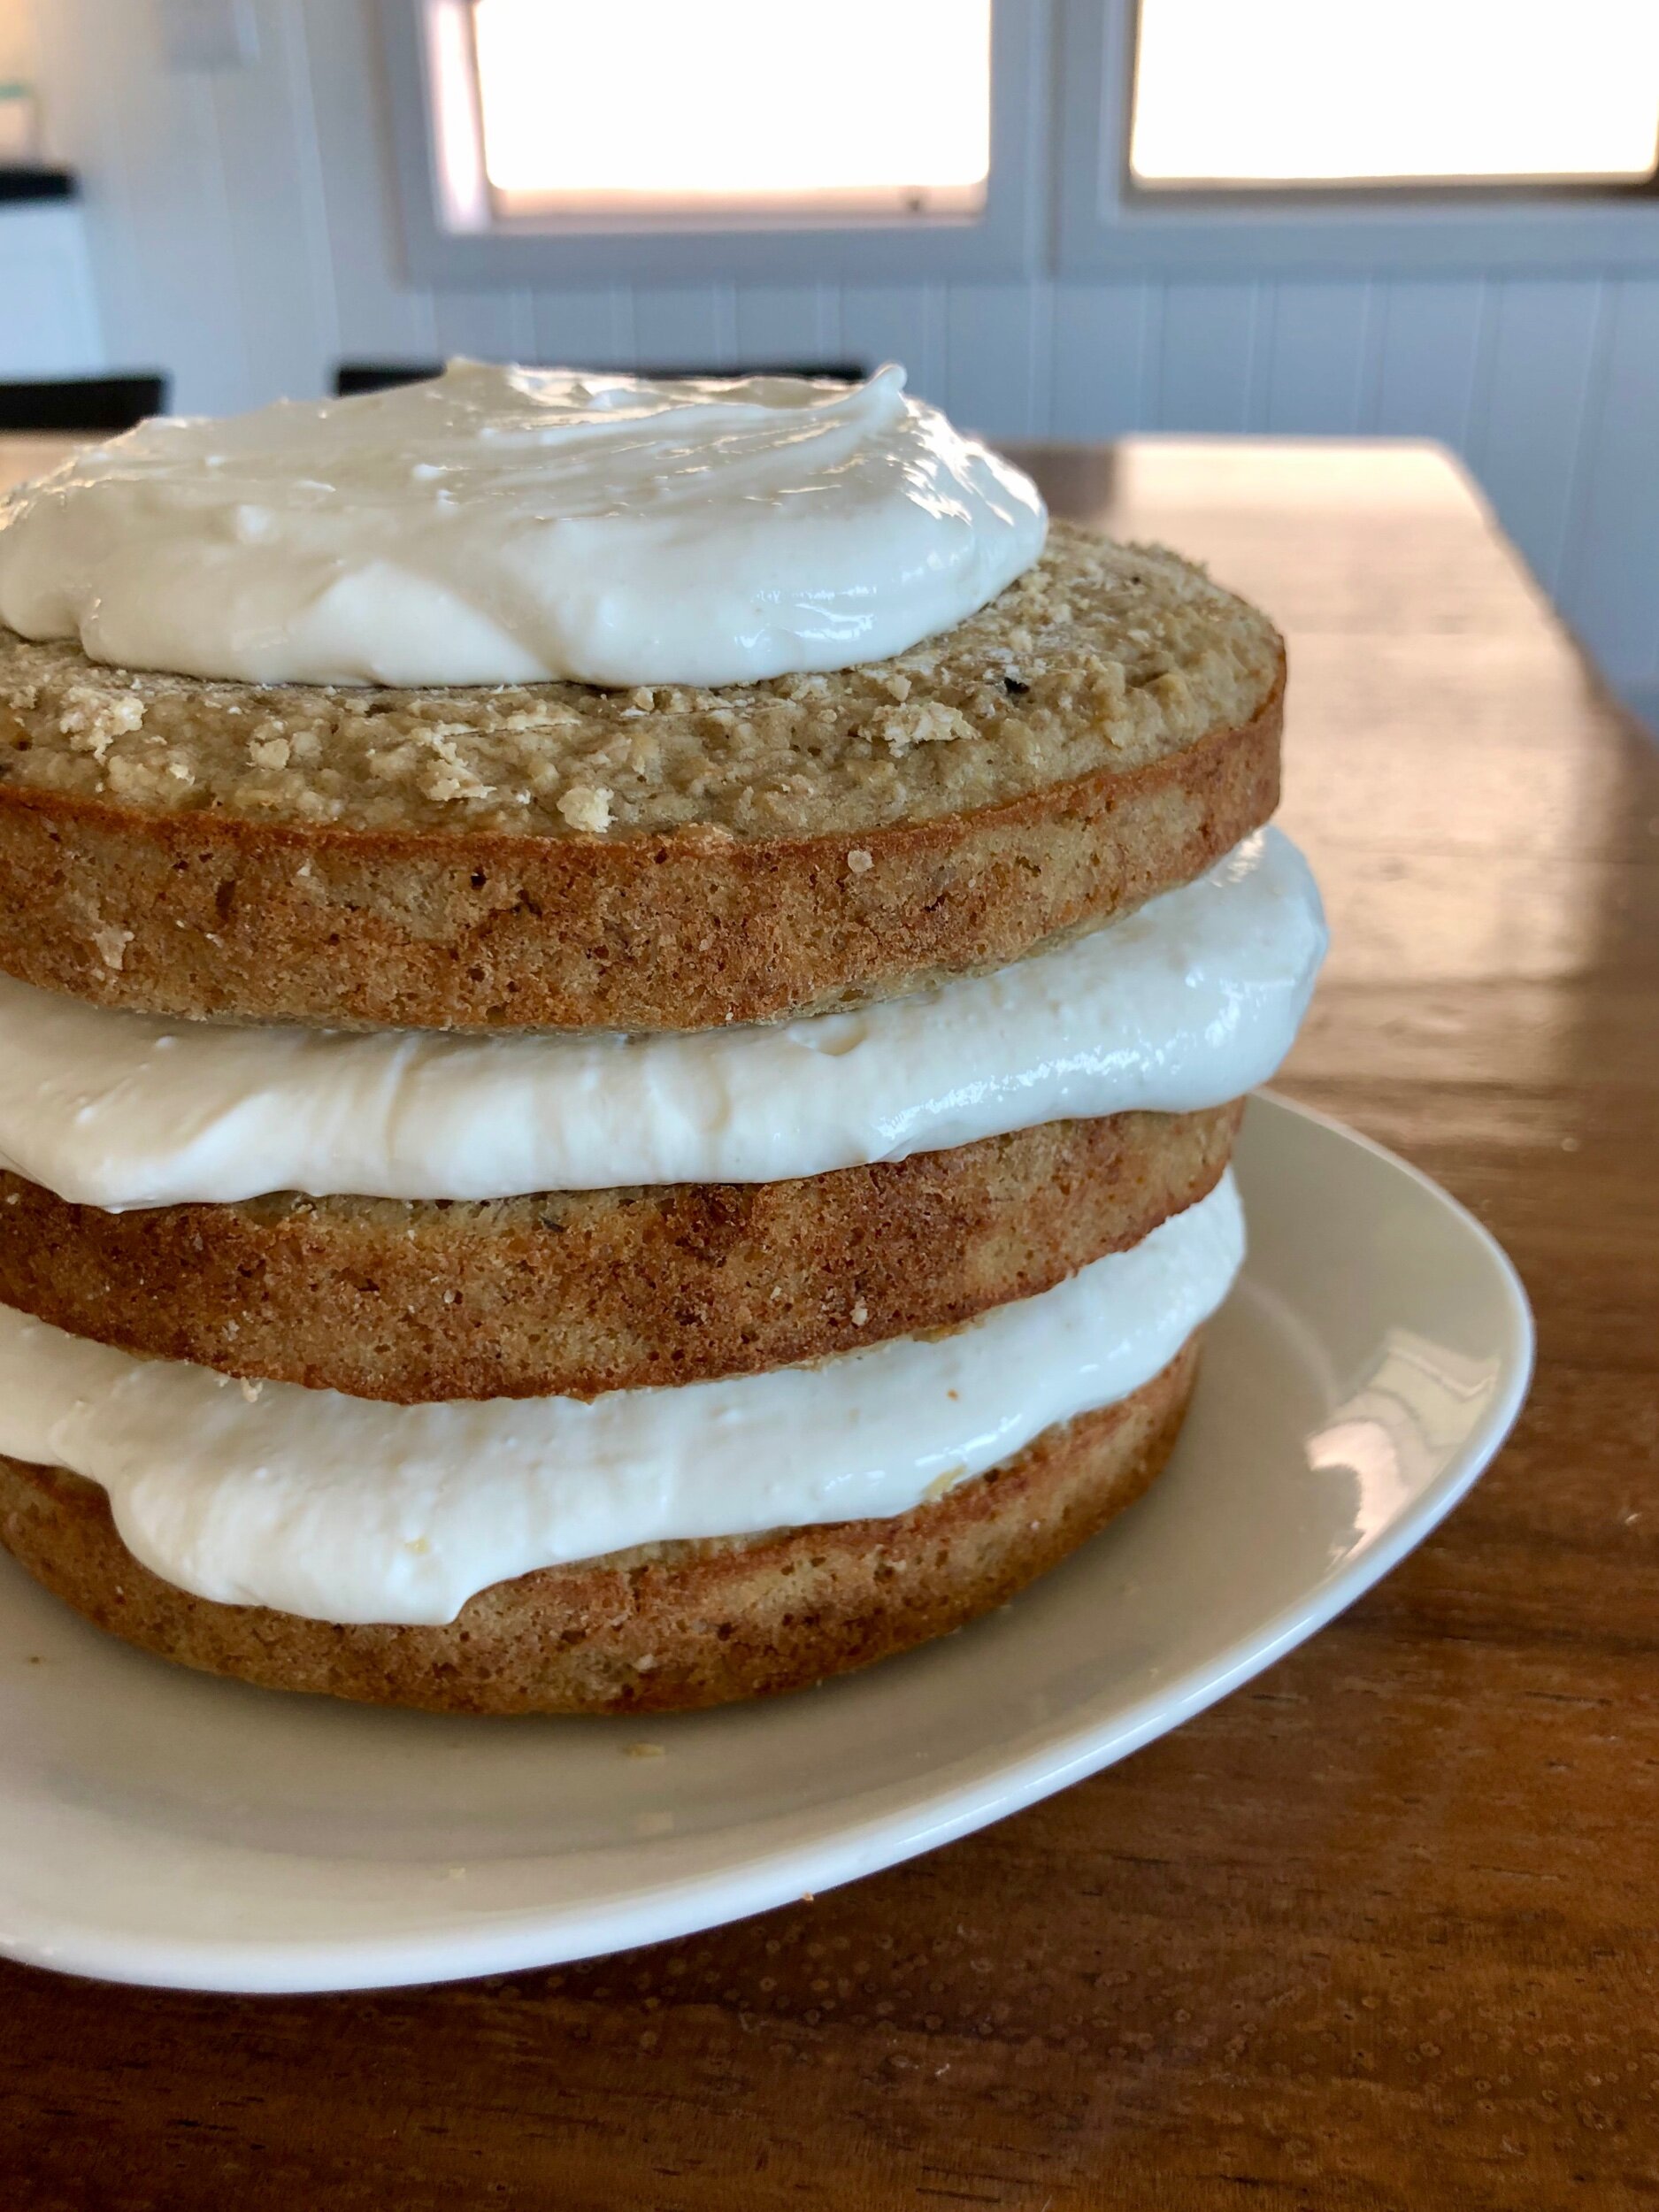
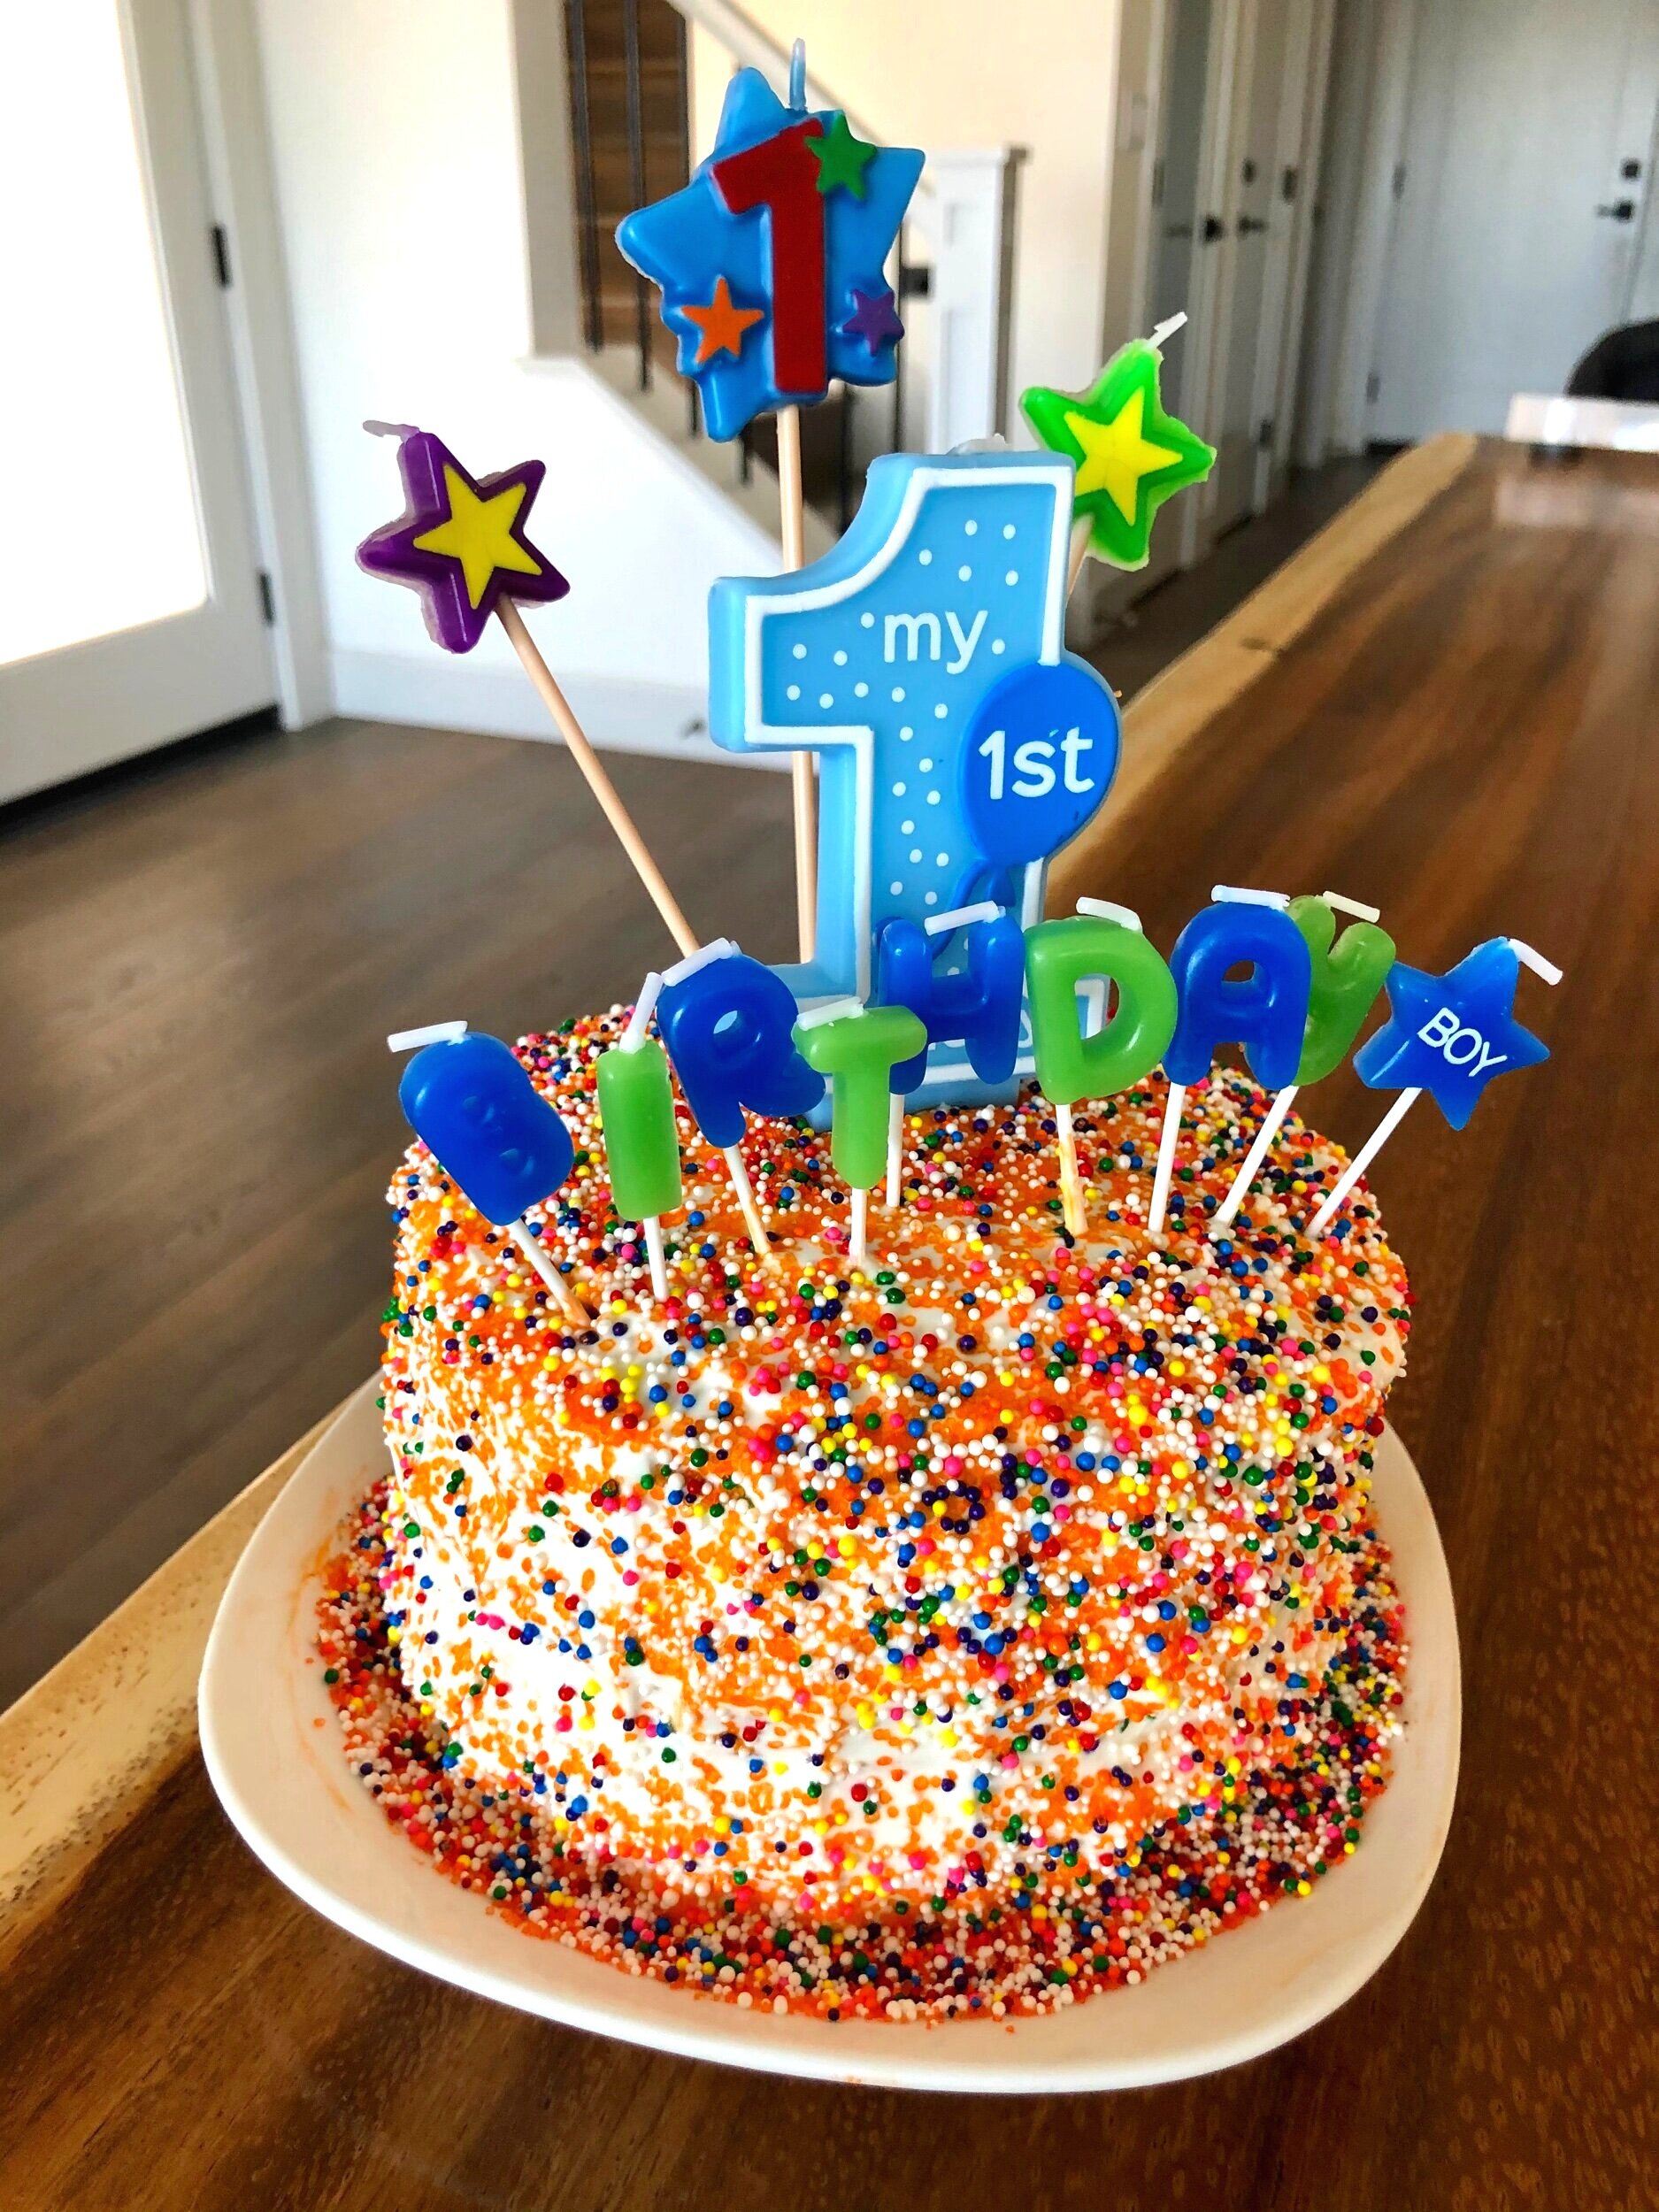
I’m sure it’s no surprise to anyone that I was super excited to bake my son Dylan’s first birthday cake. Typically called “smash cake”, it’s a birthday cake for a one year old that they can essentially smash, play around with, eat, dig in, throw, whatever. Anything goes! And extra cake for me to eat? Yes please! While researching recipes, I knew I wanted something on the healthier side- not too much added sugar for sure. Fresh fruit like bananas are a great way to add a natural sweetness to your cakes without having to add a bunch of cane sugar. I also used a combination of coconut oil (healthy fats!) and applesauce, which keeps the cake nice and moist. Oat flour is a healthy alternative to all-purpose, and I made mine by grinding up rolled oats in a food processor. Super easy! If I’m honest, I didn’t even pulverize the oats into total flour consistency, and left it a bit coarser to give the cake some texture. Whatever you prefer! Plus, if you use certified gluten-free oats, this cake is completely gluten-free as well. In terms of frosting, which can all too often be a huge sugar bomb, I went the Greek yogurt route, with just a touch of maple syrup for sweetness! Make sure you strain it so it’s extra thick for frosting purposes. Feel free to decorate however you desire- a more “naked” frosted cake or spread all-over, and top with berries or natural sprinkles. I was assembling this away from home, without my usual tools and decorating accessories, so it didn’t end up being the prettiest cake out there (I essentially threw sprinkles at it to cover up a messy frosting job), but it was still super fun to make! Just don’t forget the first birthday candles! I’m happy to report Dylan dug right in and ate quite a few handfuls (mostly frosting). Thankfully, he even shared with his mama ;) Happy baking!


First Birthday Smash Cake:
3 cups oat flour
2 tsp baking powder
1/2 tsp salt
6 tbsp coconut oil, melted and slightly cooled
6 tbsp unsweetened applesauce
1/4 cup pure maple syrup
3/4 cup mashed banana (about 1.5 large bananas)
1/4 cup unsweetened almond milk
4 large eggs
2 tsp pure vanilla extract
fresh berries or sprinkles, for topping
Greek Yogurt Frosting:
3 cups whole milk greek yogurt
1 cup cream cheese
1/4 cup pure maple syrup
1 tsp pure vanilla extract


Place greek yogurt in a mesh sieve or fine-mesh strainer lined with a paper towel with a bowl underneath. Let sit for a couple hours (or overnight in the fridge). Transfer the yogurt to a bowl and stir in maple syrup and vanilla extract. You may add more maple syrup if you prefer it sweeter. Refrigerate until ready to use.
Preheat the oven to 350 degrees F. Grease three 6-inch cake pans (you can alternatively use two 9-inch cake pans, but baking time will need to be adjusted), line each with parchment paper, and then grease the parchment as well. In a medium bowl, whisk together the flour, baking powder, and salt. In a large bowl or base of a stand mixer, whisk together melted coconut oil, applesauce, maple syrup, mashed banana, almond milk, eggs, and vanilla until smooth. Slowly add the flour mixture, mixing until just combined. Divide the batter evenly between prepared cake pans, and bake for about 22 minutes, or until a toothpick or cake tester comes out clean. Remove from oven and place pans onto a wire rack to cool for 15 minutes before removing cakes from pans to cool completely.
To assemble, level off any dome shape on your cakes, so you have flat surfaces. Place one cake on your cake stand, (you can also use cake boards and a revolving cake stand if you’d like!), and top with frosting, spreading it in an even layer just past the edges. Add the second, repeat with frosting, and then repeat with the third cake . Use an offset spatula or knife to scrape off the frosting overhang for a “naked” cake look, or use additional frosting to coat the entire cake. Top with berries or sprinkles, and enjoy!
*Adapted from First Birthday Smash Cake with Yogurt Frosting by Yummy Toddler Food.


restaurante tierra caliente
There’s not much better than a consistently good neighborhood joint. You know the place. The one you can pop in anytime, and while you aren’t expecting to be blown away by anything super out of the box, you can pretty much guarantee a delicious, satisfying meal. In our old hood in Brooklyn, that was Cafe Mogador, and we still make it a point to go back anytime we are in town. Our new neighborhood of Mount Washington has less going on food-wise, but just down the hill in Cypress Park, you’ll find a ton of tasty, authentic Mexican food. Restaurante Tierra Caliente is one place we keep returning, and what’s better is that we can walk there! A bit of Brooklyn in LA ;) This tiny spot has a chalkboard menu up on the wall, and only a few small tables. We like to sit outside amongst the hustle and bustle of the neighborhood, and enjoy our tacos al fresco! Our fave time of day to come eat at Tierra Caliente is in the early mornings before they get busy, as they make a killer breakfast! My huevos a la Mexicana never disappoints, and those homemade tortillas are super fresh and hot off the press! My husband is a fan of the chilaquiles and smothered burritos (among manyyyy other things), but I think next up I need to try the tamales and pozole verde now that the weather is cooling off! So grab yourself a horchata con cafe, why don’t ya, and dig in!
classic birthday cake
Happy Birthday! A classic birthday cake is one of those recipes any good baker should have up his or her sleeve, to whip up whenever an occasion so presents itself. Over the spring and summer months, it seems like there are hundreds of birthdays being celebrated amongst my family and friends, and this cake is a tried and true winner. While this one in particular is a vanilla cake with raspberry filling and a Swiss meringue buttercream, you can customize it in various ways based on your heart's desire: make a chocolate frosting, switch up the filling, add nuts- you get the idea! I highly recommend checking out my wedding cake post for more specific details and instructions on baking, assembling, and decorating the perfect (or close enough!) layer cake! I hope you enjoy it as much as I do :)
Classic Vanilla Birthday Cake with Raspberry Compote Filling & Swiss Meringue Buttercream:
Cake:
4 cups cake flour
2 tsp baking powder
1 1/2 tsp baking soda
1 tsp salt
1 cup unsalted butter, softened
1 1/2 cup cane sugar
1 tbsp pure vanilla extract
4 large eggs, at room temperature
2 cups buttermilk
Buttercream:
1 cup sugar
4 large egg whites
1 1/2 cup unsalted butter, cubed & softened
1 tsp pure vanilla extract
Filling:
2 cups fresh raspberries
1/2 cup granulated sugar
2 tbsp corn starch
1/4 cup water
2 tsp lemon juice
fresh raspberries, for serving


Preheat oven to 350°F. Spray two 9" round cake pans with nonstick spray, line with parchment paper, and spray the parchment as well. Mix together flour, baking powder, baking soda, and salt in a medium bowl. In the base of a stand mixer fit with whisk attachment, beat butter and sugar at medium speed until pale and fluffy, then beat in vanilla. Add eggs, beating well and scraping down the bowl to ensure they are fully incorporated. Reduce the speed to low, then mix in buttermilk until just combined. Don't be alarmed if the mixture looks curdled at this point. Add flour mixture until just incorporated, careful not to over-mix. Pour batter evenly among cake pans, and bake until golden, about 35-40 minutes. Allow to cool for a few minutes in the pan, then completely on a cooling rack.
To prepare raspberry compote, cook raspberries, sugar, cornstarch, water, and lemon juice in a small saucepan until the berries start to break down, about 10 minutes. Lower the heat and simmer until the compote is thick, about 5 minutes. Remove from heat and let cool completely. Store in an airtight container in the fridge (this can be made a week ahead of time). Makes 1 cup.
While cakes are baking, make the buttercream. Whisk egg whites and sugar together in a bowl over a double boiler until sugar is fully dissolved. Transfer mixture into the stand mixer (make sure it's clean & dry!) fit with paddle attachment and whip until it turns white glossy. Add the vanilla, then the butter and continue to whip until buttercream comes together. This may take a good 10-15 minutes, so don't worry if things look curdled or soupy at the start!
Once cakes have cooled, you may level and assemble them, adding filling between the two layers. Spread buttercream evenly around the outside, creating a pattern if desired, and finish with toppings if you choose! You may also make this a 3-layer cake by baking in 6" round cake pans, just make sure you adjust baking time accordingly. Check out my wedding cake post for more assembly and cake decorating instructions. Enjoy!
*Adapted from Best Birthday Cake and Swiss Meringue Buttercream by Smitten Kitchen.
Useful Tools: