healthy blender waffles

Waffles are a family favorite in my household. My dad is obsessed, and that love has rubbed off on my toddler son as well. We are fans of everything from toaster waffles from the freezer, to classic homemade buttermilk or old fashioned waffles, to belgian waffles at restaurants, to healthy homemade! We do not discriminate, and topped with a healthy serving of pure maple syrup, they are all welcome on our plate :) Lately I’ve been making a somewhat healthier, more nutrient dense version packed with flax seeds, bananas, and rolled oats that are so easy to whip up in a blender (or using a and blender!). Since my son will easily down three waffles at once for breakfast (or anytime of day truly), it gives me a bit of comfort knowing that these are packed with a good dose of protein, fat, and fiber! They freeze well too, so feel free to double the batch and make extra for an easy and delicious breakfast that’s ready in minute! Top with pure maple syrup, and enjoy!

Healthy Blender Waffles:

  • 1/2 cup old fashioned oats

  • 2 tbsp ground flax seeds

  • 1/4 tsp kosher salt

  • 1 tsp baking powder

  • 1/4 tsp cinnamon

  • 1 egg

  • 1-2 bananas

  • 1/2 cup almond milk

  • 1 tsp pure vanilla extract

  • coconut oil or butter, for iron

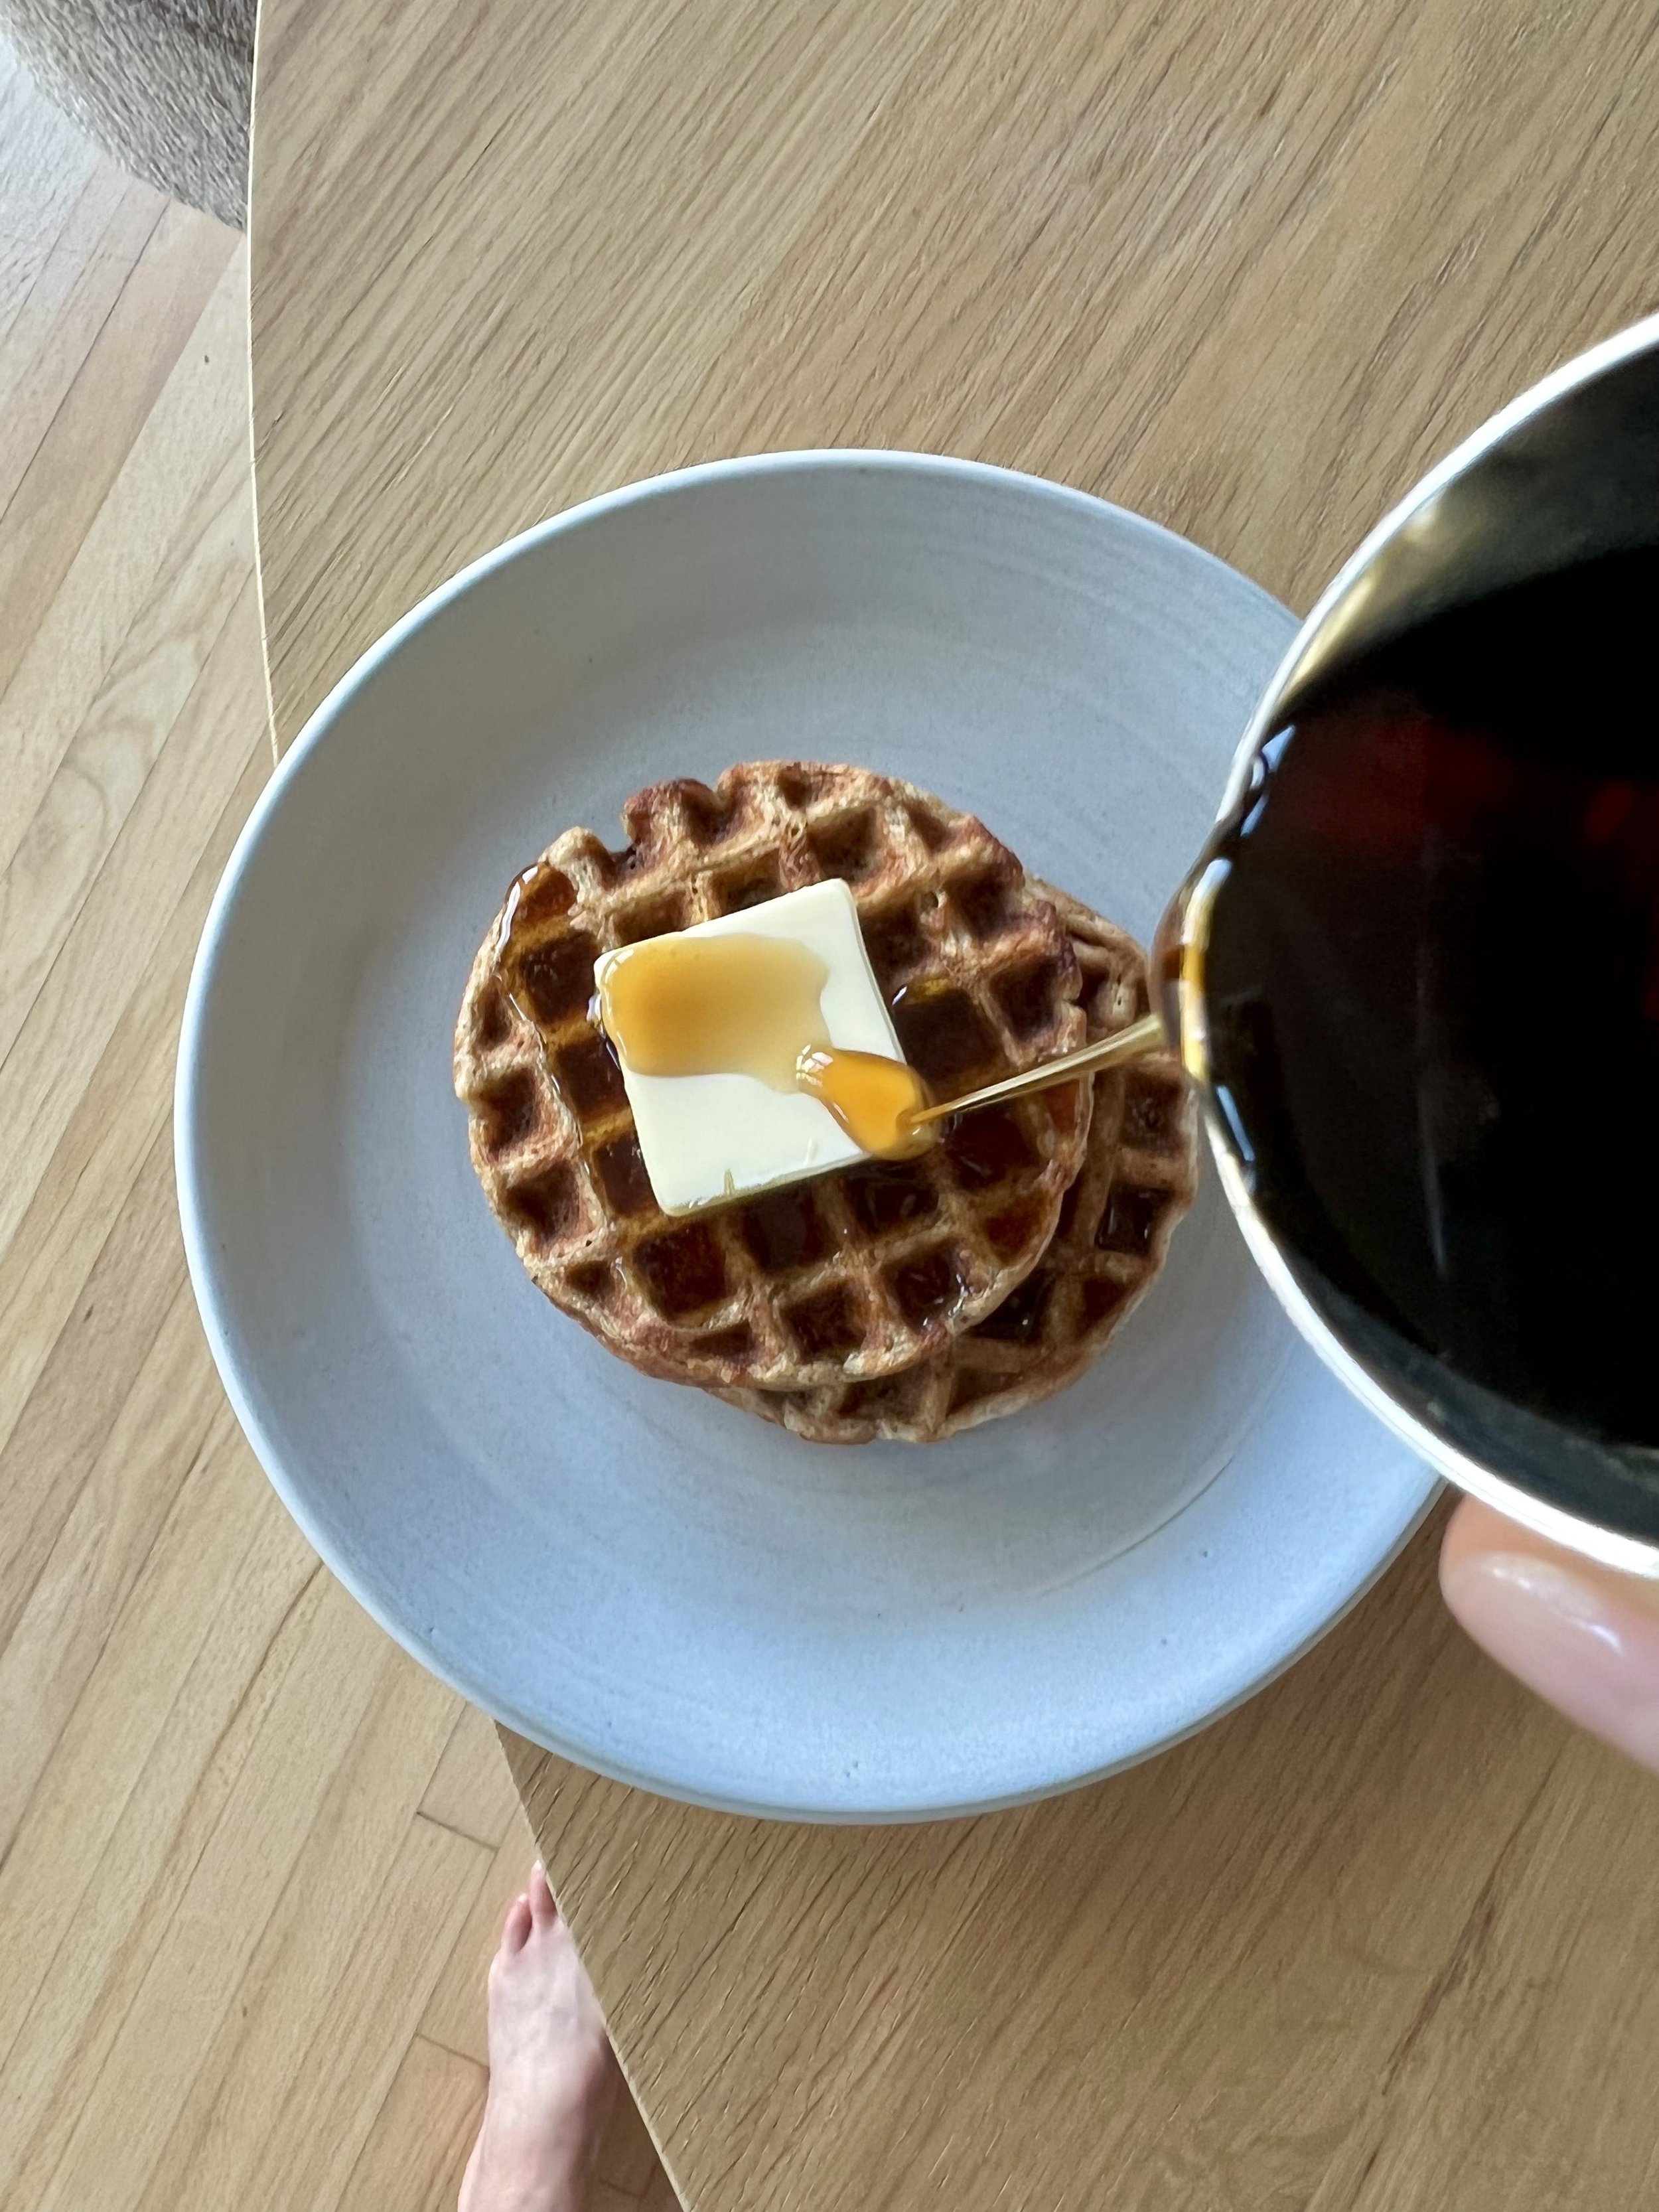
Combine all ingredients in a blender and blend until combined. Heat a waffle maker, and spray lightly with coconut oil spray or grease with butter. Add the appropriate amount of batter for your waffle iron (likely less than you think), and cook to your desired level of “crispy outside, fluffy inside”, or according to the waffler maker’s directions. Enjoy with butter and pure maple syrup. Makes about 7-8 mini waffles.


healthy nut & seed granola

Granola makes for a delicious breakfast or snack anytime of day, am I right? I’ve been known to enjoy it dry on its own, in a bowl with almond milk or Greek yogurt & fresh fruit, and even sprinkled on top of chia pudding or açaí bowls! And I have to say, it always hits the spot! Although it’s easy to buy granola pre-made, many store-bought versions are loaded with sugar and other unhealthy and unnecessary ingredients. At our house we tend to go through Costco-size bags of grain-free granola at a pretty rapid pace (it’s so addicting), and as I was finishing one off the other day, I decided to make some myself for a change! 

This recipe is super adaptable, so feel free to swap out other nuts and seeds if you prefer, or use what you have on hand. But do make sure to use plenty of them since they are the star- and super important for that tasty crunch! No one in my household avoids grains, so I did include rolled oats as well, since they make such a good base for granola. If you’d like to keep things gluten free, just make sure your oats are certified GF! My healthy nut & seed granola boasts a pretty impressive nutritional profile thanks to superfoods like chia & flax seeds, fiber-rich oats, and an extra dose of healthy fats from coconut oil. Plus, it’s lightly sweetened with pure maple syrup, which is much lower on the glycemic index than regular sugar and corn syrup, so it won’t spike your blood sugar! I definitely recommend adding pure vanilla extract and ground cinnamon for some added depth of flavor, but feel free to skip these if you prefer. You can also toss in some dried or freeze dried fruit after baking, if that’s your jam, as well. The options are endless! Homemade granola is so easy y’all- I don’t know why I haven’t done this more often, but I definitely will going forward! Not to mention it leaves your house smelling oh so delicious and fragrant! Enjoy!

Healthy Nut & Seed Granola:

healthy nut & seed granola

Preheat the oven to 300 degrees F. Line a half sheet pan or large cookie sheet with parchment paper. In a large bowl, stir together oats, nuts, seeds, cinnamon and salt (keep coconut separate for now). Set aside. In a separate bowl, heat the coconut oil and maple syrup until melted. Stir in vanilla extract. Pour over dry ingredients and mix well until oat mixture is completely coated.

Spread the granola on the baking sheet in an even layer and press down evenly with a spatula. Bake for about 35 minutes, until golden brown. Sprinkle coconut flakes on top, and return to oven for a few more minutes, until just toasted. Granola should be nice and fragrant. Remove from the oven and allow the granola to cool on the baking sheet for 10-15 minutes to set. Feel free to break it into clumps or clusters if you prefer. Transfer to an airtight container or large mason jar.

Useful Tools:


peach crisp à la mode

peach crisp à la mode

Crisps and crumbles are some of my favorite homey, comforting desserts any time of year. They’re equally as perfect in the summer with berries or stone fruits as they are in the winter with apples and pears! Did you know that although many people use the words interchangeably, crisps and crumbles are actually different? Crisps tend to use oats and nuts (in addition to flour & butter) in their topping, whereas crumbles usually contain more of a streusel-like topping with butter and flour only. Both are delish, but I tend to prefer crisps for all that added texture thanks to the oats and nuts! I was super lucky this summer, because my mom brought me some of the tastiest peaches from back home in the Texas Hill Country (thanks mom!). They were frozen to maintain freshness, so I just thawed them and reserved the juice (makes for a great bellini!) before baking, but you can also use fresh fruit here if you have access to it. I love baking crisps in my Staub cast iron skillet- it somehow looks rustic and fancy all at the same time, and also makes serving a breeze. Just grab a large spoon and dig in. I must say this summery dessert pairs perfectly with a crisp (get it, haha) glass of Lorenza Rosé enjoyed out on the deck. Whatever you do- don’t forget the vanilla ice cream!

Peach Crisp:

  • 6-8 cups sliced peaches (fresh or frozen)

  • 2 tbsp granulated sugar

  • 2 tbsp lemon juice

  • 1/2 tsp pure vanilla extract

  • 1/3 cup all-purpose flour

  • 1 cup old-fashioned oats

  • 1/2 cup slivered almonds

  • 1/3 cup dark brown sugar (or more if your peaches aren’t super sweet)

  • 1/2 tsp ground cinnamon

  • 1/2 tsp kosher salt

  • 1/2 cup (1 stick) cold, unsalted butter

  • vanilla ice cream, for serving

Preheat oven to 375°. In a large bowl, add peaches (thawed and liquid drained if using frozen), granulated sugar, lemon juice, and vanilla extract, stirring to combine. Pour peach mixture into a cast iron skillet, and place on a large sheet tray (to catch any spillage!). In a large bowl, whisk together flour, oats, slivered almonds, brown sugar, cinnamon, and salt. Using a pastry cutter (or your hands), incorporate butter into flour mixture until you have a clumpy mixture. Scatter crisp topping over the peaches, and bake until peaches are bubbling and crisp is golden, about 1 hour. Let cool 10 minutes before serving with vanilla ice cream.

*Adapted from Perfect Peach Crisp by Delish.

Useful Tools:

peach crisp à la mode

first birthday smash cake

I’m sure it’s no surprise to anyone that I was super excited to bake my son Dylan’s first birthday cake. Typically called “smash cake”, it’s a birthday cake for a one year old that they can essentially smash, play around with, eat, dig in, throw, whatever. Anything goes! And extra cake for me to eat? Yes please! While researching recipes, I knew I wanted something on the healthier side- not too much added sugar for sure. Fresh fruit like bananas are a great way to add a natural sweetness to your cakes without having to add a bunch of cane sugar. I also used a combination of coconut oil (healthy fats!) and applesauce, which keeps the cake nice and moist. Oat flour is a healthy alternative to all-purpose, and I made mine by grinding up rolled oats in a food processor. Super easy! If I’m honest, I didn’t even pulverize the oats into total flour consistency, and left it a bit coarser to give the cake some texture. Whatever you prefer! Plus, if you use certified gluten-free oats, this cake is completely gluten-free as well. In terms of frosting, which can all too often be a huge sugar bomb, I went the Greek yogurt route, with just a touch of maple syrup for sweetness! Make sure you strain it so it’s extra thick for frosting purposes. Feel free to decorate however you desire- a more “naked” frosted cake or spread all-over, and top with berries or natural sprinkles. I was assembling this away from home, without my usual tools and decorating accessories, so it didn’t end up being the prettiest cake out there (I essentially threw sprinkles at it to cover up a messy frosting job), but it was still super fun to make! Just don’t forget the first birthday candles! I’m happy to report Dylan dug right in and ate quite a few handfuls (mostly frosting). Thankfully, he even shared with his mama ;) Happy baking!

First Birthday Smash Cake:

  • 3 cups oat flour

  • 2 tsp baking powder

  • 1/2 tsp salt

  • 6 tbsp coconut oil, melted and slightly cooled

  • 6 tbsp unsweetened applesauce

  • 1/4 cup pure maple syrup

  • 3/4 cup mashed banana (about 1.5 large bananas)

  • 1/4 cup unsweetened almond milk

  • 4 large eggs

  • 2 tsp pure vanilla extract

  • fresh berries or sprinkles, for topping

Greek Yogurt Frosting: 

  • 3 cups whole milk greek yogurt

  • 1 cup cream cheese

  • 1/4 cup pure maple syrup

  • 1 tsp pure vanilla extract

Place greek yogurt in a mesh sieve or fine-mesh strainer lined with a paper towel with a bowl underneath. Let sit for a couple hours (or overnight in the fridge). Transfer the yogurt to a bowl and stir in maple syrup and vanilla extract. You may add more maple syrup if you prefer it sweeter. Refrigerate until ready to use.

Preheat the oven to 350 degrees F. Grease three 6-inch cake pans (you can alternatively use two 9-inch cake pans, but baking time will need to be adjusted), line each with parchment paper, and then grease the parchment as well. In a medium bowl, whisk together the flour, baking powder, and salt. In a large bowl or base of a stand mixer, whisk together melted coconut oil, applesauce, maple syrup, mashed banana, almond milk, eggs, and vanilla until smooth. Slowly add the flour mixture, mixing until just combined. Divide the batter evenly between prepared cake pans, and bake for about 22 minutes, or until a toothpick or cake tester comes out clean. Remove from oven and place pans onto a wire rack to cool for 15 minutes before removing cakes from pans to cool completely.

To assemble, level off any dome shape on your cakes, so you have flat surfaces. Place one cake on your cake stand, (you can also use cake boards and a revolving cake stand if you’d like!), and top with frosting, spreading it in an even layer just past the edges. Add the second, repeat with frosting, and then repeat with the third cake . Use an offset spatula or knife to scrape off the frosting overhang for a “naked” cake look, or use additional frosting to coat the entire cake. Top with berries or sprinkles, and enjoy!

*Adapted from First Birthday Smash Cake with Yogurt Frosting by Yummy Toddler Food.


homestyle apple plum crisp

Apple crisp (or crumble, whatever you want to call it) is one of those good ‘ol classic desserts that always hits the spot. I love it come fall and winter, served warm with spicy notes of cinnamon and streusel topping. It’s super tasty alone, but even better topped with some vanilla bean gelato! Some apples, like Honeycrisp, Pink Lady & Fuji, are better for eating thanks to their crisp, sweet bite. Others, like Macintosh & Braeburn, are better for cooking, and get nicely stewed in a crisp. I like using a variety of apples for layers of flavor and texture that can’t be beat! This time I also decided to throw in some gorgeous, seasonal plums that I had on hand. Perfect combo! Don’t forget about crisps and crumbles during spring and summer- by switching up the fruit, you can enjoy a delicious bowl of goodness year-round!

Homestyle Apple Plum Crisp:

Fruit Filling:

  • 2 pounds apples (I like any combo of Macintosh, Granny Smith, Cortland, Braeburn & Fuji)

  • 1 pound plums

  • 1 lemon, zested & juiced

  • 1/3 cup cane sugar

  • 1/2 tsp pure vanilla extract

  • 1 tsp ground cinnamon

  • 1 tsp ground nutmeg

  • 2 tbsp cornstarch

Crumble Topping:

  • 1 cup all-purpose flour

  • 1 cup old-fashioned oats

  • 1 cup pecans, chopped

  • 1 tsp ground cinnamon

  • 1/2 tsp kosher salt

  • 1 cup brown sugar, packed

  • 1 cup unsalted butter, chilled and cubed

  • vanilla bean ice cream, for serving

Preheat oven to 350 F, and butter a large baking dish (9x13 or 2 qt oval). Peel, core & cut apples into 1/4-inch slices, and place into a large bowl. Add lemon zest, lemon juice, sugar, cinnamon, nutmeg, and cornstarch, and mix to combine. Pour apples into baking dish.

For the topping, add the flour, oats, pecans, cinnamon, salt, and sugars in a large bowl and stir well with a wooden spoon. Work the butter into the mixture with your fingertips until evenly distributed (you may also use a stand mixer if you prefer). Spread the streusel topping mixture evenly over the apples. Bake the crisp in the dish on a baking sheet on the center oven rack until the topping is crunchy and the apples are bubbling, about 55-60 minutes. Best served warm, topped with vanilla bean ice cream.

*Adapted from Sit & Stay Awhile Apple Crisp by Joy the Baker and Old-Fashioned Apple Crisp by Ina Garten.

Useful Tools:


ranger cookies

Ranger Cookies are a childhood favorite of mine- they always make me think of home. My mom got the recipe from a neighbor in the Texas Hill Country after she brought over a freshly baked batch, and we quickly became enamored. The original recipe calls for shortening (butter flavored Crisco!), but for health's sake I have updated it to either unsalted butter, or if you want an extra coconut kick, coconut oil. I love the combination of sweet and salty textures with the corn flakes, pecans, coconut, and oats! There are several names and variations out there for these cookies- Cowboy, Everything, Kitchen Sink, but to me they will always be Rangers. I recently got the opportunity to whip up a batch of these as part of a steamy shoot for Sports Illustrated Swimsuit! The retro, 50s housewife-inspired looks were sexy & fun, and any shoot that requires me to eat cookie dough is a win in my book! I hope you enjoy these as much as I do.

Ranger Cookies:

  • 1 cup unsalted butter, diced (or coconut oil)

  • 1 cup granulated sugar

  • 1 cup light brown sugar

  • 2 large eggs

  • 1 tsp pure vanilla extract

  • ½ tsp salt

  • ½ tsp baking powder

  • 2 tsp baking soda

  • 2 cups all-purpose flour

  • 2 cups Corn Flakes (or similar cereal)

  • 2 cups rolled oats

  • 1 cup unsweetened coconut, shredded or flaked

  • 1 cup pecans, toasted and chopped

Preheat oven to 350 F. Combine butter, sugars, eggs and vanilla using a stand mixer fit with a paddle attachment on medium-low speed. Add salt, baking powder, baking soda and flours, mixing until no lumps remain.  Finally, mix in corn flakes, oats, coconut and pecans.  Drop by heaping tablespoonful onto a cookie sheet and bake for approximately 10 minutes or until cookies are lightly browned. Let cool and enjoy! Dough and cookies also freeze well.

Useful Tools:

*Photos by Taylor Ballantyne