homestyle apple plum crisp

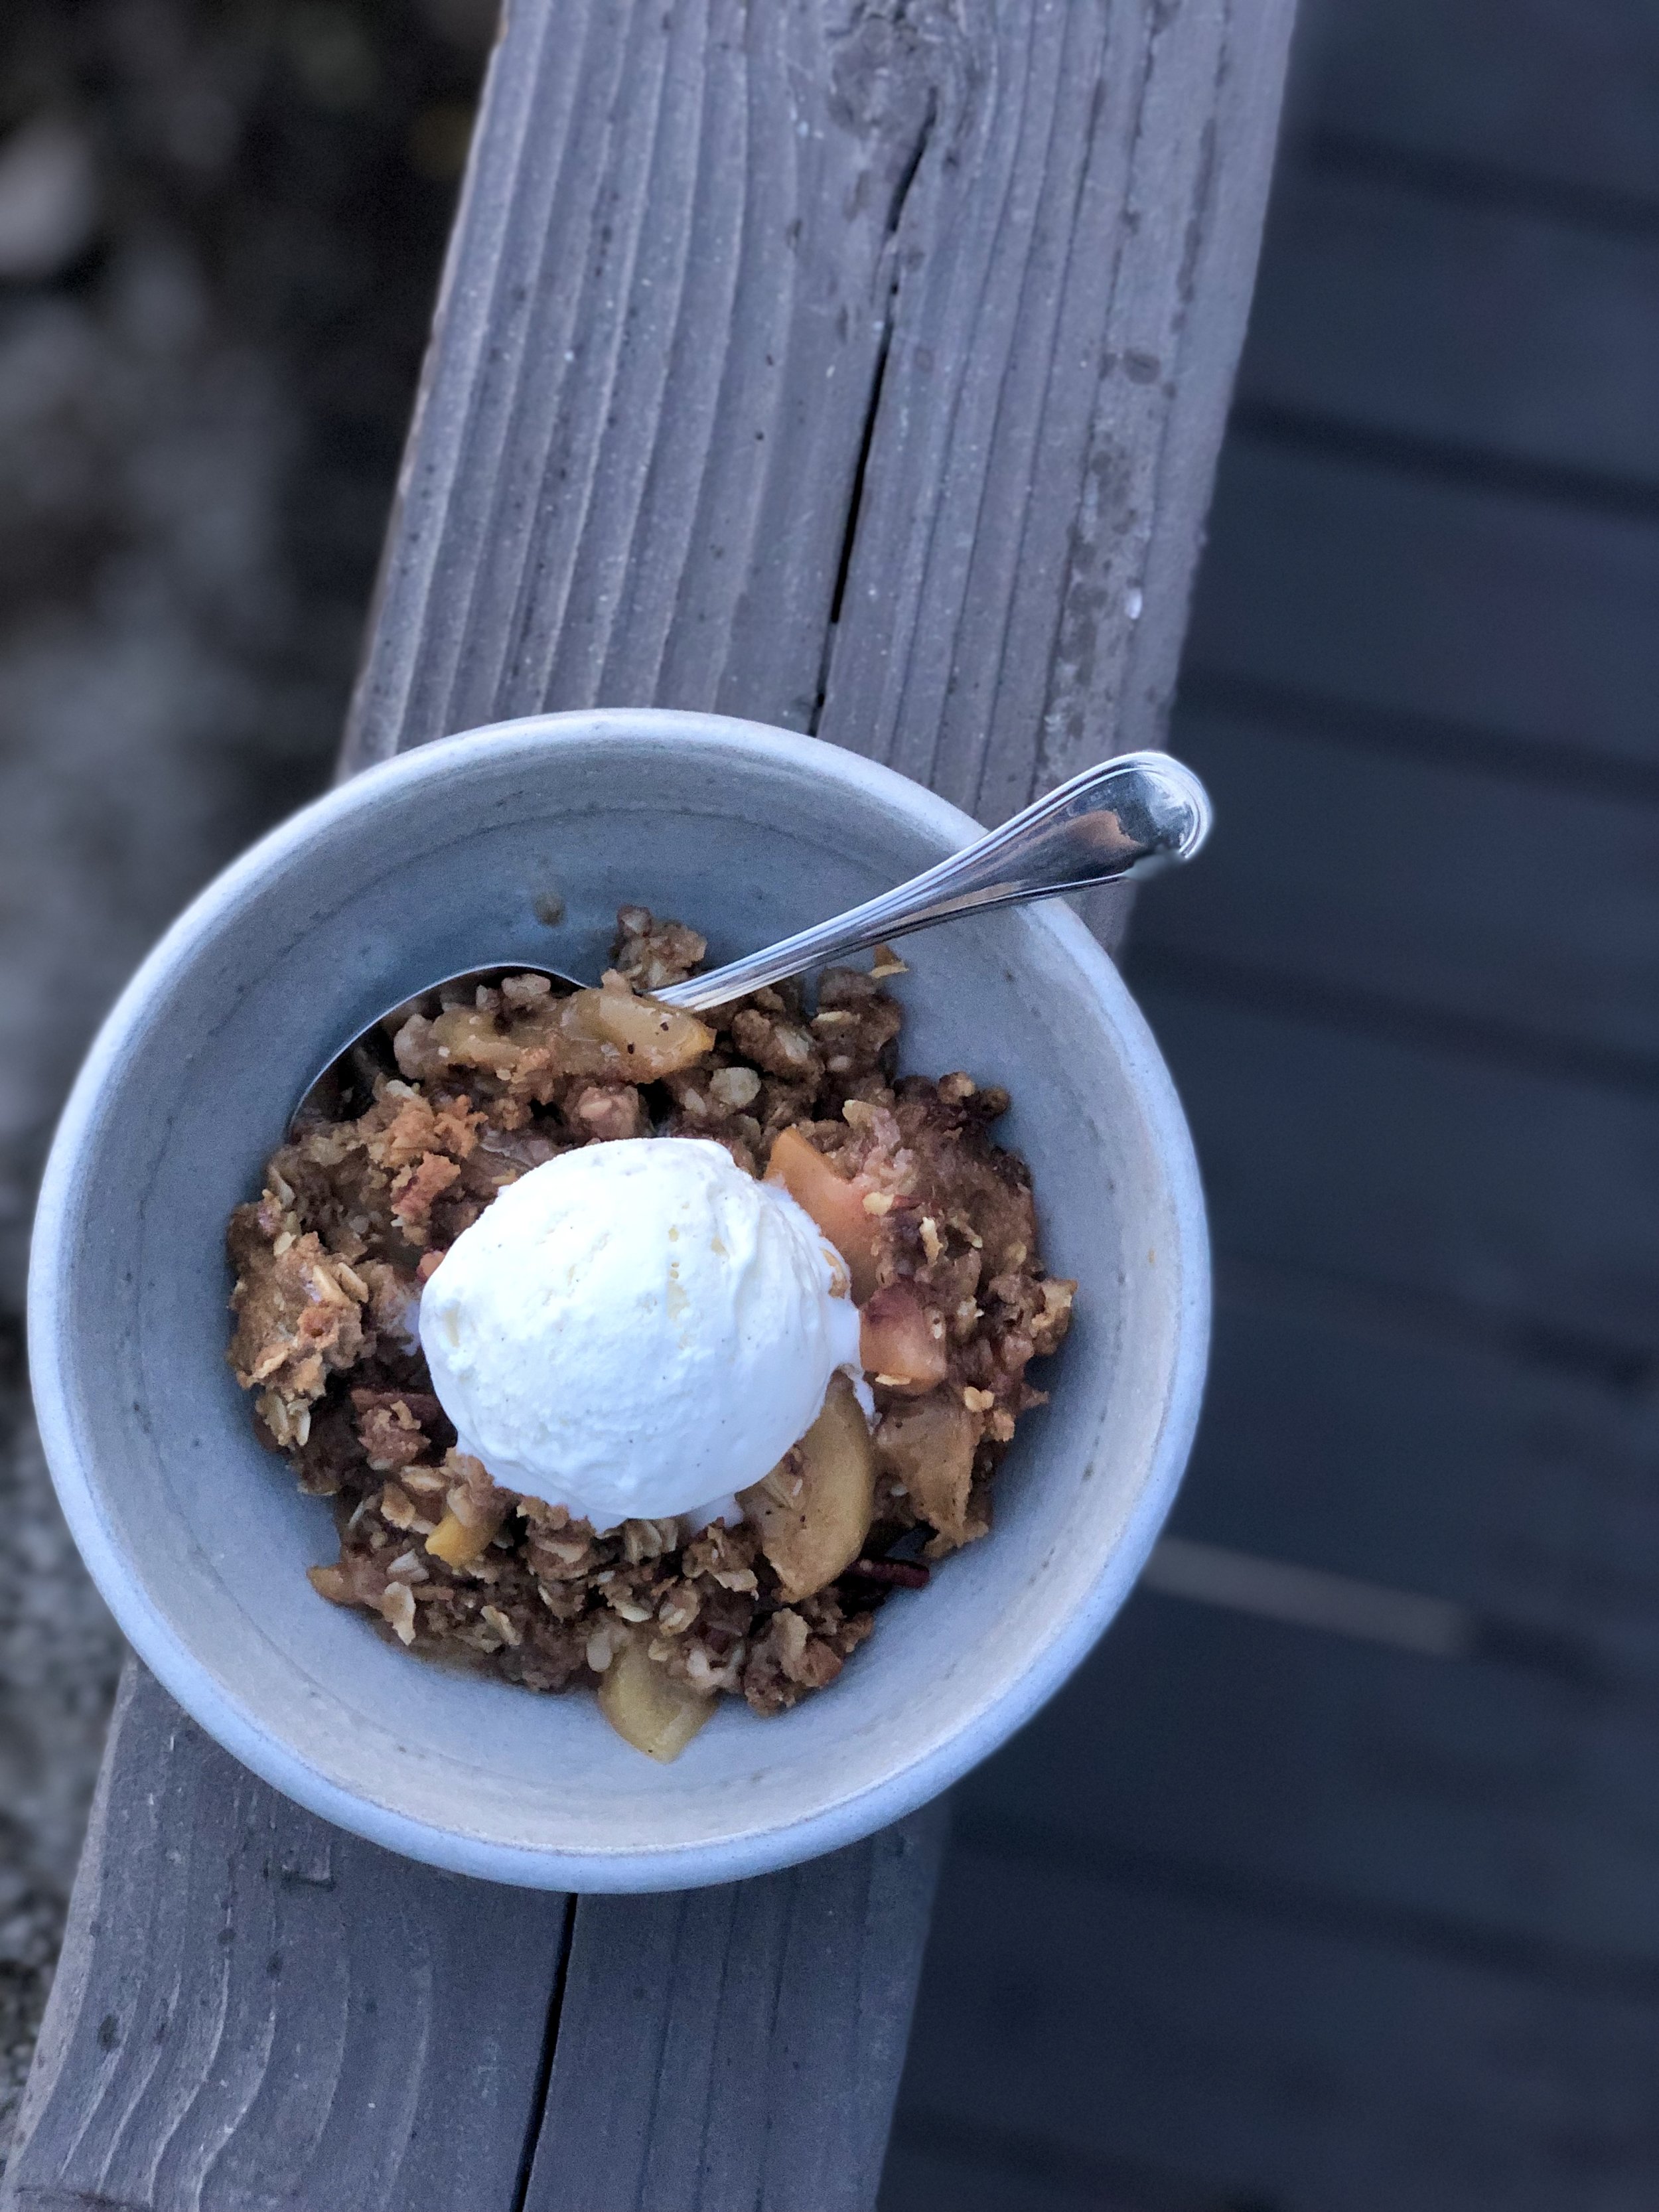
Apple crisp (or crumble, whatever you want to call it) is one of those good ‘ol classic desserts that always hits the spot. I love it come fall and winter, served warm with spicy notes of cinnamon and streusel topping. It’s super tasty alone, but even better topped with some vanilla bean gelato! Some apples, like Honeycrisp, Pink Lady & Fuji, are better for eating thanks to their crisp, sweet bite. Others, like Macintosh & Braeburn, are better for cooking, and get nicely stewed in a crisp. I like using a variety of apples for layers of flavor and texture that can’t be beat! This time I also decided to throw in some gorgeous, seasonal plums that I had on hand. Perfect combo! Don’t forget about crisps and crumbles during spring and summer- by switching up the fruit, you can enjoy a delicious bowl of goodness year-round!

Homestyle Apple Plum Crisp:

Fruit Filling:

  • 2 pounds apples (I like any combo of Macintosh, Granny Smith, Cortland, Braeburn & Fuji)

  • 1 pound plums

  • 1 lemon, zested & juiced

  • 1/3 cup cane sugar

  • 1/2 tsp pure vanilla extract

  • 1 tsp ground cinnamon

  • 1 tsp ground nutmeg

  • 2 tbsp cornstarch

Crumble Topping:

  • 1 cup all-purpose flour

  • 1 cup old-fashioned oats

  • 1 cup pecans, chopped

  • 1 tsp ground cinnamon

  • 1/2 tsp kosher salt

  • 1 cup brown sugar, packed

  • 1 cup unsalted butter, chilled and cubed

  • vanilla bean ice cream, for serving

Preheat oven to 350 F, and butter a large baking dish (9x13 or 2 qt oval). Peel, core & cut apples into 1/4-inch slices, and place into a large bowl. Add lemon zest, lemon juice, sugar, cinnamon, nutmeg, and cornstarch, and mix to combine. Pour apples into baking dish.

For the topping, add the flour, oats, pecans, cinnamon, salt, and sugars in a large bowl and stir well with a wooden spoon. Work the butter into the mixture with your fingertips until evenly distributed (you may also use a stand mixer if you prefer). Spread the streusel topping mixture evenly over the apples. Bake the crisp in the dish on a baking sheet on the center oven rack until the topping is crunchy and the apples are bubbling, about 55-60 minutes. Best served warm, topped with vanilla bean ice cream.

*Adapted from Sit & Stay Awhile Apple Crisp by Joy the Baker and Old-Fashioned Apple Crisp by Ina Garten.

Useful Tools:


mini speculoos pumpkin tarts with candied pepitas

I love all things seasonal, and therefore I love all things pumpkin! I will admit, however, that pumpkin pie can be a bit mundane at times.  I love to spruce it up by adding more textures and flavors, both in the crust as well as toppings. Speculoos (aka Biscoff) cookies make for a much more exciting crust than traditional dough in my opinion- I’m obsessed with their spicy flavor! I also prefer a high crust to filling ratio, so it’s not like you’re just eating a bowl of custard. Candied ginger adds a nice zingy complement to the creamy pumpkin filling, and candied pepitas top these babies off with the perfect crunch! By making them in individual tart shells (mine are technically crème brûlée dishes), everyone gets their own mini pie, and you don’t have to worry about the crust crumbling when trying to remove it from the dish. Just grab a spoon and dig in! I got to bake these with one of my fave bloggers, Camille Styles, when she was in town from my home state of Texas. We had such a blast and now I’m super pumped for all things holiday! If you’re still looking for the perfect Thanksgiving dessert, these tarts would be the perfect addition to your dinner table! Be sure to check out the feature on her blog as well! Enjoy :)

Mini Speculoos Pumpkin Tarts with Candied Pepitas:

Crust:

  • 12 oz. Speculoos or Biscoff cookies

  • 1 tbsp brown sugar

  • 1/2 tsp salt   

  • 1/2 cup butter, melted  

Pie: 

  • 1 can pumpkin puree

  • 1/2 cup dark brown sugar, packed

  • 1/4 cup cane sugar

  • 1 tsp ground cinnamon

  • 1 tsp ground ginger

  • 1/4 tsp ground nutmeg

  • 1/8 tsp ground allspice

  • 1/4 tsp salt

  • 1 can coconut milk

  • 2 large eggs, at room temperature

  • 1/2 cup candied pepitas (pumpkin seeds), for topping

  • 1/2 cup candied ginger, for topping

  • whipped cream, for serving

Preheat oven to 350°. Process cookies in food processor until fully crumbled. Add coconut oil and pulse until well combined, then spread the mixture evenly among the tart shells, making sure to push some up the sides as well. It should be nice and thick! Place tarts shells on a baking sheet, then bake for about 8 minutes. Set aside to cool. In a saucepan over medium heat, combine pumpkin, both sugars, spices, and salt, and cook for about 5 minutes until thick and smooth. Remove from heat, and add coconut milk and eggs, whisking until fully incorporated. Allow mixture to cool for a few minutes. Pour pumpkin mixture into prepared tart shells. Bake at 350° for about 25-30 minutes or until a toothpick inserted into the center comes out clean. Remove from baking sheet and cool completely on wire rack. Top with candied pepitas and ginger, and serve with whipped cream. Enjoy immediately or chilled.

*To make this dairy-free, sub coconut oil for the butter in the crust, and serve with whipped coconut cream.

All photos by Kristen Kilpatrick for Camille Styles. Check out the feature and recipe on her site as well!

Useful Tools:

 * This post may contain affiliate links. If you buy something through one of these links, it won’t cost you a penny more, but I’ll earn a small commission. This allows me to continue to generate content for you, and helps keep the site up and running. Thanks for your support! 


classic birthday cake

Happy Birthday! A classic birthday cake is one of those recipes any good baker should have up his or her sleeve, to whip up whenever an occasion so presents itself. Over the spring and summer months, it seems like there are hundreds of birthdays being celebrated amongst my family and friends, and this cake is a tried and true winner. While this one in particular is a vanilla cake with raspberry filling and a Swiss meringue buttercream, you can customize it in various ways based on your heart's desire: make a chocolate frosting, switch up the filling, add nuts- you get the idea! I highly recommend checking out my wedding cake post for more specific details and instructions on baking, assembling, and decorating the perfect (or close enough!) layer cake! I hope you enjoy it as much as I do :)

Classic Vanilla Birthday Cake with Raspberry Compote Filling & Swiss Meringue Buttercream:

Cake:

  • 4 cups cake flour

  • 2 tsp baking powder

  • 1 1/2 tsp baking soda

  • 1 tsp salt

  • 1 cup unsalted butter, softened

  • 1 1/2 cup cane sugar

  • 1 tbsp pure vanilla extract

  • 4 large eggs, at room temperature

  • 2 cups buttermilk

Buttercream:

  • 1 cup sugar

  • 4 large egg whites

  • 1 1/2 cup unsalted butter, cubed & softened

  • 1 tsp pure vanilla extract

Filling:

  • 2 cups fresh raspberries

  • 1/2 cup granulated sugar

  • 2 tbsp corn starch

  • 1/4 cup water

  • 2 tsp lemon juice

  • fresh raspberries, for serving

Preheat oven to 350°F. Spray two 9" round cake pans with nonstick spray, line with parchment paper, and spray the parchment as well. Mix together flour, baking powder, baking soda, and salt in a medium bowl. In the base of a stand mixer fit with whisk attachment, beat butter and sugar at medium speed until pale and fluffy, then beat in vanilla. Add eggs, beating well and scraping down the bowl to ensure they are fully incorporated. Reduce the speed to low, then mix in buttermilk until just combined. Don't be alarmed if the mixture looks curdled at this point. Add flour mixture until just incorporated, careful not to over-mix. Pour batter evenly among cake pans, and bake until golden, about 35-40 minutes. Allow to cool for a few minutes in the pan, then completely on a cooling rack. 

To prepare raspberry compote, cook raspberries, sugar, cornstarch, water, and lemon juice in a small saucepan until the berries start to break down, about 10 minutes. Lower the heat and simmer until the compote is thick, about 5 minutes. Remove from heat and let cool completely. Store in an airtight container in the fridge (this can be made a week ahead of time). Makes 1 cup.

While cakes are baking, make the buttercream. Whisk egg whites and sugar together in a bowl over a double boiler until sugar is fully dissolved. Transfer mixture into the stand mixer (make sure it's clean & dry!) fit with paddle attachment and whip until it turns white glossy. Add the vanilla, then the butter and continue to whip until buttercream comes together. This may take a good 10-15 minutes, so don't worry if things look curdled or soupy at the start!

Once cakes have cooled, you may level and assemble them, adding filling between the two layers. Spread buttercream evenly around the outside, creating a pattern if desired, and finish with toppings if you choose! You may also make this a 3-layer cake by baking in 6" round cake pans, just make sure you adjust baking time accordingly. Check out my wedding cake post for more assembly and cake decorating instructions. Enjoy!

*Adapted from Best Birthday Cake and Swiss Meringue Buttercream by Smitten Kitchen.

Useful Tools:


açaí bowls

My husband has been on a serious açaí bowl kick lately, and to be honest, I'm not complaining! They're refreshing, delicious, and packed full of healthy ingredients like açaí (duh!), nuts, seeds, and other fruit! The options are pretty endless, but a good place to start is with some high quality, unsweetened açaí, either puréed and frozen or freeze-dried and powdered. The recipe for our go-to version is listed below, but feel free to play around with your favorite superfoods! We love including chia seeds, matcha powder, coconut flakes, and almond butter for a healthy, yet satisfying treat. While artfully arranging the toppings over your smoothie is not necessary, it sure does make for a pretty darn beautiful breakfast or snack! PS- Make sure you go follow my husband's catering company, Beck & Call, as well as his soon-to-be casual eatery Scratch BK, for more delicious eats!

Açaí Bowls:

  • 2 packs açaí purée, frozen

  • 1 banana, frozen

  • 1 cup mixed berries, frozen

  • 2 cups milk of choice (we like coconut or almond)

  • 1 tbsp chia seeds

  • 1 tbsp almond butter

  • 1 tsp maca powder

  • honey or agave nectar, to taste

  • toppings: fresh raspberries, strawberries, blackberries, bananas, coconut flakes, granola, almond butter, matcha powder, chia seeds, hemp hearts, flax seeds, etc.

Blend everything together in a high-powered blender, like a Vitamix. You're going for a thick smoothie consistency, so that it can be eaten with a spoon. Scatter desired toppings across the bowl. Enjoy! Makes two bowls.

Useful Tools:

* This post may contain affiliate links. If you buy something through one of these links, it won’t cost you a penny more, but I’ll earn a small commission. This allows me to continue to generate content for you, and helps keep the site up and running. Thanks for your support! 


moro

On a recent trip to London I got to have dinner with a good friend from NYC. It's funny that with our busy travel schedules, sometimes it ends up being easier to get together when we're away from home! She knows London better than I do, and also appreciates really great food, so she suggested we dine at Moro. This place is a true classic (it's been around for 20 years!), and after trying their food, I totally understand why. The chefs focus on the flavors of the Southern Mediterranean- think Spain, Morocco, and the Sahara- which leads to some truly vibrant food. Everything was flavorful and delicious, from the seasonal special we shared to start (which we ate too quickly for a photo!) to the charcoal grilled halibut. I think the highlight, for me personally, was the mixed vegetable mezze- it's everything I want on a plate and truly how I love to eat on a daily basis. Not to mention the fresh bread was baked to perfection!

A few nights later I also got to dine at their sister restaurant, Morito Hackney Road, which was equally impressive and totally up my alley. Think a similar vibe but offered in more a small plates setting. Super tasty and great for a group! I really cannot say enough good things about Moro and Morito, and I definitely look forward to returning to both spots on my next trip to London!

top shop byron bay

Byron Bay is truly one of the most magical places. I got to spend a few days there with friends on my trip to Australia, but I'd gladly return at the drop of a hat! It's a picturesque beach town, with tons of cute shops and places to eat. I've raved about my love for Aussie food culture before, but it's seriously the best. I love the idea of going out for a leisurely breakfast or lunch, sitting outside, and enjoying all the fresh flavors the season has to offer. Top Shop Byron Bay is a popular little corner store and café (super close to where we stayed!) that focuses on local and organic produce, and makes some really great coffee! We stopped in multiple times on our three day getaway from Sydney, and practically everything on the menu is right up my alley. The acaí bowls come topped with tropical fruit, dried coconut, and granola, and are the perfect refreshment after a morning in the sun. I became particularly obsessed with the maca-mango smoothie, made from mango, macadamia nut milk, and macadamia nut butter. Oh my glory it was so delicious, and I cannot wait to recreate it at home! My husband was a fan of the breaky burger, which comes fully loaded with egg, bacon, and avocado! All the homemade baked goods are laid out on display to tempt you as well, and they are absolutely worth the indulgence. Top Shop is totally my kind of spot, one that I definitely wish there were more of stateside!