grain free vanilla cake with pumpkin cream frosting

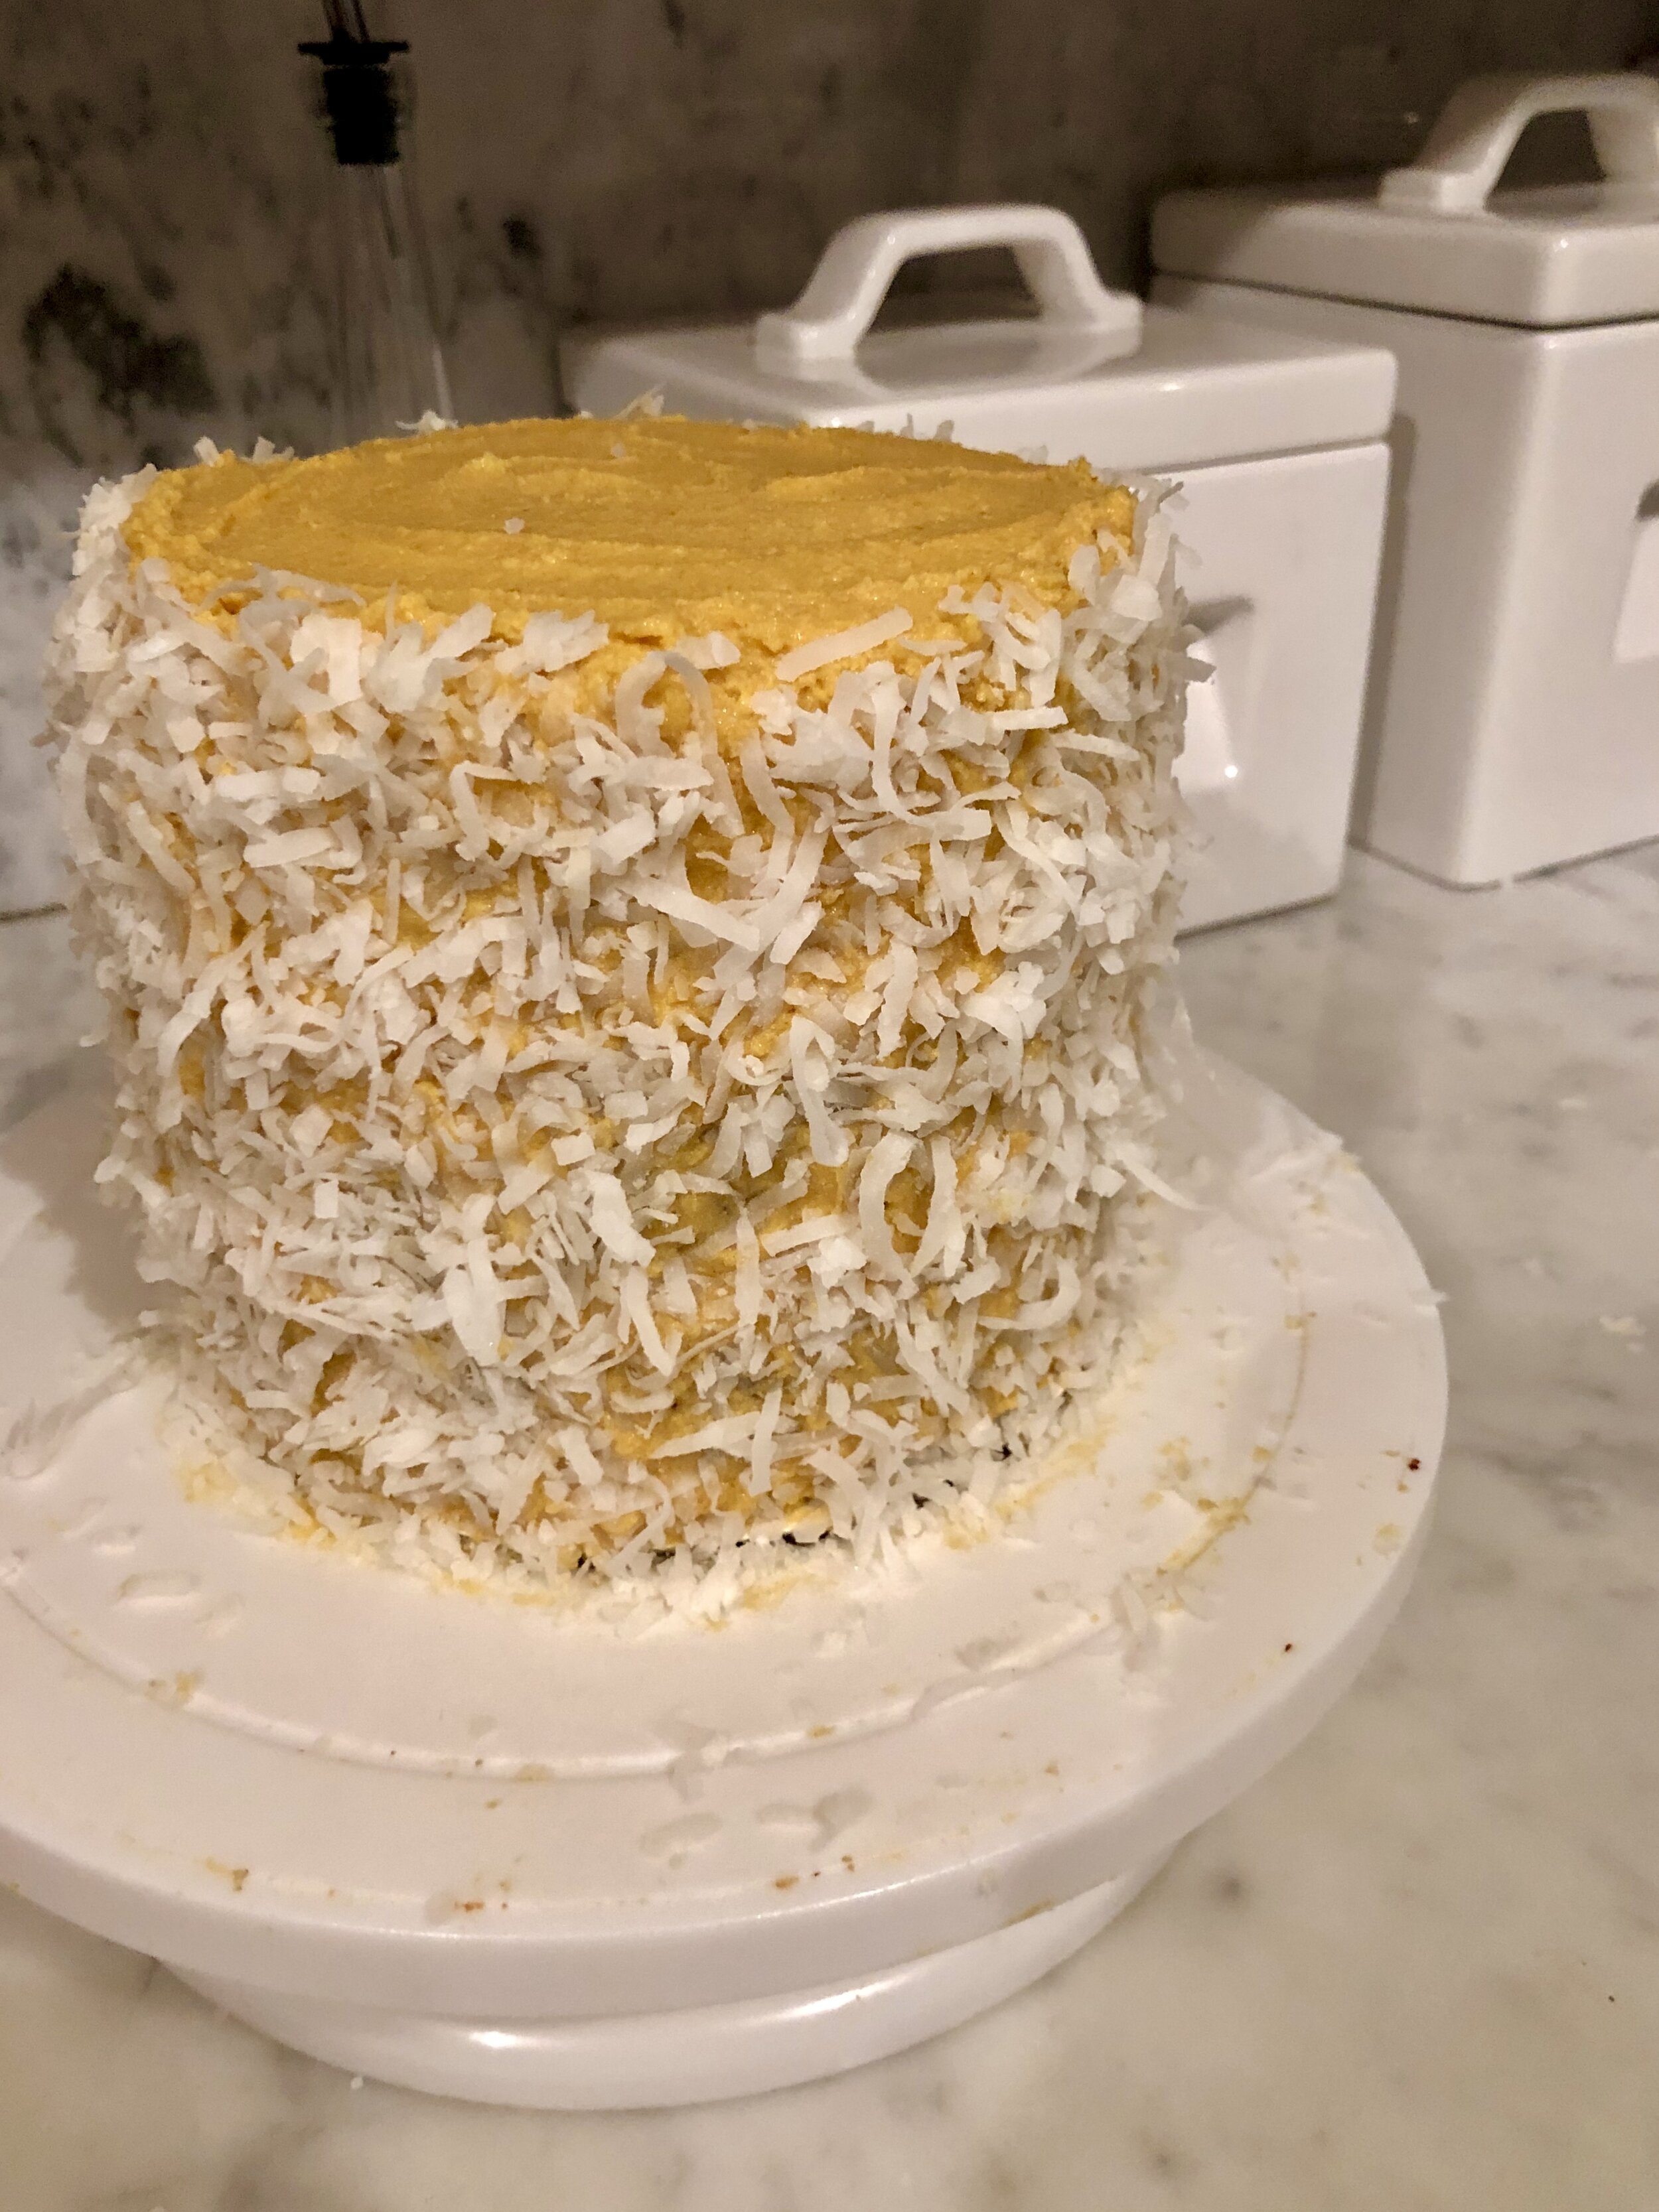
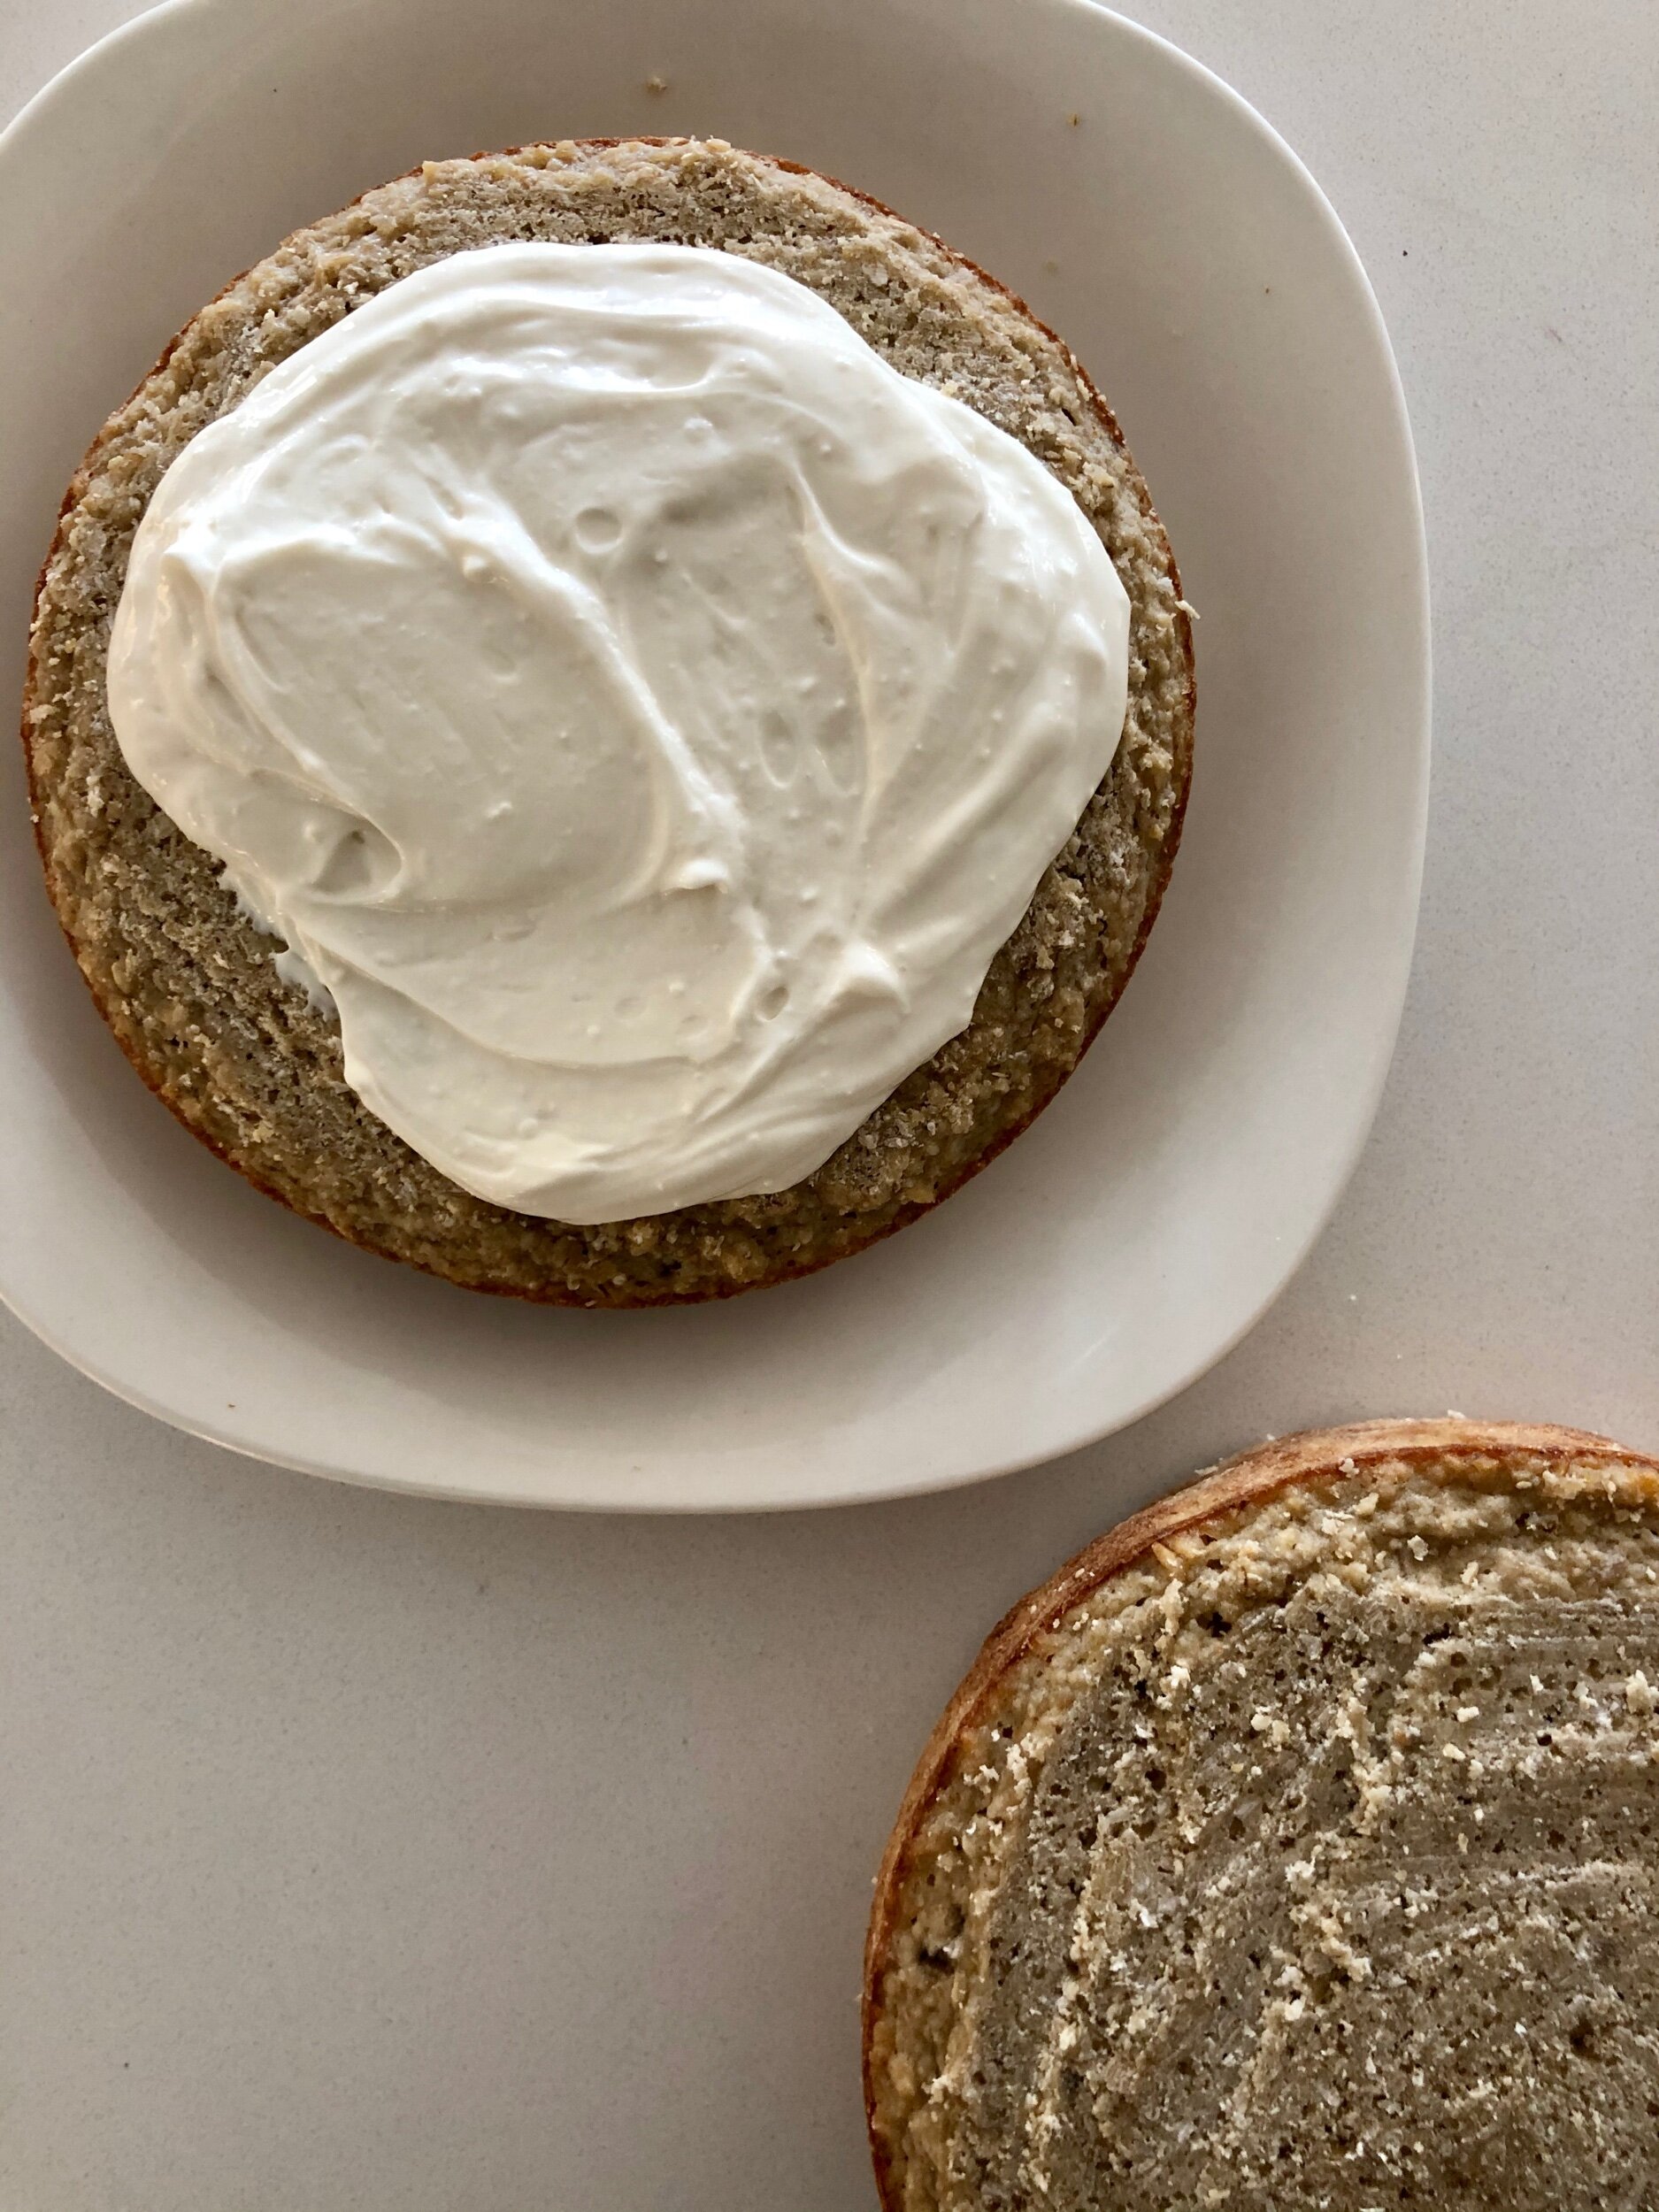
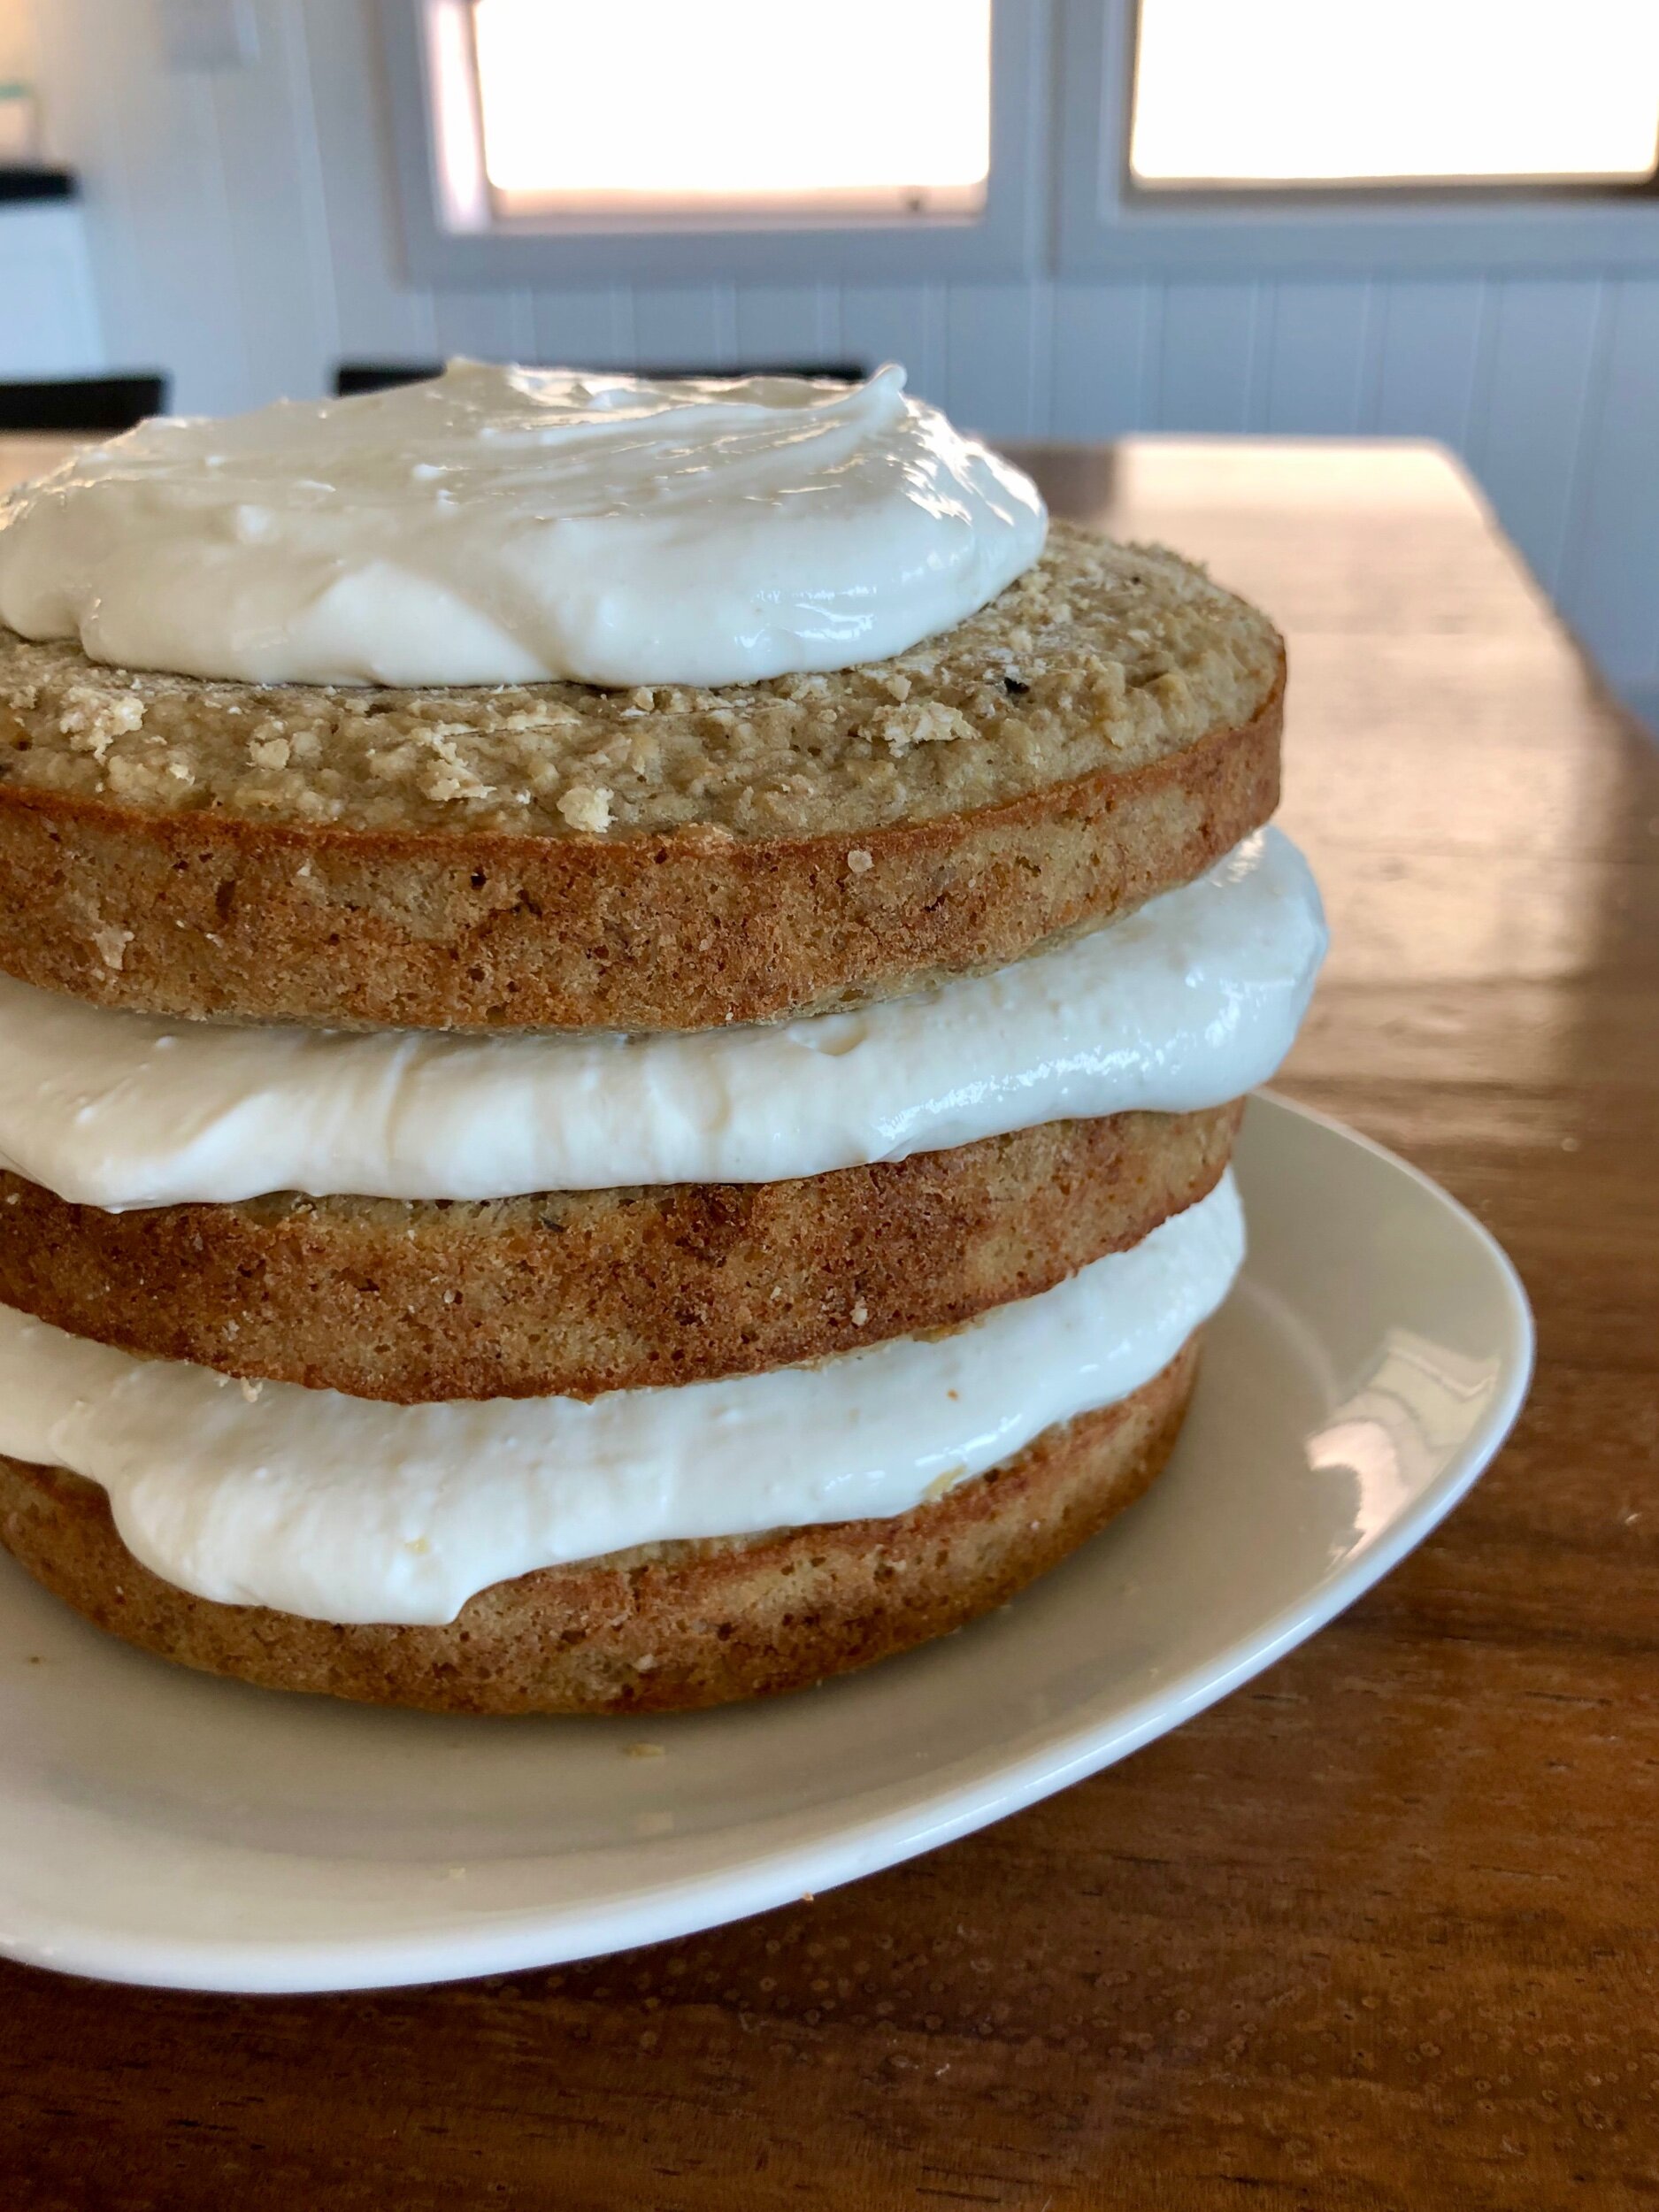
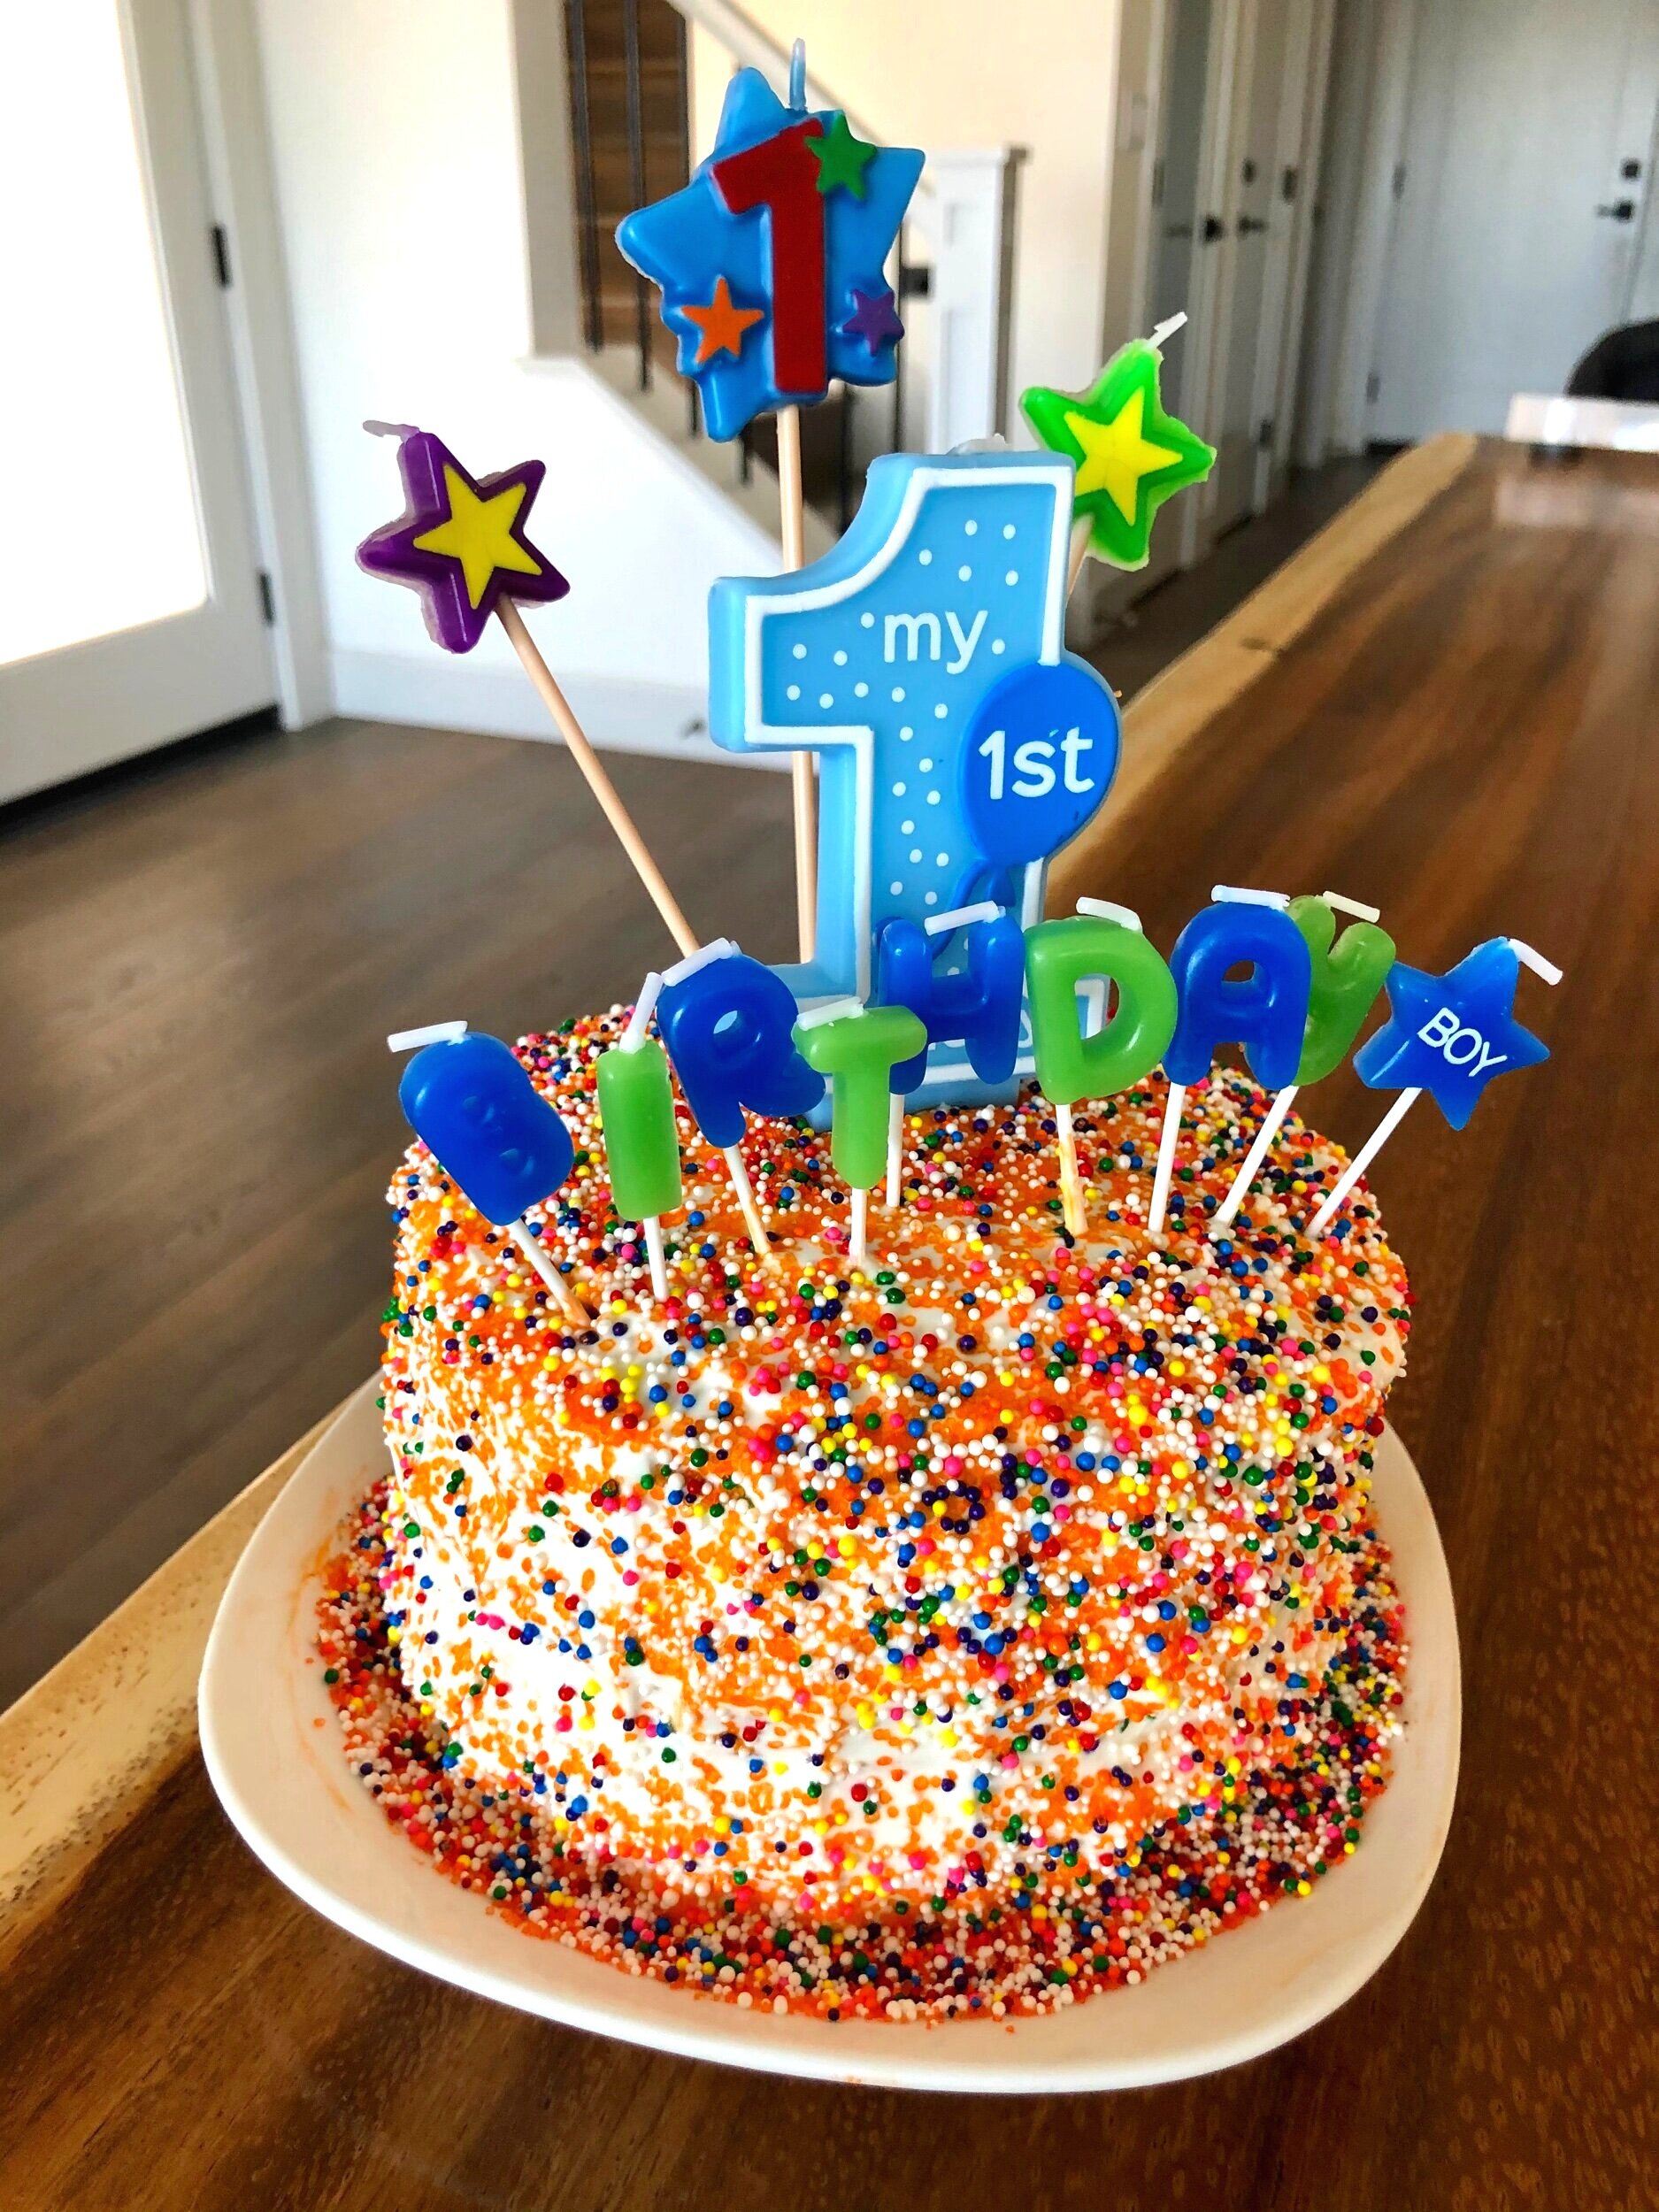
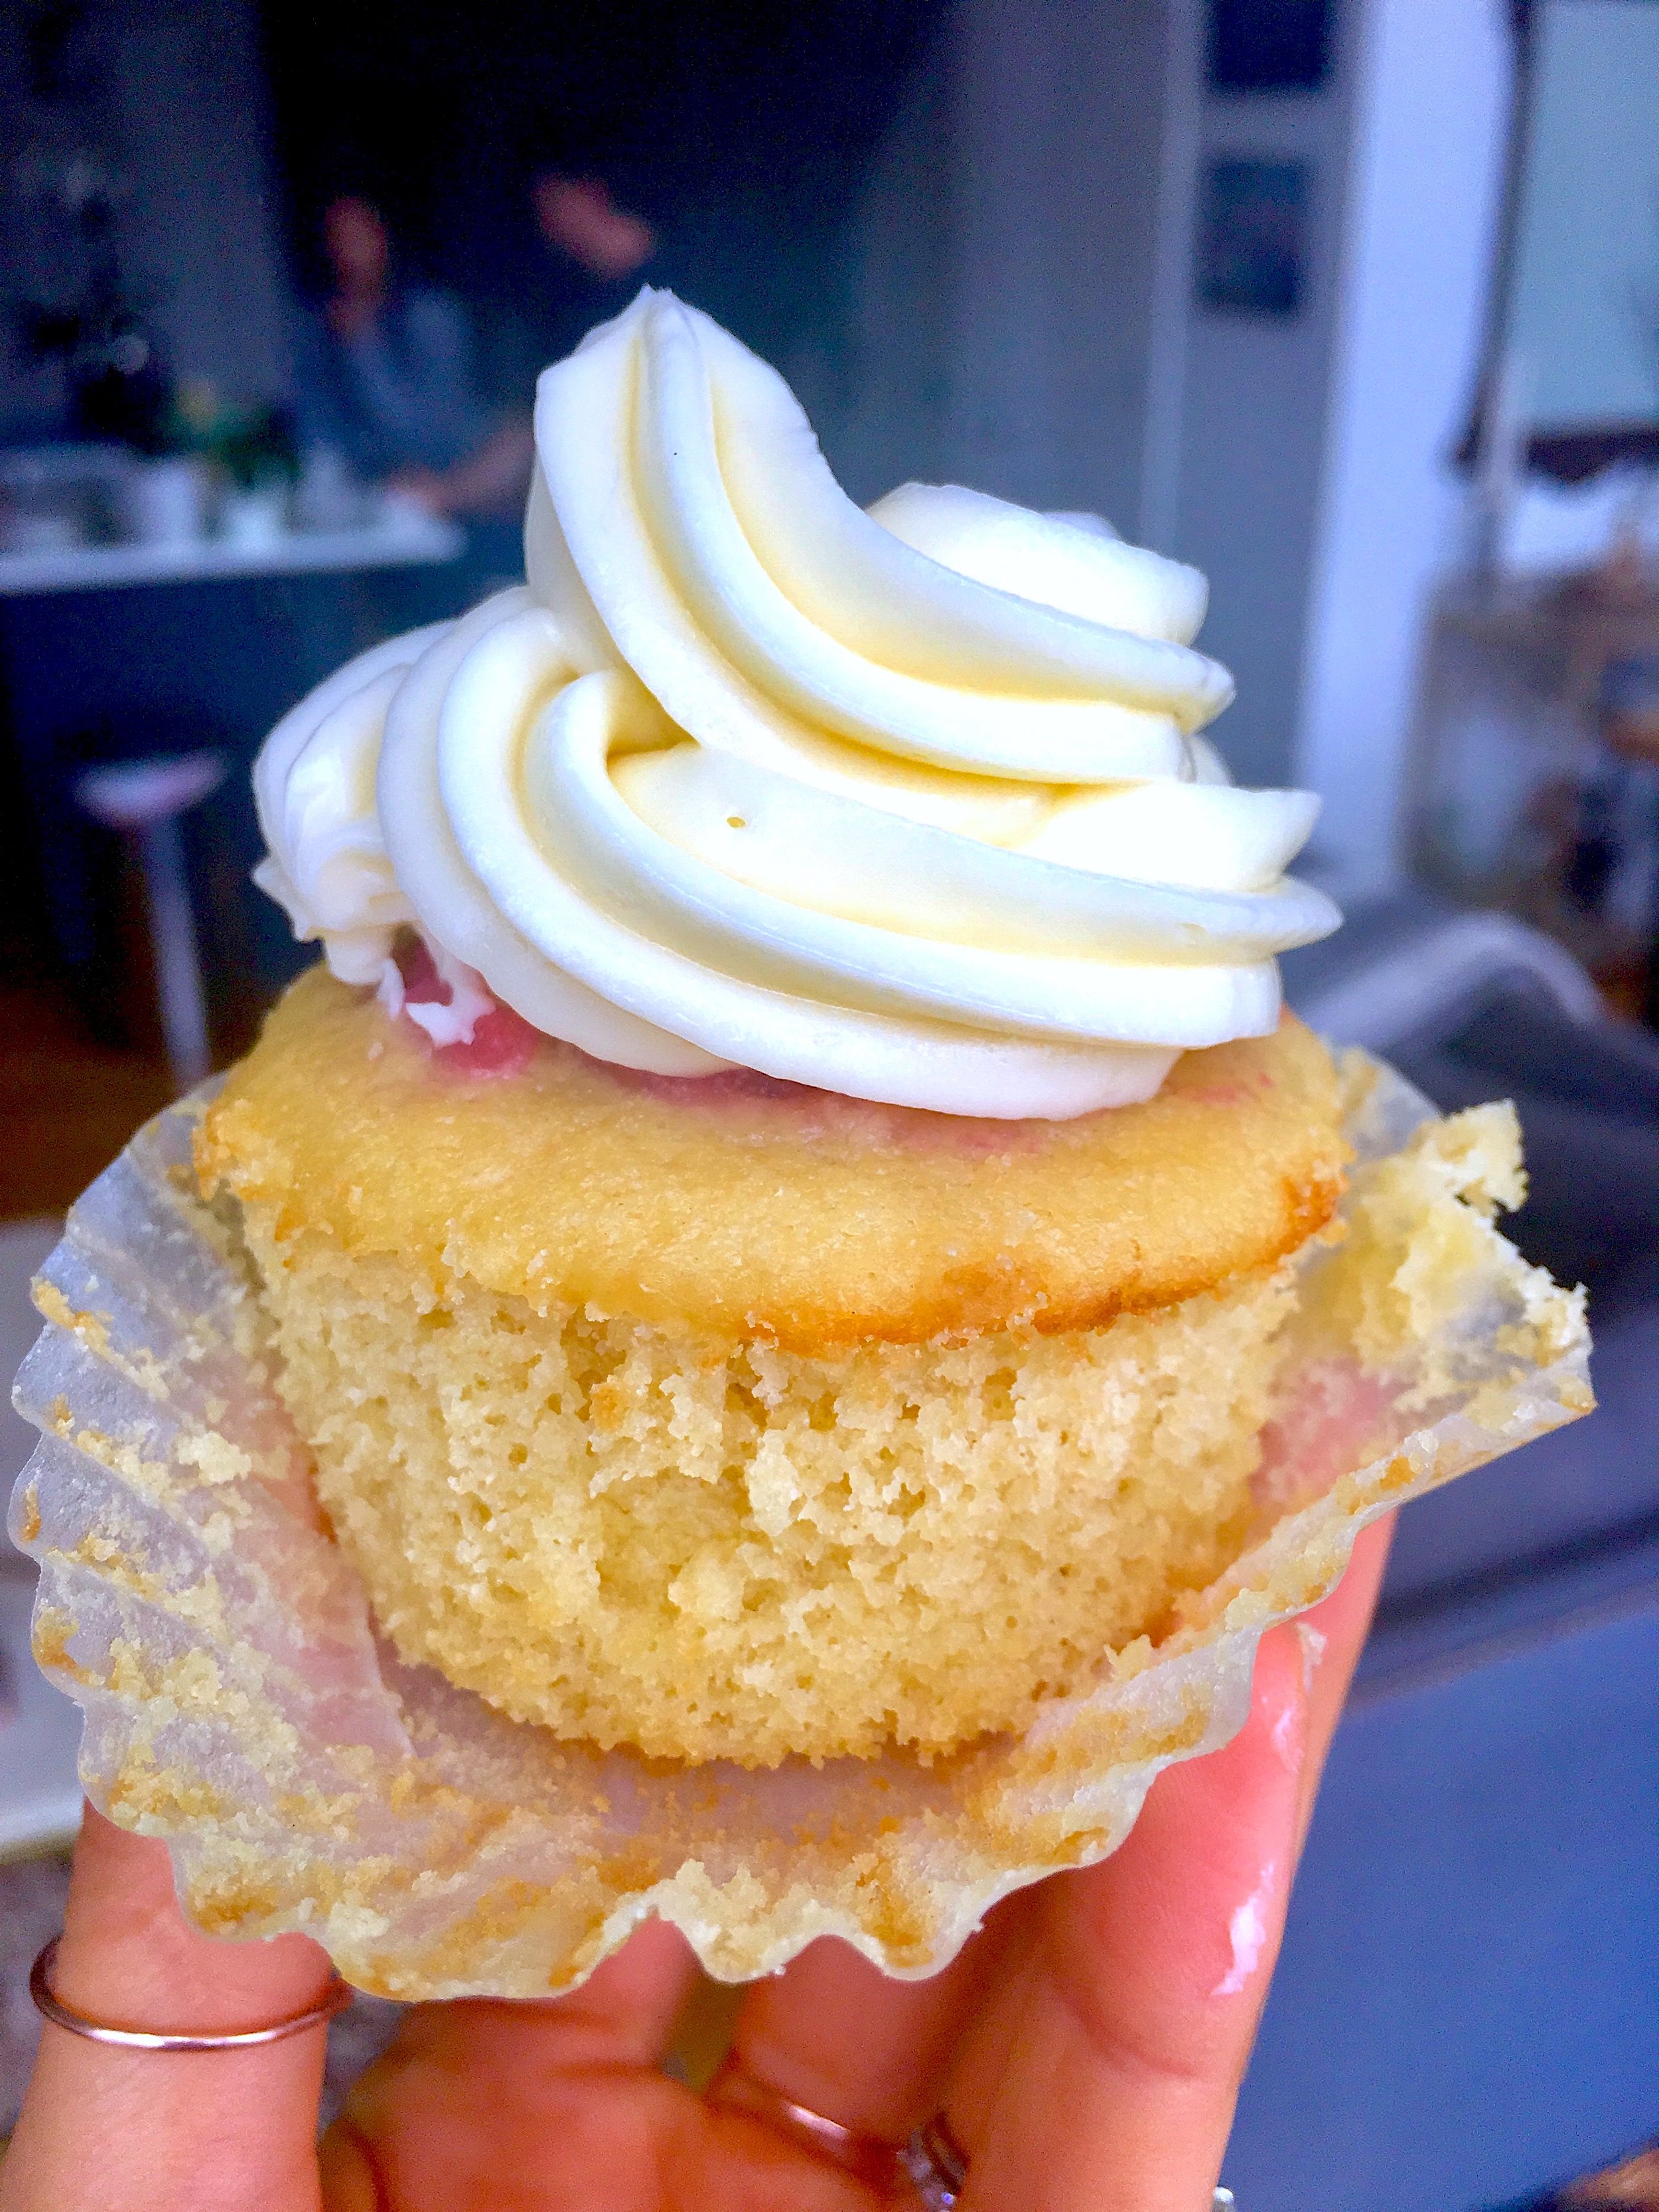
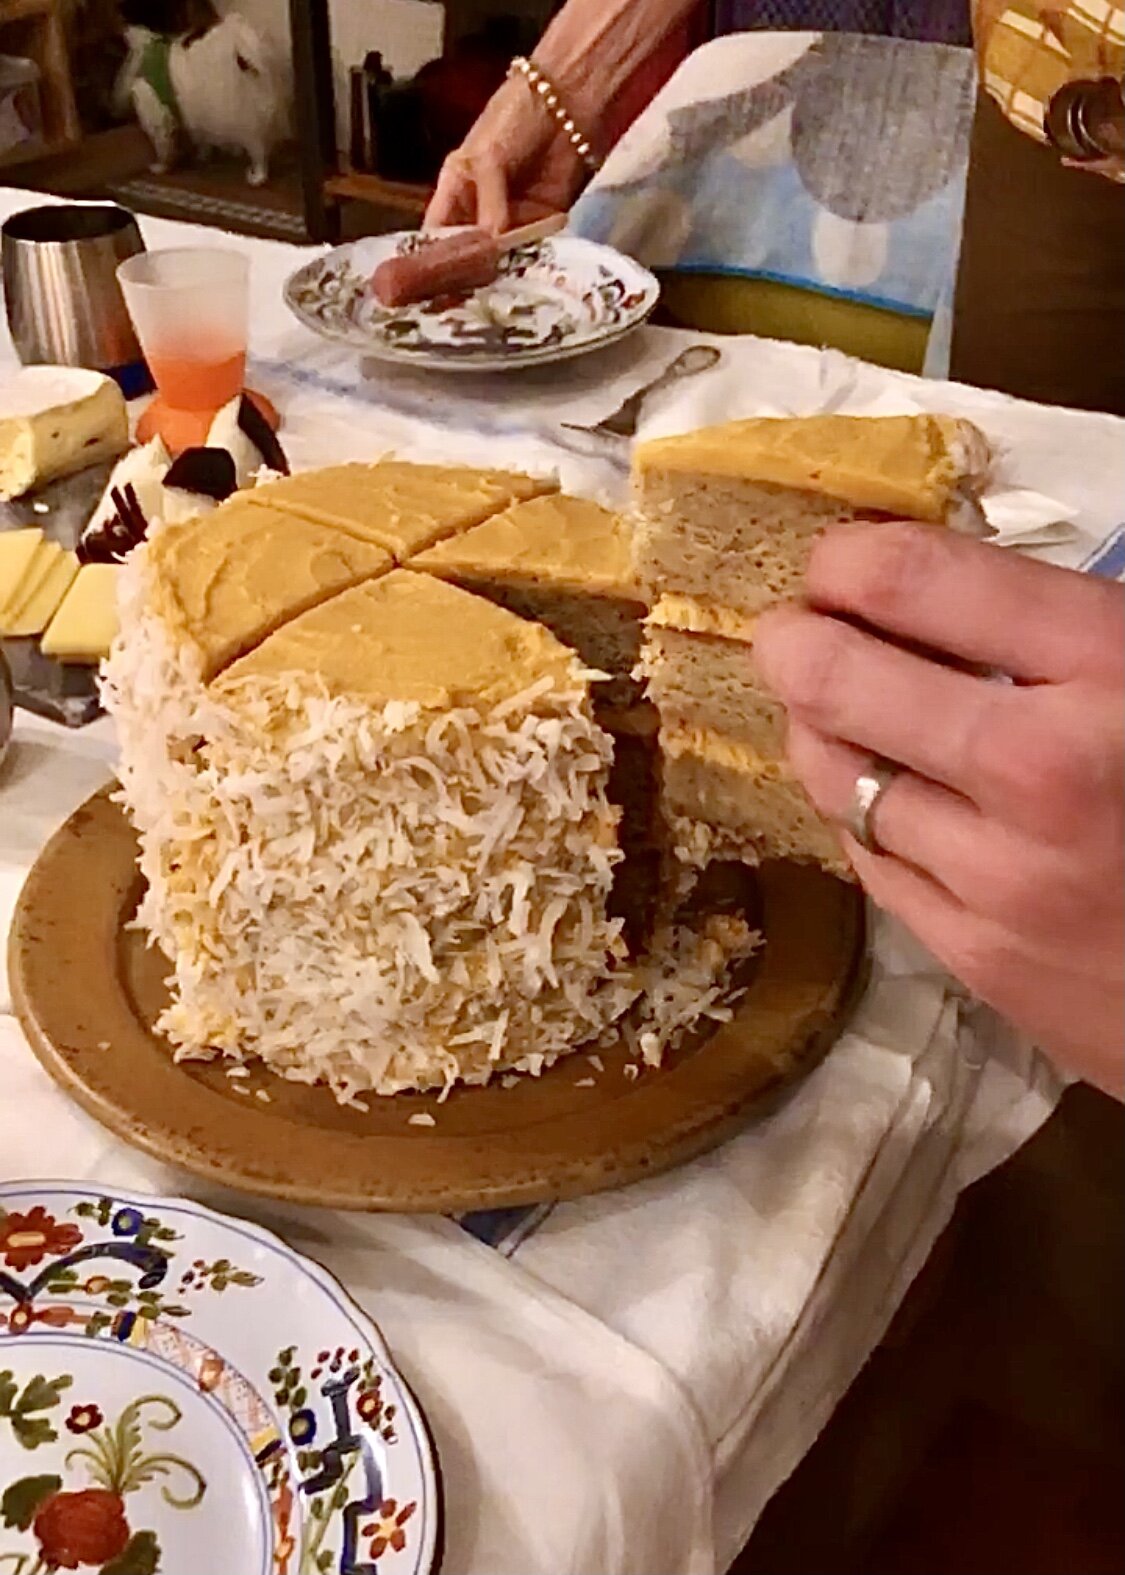
I love fall. The weather, the colors, the fashion… The flavors and food! It’s oh so comforting and delicious, and this vanilla cake with pumpkin cream is just that. Pumpkin spice and pumpkin pies are everywhere this time of year, but they can be a bit boring, no? I’m more of a cake than pie person anyway, to be honest… This cake goes a bit beyond your typical pumpkin dessert- moist vanilla cake makes up the base, topped with layers of smooth pumpkin frosting (basically a cream cheese & buttercream hybrid!), and finished with plenty of shredded coconut! Plus, since you can mix up the frosting flavor with whatever fruit you fancy, it’s adaptable for all seasons. Win! This cake is actually grain-free as well, so even those with gluten sensitivities can enjoy a piece. The vanilla really comes through thanks to the use of whole vanilla bean pods, as opposed to just vanilla extract, so don’t skip out if you can get your hands on some! But if you can’t find them, just up the vanilla extract to one tablespoon, and you’ll be fine. It’ll be delicious either way. I think this cake is even better the next day, which is great for all your holiday meals when the kitchen gets busy. Just bake it ahead of time and decorate before serving! I hope you enjoy.

Grain-Free Vanilla Cake:

Pumpkin Cream Frosting:

  • 1/2 cup unsalted butter, room temperature

  • 1/2 cup cream cheese, at room temperature

  • 1/2 cup pumpkin puree

  • 1 tsp pure vanilla extract

  • 1/2 tsp ground cinnamon

  • 1/4 tsp ground ginger

  • 1/4 tsp ground nutmeg

  • pinch of salt

  • 4 cups powdered sugar

  • 1-3 tablespoons milk of choice, if needed

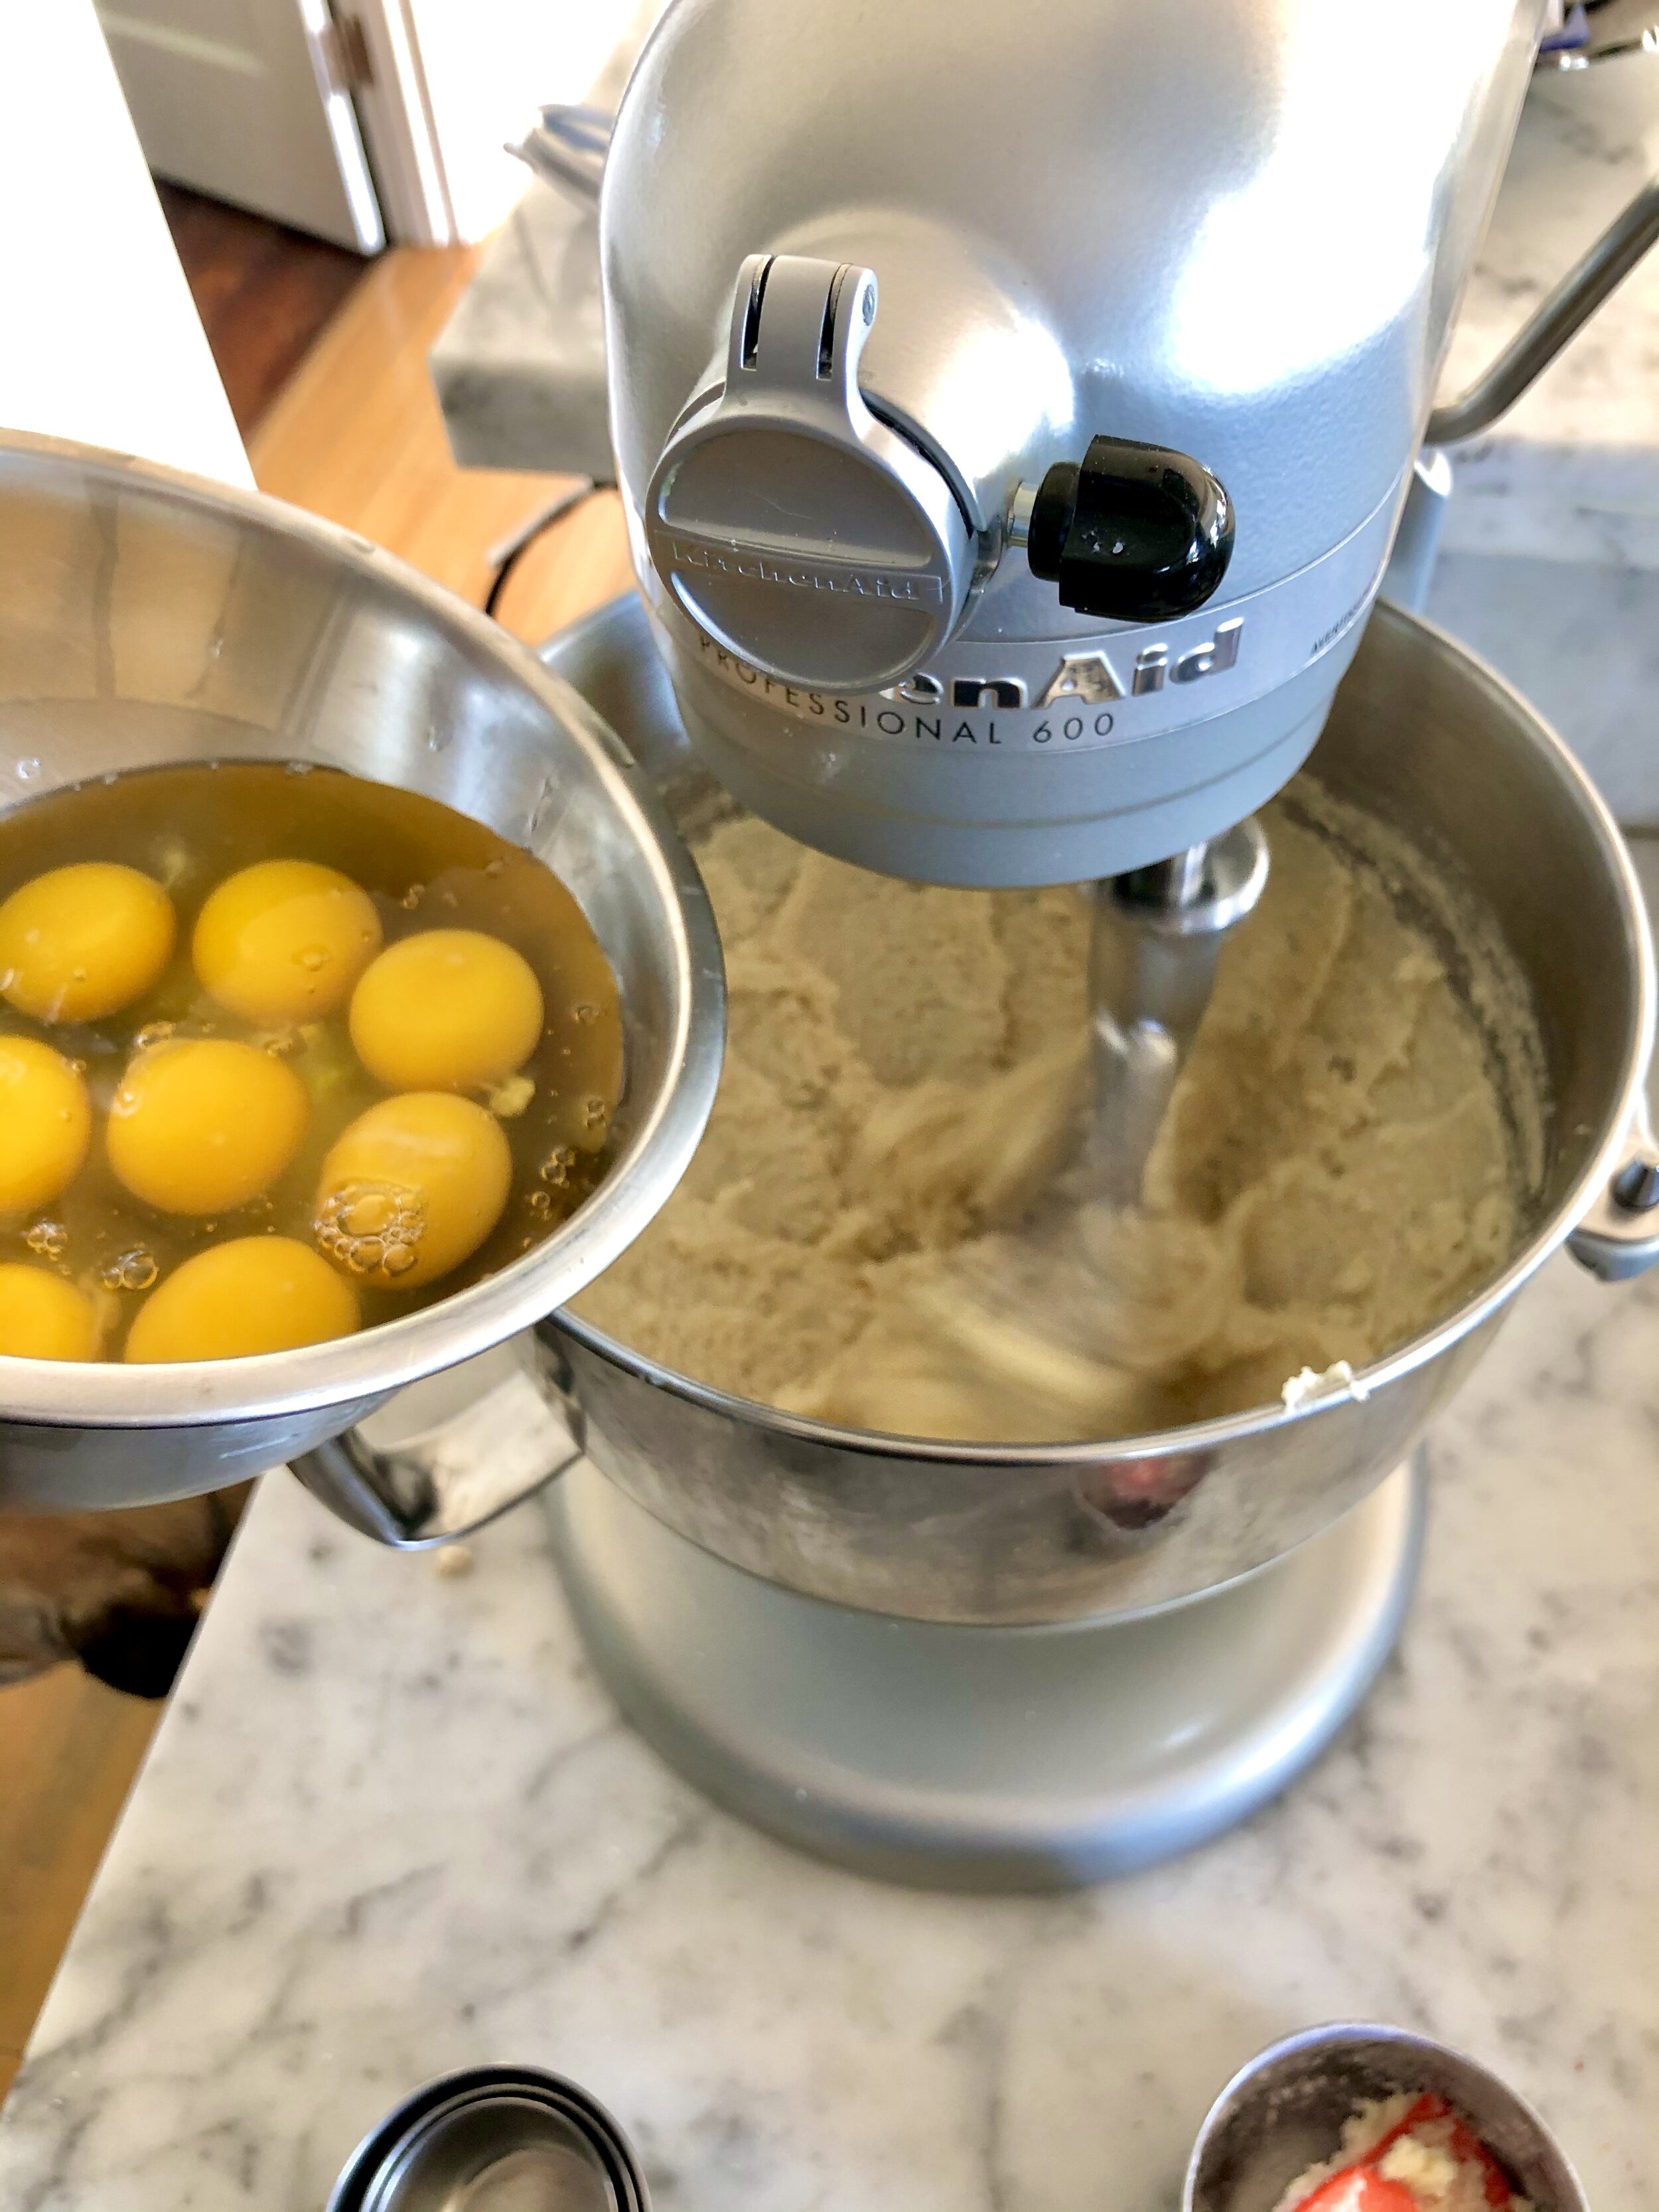
Preheat oven to 350F. Line two 9” round cake pans (or three 6” round cake pans) with parchment paper and grease them with butter or nonstick spray, then set aside. In the bowl of a stand mixer (or hand mixer), whip butter, coconut oil and sugar together on high until smooth, then reduce speed and add eggs, one at a time. Reduce speed to low, and add in milk, vanilla bean seeds, and vanilla extract until well mixed. In a separate mixing bowl, combine almond flour, coconut flour, baking powder and sea salt. Use a spatula or fork to get rid of any large lumps. Slowly add flour mixture into wet ingredients in small batches with mixer on low speed until fully incorporated. Careful not to over-mix (it will be thick)! Divide batter into cakes pans, spreading evenly with a spatula. I like to bang the cake pans a couple times on the counter to remove any air bubbles. Bake cakes for about 38-40 minutes, or until a cake tester comes out clean. Allow them to cool for at least 30 minutes in the pans on a cooling rack before flipping them out onto a the rack to cool completely before frosting.

While the cakes cool, make your buttercream frosting. Place softened butter, cream cheese and pumpkin puree in the bowl of a stand mixer with whisk attachment, and whip until creamy. Add vanilla extract, spices, and salt, mixing until combined. Slowly add the powdered sugar and mix on high for a few minutes, until frosting is light and fluffy. If it’s too thick, add milk 1 tbsp at a time, until it gets to desired consistency. You may make this ahead of time, and store in the fridge for a couple days. Just bring to room temperature and re-whip before frosting. To decorate, use a sharp knife to level off the tops of cakes, if needed, then layer on cake stand (or revolving cake stand) and decorate with frosting, as desired. Top with shredded coconut. Slice and enjoy!

*Adapted from Grain Free Vanilla Cake by Everyday Maven.


first birthday smash cake

I’m sure it’s no surprise to anyone that I was super excited to bake my son Dylan’s first birthday cake. Typically called “smash cake”, it’s a birthday cake for a one year old that they can essentially smash, play around with, eat, dig in, throw, whatever. Anything goes! And extra cake for me to eat? Yes please! While researching recipes, I knew I wanted something on the healthier side- not too much added sugar for sure. Fresh fruit like bananas are a great way to add a natural sweetness to your cakes without having to add a bunch of cane sugar. I also used a combination of coconut oil (healthy fats!) and applesauce, which keeps the cake nice and moist. Oat flour is a healthy alternative to all-purpose, and I made mine by grinding up rolled oats in a food processor. Super easy! If I’m honest, I didn’t even pulverize the oats into total flour consistency, and left it a bit coarser to give the cake some texture. Whatever you prefer! Plus, if you use certified gluten-free oats, this cake is completely gluten-free as well. In terms of frosting, which can all too often be a huge sugar bomb, I went the Greek yogurt route, with just a touch of maple syrup for sweetness! Make sure you strain it so it’s extra thick for frosting purposes. Feel free to decorate however you desire- a more “naked” frosted cake or spread all-over, and top with berries or natural sprinkles. I was assembling this away from home, without my usual tools and decorating accessories, so it didn’t end up being the prettiest cake out there (I essentially threw sprinkles at it to cover up a messy frosting job), but it was still super fun to make! Just don’t forget the first birthday candles! I’m happy to report Dylan dug right in and ate quite a few handfuls (mostly frosting). Thankfully, he even shared with his mama ;) Happy baking!

First Birthday Smash Cake:

  • 3 cups oat flour

  • 2 tsp baking powder

  • 1/2 tsp salt

  • 6 tbsp coconut oil, melted and slightly cooled

  • 6 tbsp unsweetened applesauce

  • 1/4 cup pure maple syrup

  • 3/4 cup mashed banana (about 1.5 large bananas)

  • 1/4 cup unsweetened almond milk

  • 4 large eggs

  • 2 tsp pure vanilla extract

  • fresh berries or sprinkles, for topping

Greek Yogurt Frosting: 

  • 3 cups whole milk greek yogurt

  • 1 cup cream cheese

  • 1/4 cup pure maple syrup

  • 1 tsp pure vanilla extract

Place greek yogurt in a mesh sieve or fine-mesh strainer lined with a paper towel with a bowl underneath. Let sit for a couple hours (or overnight in the fridge). Transfer the yogurt to a bowl and stir in maple syrup and vanilla extract. You may add more maple syrup if you prefer it sweeter. Refrigerate until ready to use.

Preheat the oven to 350 degrees F. Grease three 6-inch cake pans (you can alternatively use two 9-inch cake pans, but baking time will need to be adjusted), line each with parchment paper, and then grease the parchment as well. In a medium bowl, whisk together the flour, baking powder, and salt. In a large bowl or base of a stand mixer, whisk together melted coconut oil, applesauce, maple syrup, mashed banana, almond milk, eggs, and vanilla until smooth. Slowly add the flour mixture, mixing until just combined. Divide the batter evenly between prepared cake pans, and bake for about 22 minutes, or until a toothpick or cake tester comes out clean. Remove from oven and place pans onto a wire rack to cool for 15 minutes before removing cakes from pans to cool completely.

To assemble, level off any dome shape on your cakes, so you have flat surfaces. Place one cake on your cake stand, (you can also use cake boards and a revolving cake stand if you’d like!), and top with frosting, spreading it in an even layer just past the edges. Add the second, repeat with frosting, and then repeat with the third cake . Use an offset spatula or knife to scrape off the frosting overhang for a “naked” cake look, or use additional frosting to coat the entire cake. Top with berries or sprinkles, and enjoy!

*Adapted from First Birthday Smash Cake with Yogurt Frosting by Yummy Toddler Food.


classic birthday cake

Happy Birthday! A classic birthday cake is one of those recipes any good baker should have up his or her sleeve, to whip up whenever an occasion so presents itself. Over the spring and summer months, it seems like there are hundreds of birthdays being celebrated amongst my family and friends, and this cake is a tried and true winner. While this one in particular is a vanilla cake with raspberry filling and a Swiss meringue buttercream, you can customize it in various ways based on your heart's desire: make a chocolate frosting, switch up the filling, add nuts- you get the idea! I highly recommend checking out my wedding cake post for more specific details and instructions on baking, assembling, and decorating the perfect (or close enough!) layer cake! I hope you enjoy it as much as I do :)

Classic Vanilla Birthday Cake with Raspberry Compote Filling & Swiss Meringue Buttercream:

Cake:

  • 4 cups cake flour

  • 2 tsp baking powder

  • 1 1/2 tsp baking soda

  • 1 tsp salt

  • 1 cup unsalted butter, softened

  • 1 1/2 cup cane sugar

  • 1 tbsp pure vanilla extract

  • 4 large eggs, at room temperature

  • 2 cups buttermilk

Buttercream:

  • 1 cup sugar

  • 4 large egg whites

  • 1 1/2 cup unsalted butter, cubed & softened

  • 1 tsp pure vanilla extract

Filling:

  • 2 cups fresh raspberries

  • 1/2 cup granulated sugar

  • 2 tbsp corn starch

  • 1/4 cup water

  • 2 tsp lemon juice

  • fresh raspberries, for serving

Preheat oven to 350°F. Spray two 9" round cake pans with nonstick spray, line with parchment paper, and spray the parchment as well. Mix together flour, baking powder, baking soda, and salt in a medium bowl. In the base of a stand mixer fit with whisk attachment, beat butter and sugar at medium speed until pale and fluffy, then beat in vanilla. Add eggs, beating well and scraping down the bowl to ensure they are fully incorporated. Reduce the speed to low, then mix in buttermilk until just combined. Don't be alarmed if the mixture looks curdled at this point. Add flour mixture until just incorporated, careful not to over-mix. Pour batter evenly among cake pans, and bake until golden, about 35-40 minutes. Allow to cool for a few minutes in the pan, then completely on a cooling rack. 

To prepare raspberry compote, cook raspberries, sugar, cornstarch, water, and lemon juice in a small saucepan until the berries start to break down, about 10 minutes. Lower the heat and simmer until the compote is thick, about 5 minutes. Remove from heat and let cool completely. Store in an airtight container in the fridge (this can be made a week ahead of time). Makes 1 cup.

While cakes are baking, make the buttercream. Whisk egg whites and sugar together in a bowl over a double boiler until sugar is fully dissolved. Transfer mixture into the stand mixer (make sure it's clean & dry!) fit with paddle attachment and whip until it turns white glossy. Add the vanilla, then the butter and continue to whip until buttercream comes together. This may take a good 10-15 minutes, so don't worry if things look curdled or soupy at the start!

Once cakes have cooled, you may level and assemble them, adding filling between the two layers. Spread buttercream evenly around the outside, creating a pattern if desired, and finish with toppings if you choose! You may also make this a 3-layer cake by baking in 6" round cake pans, just make sure you adjust baking time accordingly. Check out my wedding cake post for more assembly and cake decorating instructions. Enjoy!

*Adapted from Best Birthday Cake and Swiss Meringue Buttercream by Smitten Kitchen.

Useful Tools:


wedding cake

Everyone knows my love for baking and all things sweets-related, so when I got asked to make one of my best friend's wedding cakes, I jumped at the opportunity. What an honor, and so exciting to be a part of their big day! Don't get me wrong, though- this was a huge undertaking, and I had not baked on this scale before, so practice rounds were definitely required! I researched quite a bit, and was not surprised to find that Deb of Smitten Kitchen had published several posts with steps detailing her own "Project Wedding Cake". These became my wedding cake bible, through her trial and error, and attention to detail, I was able to gain the confidence I needed to tackle my own project wedding cake! 

I did a tasting for the bride and groom so that they could decide on flavors, and we ended up going for a classic vanilla buttermilk cake, with raspberry compote and salted coconut caramel fillings (one for each tier), all finished with luxurious Swiss meringue buttercream! The decorations were to be simplistic, with a rustically finished frosting along with florals and greenery from the farm where the wedding was taking place. This calmed my nerves a bit, as I am not one for the tiny, meticulous, perfectly designed cakes. Luckily the rustic look fit in perfectly with the entire vibe of the wedding. I've linked to Deb's posts below, since I only made minor changes to her stellar recipes, and included my own for the fillings as well. One word of advice I can give is to prep and get certain things done ahead of time if possible! My husband's catering company Beck & Call was doing the food for the entire wedding weekend, so I knew he would have his hands full and couldn't expect much help. Not to mention I was a bridesmaid in the wedding as well, so had plenty of other "duties" and fun things to tend to. My planning and organizing skills really came in handy here, and I can safely say after successfully finishing my cake that I had a blast doing it, and look forward to making another!

Vanilla Buttermilk Cakes:

My layer cake recipe comes from the super-talented Deb of Smitten Kitchen. This one in particular is for a classic birthday cake, but she also makes a wedding cake as well. They both use the same ingredients, just in different ratios, and I ended up using the birthday cake recipe because it yielded a bit more, and was easier to convert into different sizes for multiple tiers. The recipe makes three 6" round layers for the top tier of wedding cake, so for the bottom tier, scale recipe up (multiply everything by 1.5) to get three 9" round layers. I weighed about 560g per pan for 6" layers, and about 750g per pan for 9" layers, so ended up with some leftover batter for a couple mini loaf cakes! Feel free to make the layers as thick as you want. Once the cakes are fully cooled, I suggest wrapping and freezing each layer before assembling and frosting, as they are much easier to handle this way. That way you can make the cake layers a couple days early to get this step out of the way! You can also level each cake (remove the dome shape at the top so as to create flat surfaces for stacking) either when they are fully cooled before freezing, or once they're frozen and you're ready to frost. Other than that, go check out Deb's recipe for fool-proof vanilla layer cake here

Swiss Meringue Buttercream:

I wanted to use Swiss meringue buttercream as the frosting for my cake for multiple reasons. First, it's not sickeningly sweet like the frostings most of us are accustomed to. It also holds up extremely well in warm temperatures, and since this wedding was taking place outside in New York in August, that was definitely something to consider. And finally, it is super smooth, making it perfect for piping, and doesn't end up crusting like many other frostings do. It's all about the butter here, so use a high quality one if you can! And, surprise- this recipe also comes from Smitten Kitchen. Even Deb seemed to have some worries about the supposedly tricky Swiss meringue buttercream coming together, but rest assured that it will! It just takes a bit of time, and at some point may look too runny or curdled, but not to worry. Continue mixing for about 15 minutes, and it all work out nicely. You can make this a couple days ahead if need-be, just store in the fridge in an airtight container. Before you're ready to frost, let it come to room temperature, and then re-whip buttercream in the mixer until it's smooth and glossy. Get Deb's recipe for Swiss meringue buttercream here

Raspberry Compote Filling:

At the tasting, the bride and groom sampled both a fruit and caramel-type filling, and ended up loving both! Since the cake was to have two tiers, we decided to do the raspberry compote in the layers of one, and the salted coconut caramel in the other. I suggest piping a circle of buttercream around the outer edge of each layer before adding filling, so that it doesn't spill over the sides! Fillings are another key component that can be made ahead of time, thus saving you time for assembling on wedding day!

  • 2 cups fresh raspberries

  • 1/2 cup granulated sugar

  • 2 tbsp corn starch

  • 1/4 cup water

  • 2 tsp lemon juice

  • fresh raspberries, for serving

To prepare raspberry compote, cook raspberries, sugar, cornstarch, and water in a small saucepan until the berries start to break down, about 10 minutes. Lower the heat and simmer until the compote is thick, about 5 minutes. Remove from heat and let cool completely. Store in an airtight container in the fridge (this can be made a week ahead of time). Makes 1 cup.

Salted Coconut Caramel Filling:

  • 1 cup granulated sugar

  • 6 tbsp unsalted butter, softened

  • 2/3 cup full-fat coconut milk

  • 1 1/2 tsp salt

  • toasted coconut, for serving

Heat sugar in a saucepan over medium heat, stirring constantly with a wooden spoon. Sugar will form clumps and eventually melt into a thick brown, amber-colored liquid as you continue to stir. Be careful not to burn. Once sugar is completely melted, add the butter tablespoon by tablespoon. Be careful are the mixture will start to bubble. Stir the butter into the caramel until it is completely melted, using a whisk if necessary. Slowly pour in coconut milk while stirring, taking care as the mixture bubbles and may splatter. Allow the mixture to boil for 1 minute. It will rise in the pan as it boils. Remove from heat and stir in salt. Allow to cool down before using. You may make this in advance and store in an airtight container in the fridge for up to one week. Makes 1 cup.

Assembly:

Here comes the fun (and slightly terrifying) part! Once all the cake layers are baked, fillings are made, and buttercream is whipped to glossy perfection, it's time to assemble your wedding cake! The assembly and decoration stage is where all your fun cake accessories come in handy! Cake boards, piping bags, decorating tips, offset spatulas (in multiple sizes), a pastry comb, a rotating cake stand, and a cake carrier are all important tools that played a big part in my cake's success. I definitely suggest looking into these as they make the entire process easier, especially for an amateur baker like myself. I like to use a bit of buttercream underneath the base layers to "glue" them to the cake boards. This will make things more stable and keep them from sliding around! While stacking the layers, giving them a spritz of simple syrup will ensure the cake stays moist until serving time. After filling your layers (remember the ring of frosting around the edges to keep the filling from spilling over!), I strongly suggest adding a "crumb layer" of frosting to each tier. This thin layer doesn't need to be perfect by any means, but it will keep those inevitable crumbs where they belong- on the inside layers and not at all visible on your pretty, final product! Just allow the crumb layered tiers to set in the refrigerator for at least 30 minutes before attempting to frost with a full, thicker layer of buttercream. At this point, the pastry comb came in handy, and its several design options truly helped me look like a pro! A few flowers and greenery from the farm, et voila! Be patient, take it one step at a time, and always remember- buttercream can cover a multitude of sins! 

Useful Tools:

IMG_3161.jpg

vanilla cupcakes

Everyone needs a good 'ol vanilla cupcake recipe, and this one is a tried and true favorite. It's the perfect blank canvas, making it super easy to customize based on what you're in the mood for! Whether it's with fillings (strawberry compote and salted caramel are both great), or toppings (I love nuts, chocolate, or sprinkles), the options are endless! Swiss meringue buttercream is the best frosting option, in my humble opinion. It's super pretty and glossy, less sickeningly sweet than traditional American buttercream, and holds up well at room temperature and even outdoors! You can also add flavor to the frosting if you want to mix things up, but the vanilla is a great classic that goes with many flavors. Whatever you end up with, you'll almost always be guaranteed a delicious treat! Now get to baking!

Vanilla Cupcakes with Swiss Meringue Buttercream:

Cupcakes:

  • 2 cups cake flour

  • 1 tsp baking powder

  • 3/4 tsp baking soda

  • 1 tsp table salt

  • 1/2 cup unsalted butter, softened

  • 1 cup sugar

  • 1 tsp pure vanilla extract

  • 2 large eggs, at room temperature

  • 1 cup buttermilk

Buttercream:

  • 1/2 cup sugar

  • 2 large egg whites

  • 3/4 cup unsalted butter, cubed & softened

  • 1/2 tsp pure vanilla extract

Preheat oven to 350°F. Line a cupcake pan with liners, and spray them with nonstick spray. Mix together flour, baking powder, baking soda, and salt in a medium bowl. In the base of a stand mixer fit with whisk attachment, beat butter and sugar at medium speed until pale and fluffy, then beat in vanilla. Add eggs, beating well and scraping down the bowl to ensure they are fully incorporated. Reduce the speed to low, then mix in buttermilk until just combined. Don't be alarmed if the mixture looks curdled at this point. 

Add flour mixture until just incorporated, careful not to over-mix. Pour batter evenly among cupcake liners, and bake until golden, about 20 minutes. Allow to cool for a few minutes in the pan, then completely on a cooling rack. Makes about a dozen cupcakes

While cupcakes are baking, make the buttercream. Whisk egg whites and sugar together in a bowl over a double boiler until sugar is fully dissolved. Transfer mixture into the stand mixer (make sure it's clean & dry!) fit with paddle attachment and whip until it turns white glossy. Add the vanilla, then the butter and continue to whip until buttercream comes together. This may take a good 10-15 minutes, so don't worry if things look curdled or soupy at the start!

Once cupcakes have cooled, you may add filling if desired. Scoop out a small bit of cake from the top (using a knife or melon-baller), add the filling, and replace the cake on top. Pipe buttercream onto cupcakes using a pastry bag fit with an icing tip, and finish with toppings if you choose! Enjoy!

*Adapted from Best Birthday Cake by Smitten Kitchen.

Useful Tools:


sticky toffee pudding

I've had a love affair with sticky toffee pudding for quite a while now. This British dessert made from dates and toffee sauce is less a pudding (by American standards), but rather a rich and gooey cake. Since I was in London last week, I took the opportunity to seek out and indulge in a few versions of this local dessert- all in the name of research, of course- so that I could recreate a worthy version at home just in time for Easter brunch. Sticky toffee pudding is seriously decadent, super unique, and utterly delicious, making it the perfect Easter dessert in my book. It's best served warm out of the oven, so if you need to bake the cake ahead of time, just wait to poke holes and pour the sauce over it until just before serving. Cover and reheat at 300ºF for about 20 minutes. While this cake is super delicious as-is, a little ice cream or whipped cream never hurt anybody, right? Throw on some toasted nuts and the rest of the warm toffee sauce, and you'll be adding this to your dessert rotation in no time!

Sticky Toffee Pudding:

Date Cake:

  • 1 cup Medjool dates, pitted & chopped

  • 1 1/4 cup boiling water

  • 1 teaspoon baking soda

  • 3/4 cup all-purpose flour

  • 1/2 cup whole wheat flour

  • 1 teaspoon baking powder

  • 1/2 teaspoon kosher salt

  • 1/2 cup unsalted butter

  • 1/2 cup turbinado sugar

  • 1/4 cup dark brown sugar

  • 2 large eggs, at room temperature

  • 1 teaspoon vanilla extract

Toffee Sauce:

  • 1 cup unsalted butter

  • 1 cup heavy cream

  • 1/2 cup dark brown sugar

  • 2 tsp pure vanilla extract

  • pinch salt

Toppings:

  • whipped cream or ice cream

  • pecans, toasted & chopped

  • extra toffee sauce

Preheat the oven to 350ºF and butter an 8 1/2 or 9 inch square (or round) baking dish. Place chopped dates in a heat-proof bowl, and cover with the boiling water. Mix in baking soda, then set aside to let soften. 

In the bowl of a stand mixer, beat the butter and sugars together until light and fluffy. Gradually beat in the eggs, then the vanilla until fully combined. In a separate bowl, sift together the flours, baking powder, and salt. Slowly add the flour and date mixtures to the stand mixer, alternating 1/2 of each at a time. Careful not to over-mix. 

Pour the batter into the baking dish and bake for about 45 minutes, or until a toothpick inserted into the center comes out with some moist crumbs still attached. Remove from the oven, and let cool a few minutes. While the cake bakes, make the toffee sauce. Bring the butter, cream, brown sugar, vanilla and salt to a boil in a saucepan, then lower to simmer. Whisk or stir constantly for about 10 minutes until sauce thickens and coats spoon. Remove from heat and set aside.

While cake is still warm, poke several holes over the entire surface with a chopstick. Pour toffee sauce over top of the cake, spreading it around evenly and allowing it to be absorbed into the cake. Repeat another time, leaving about 1/4 of the sauce for serving. If desired, turn oven to broil and return the cake to the oven for just one minute for extra caramelization! Careful not to let it burn.

To serve, you may cut squares, use a ring-mold, or simply spoon portions of the cake into serving bowls. Top with additional warm toffee sauce, whipped cream (or ice cream), and toasted pecans.

*Adapted from Date Cake with Toffee Sauce by Smitten Kitchen and Warm Sticky Toffee Pudding by David Lebovitz.

Useful Tools: