zucchini lasagna

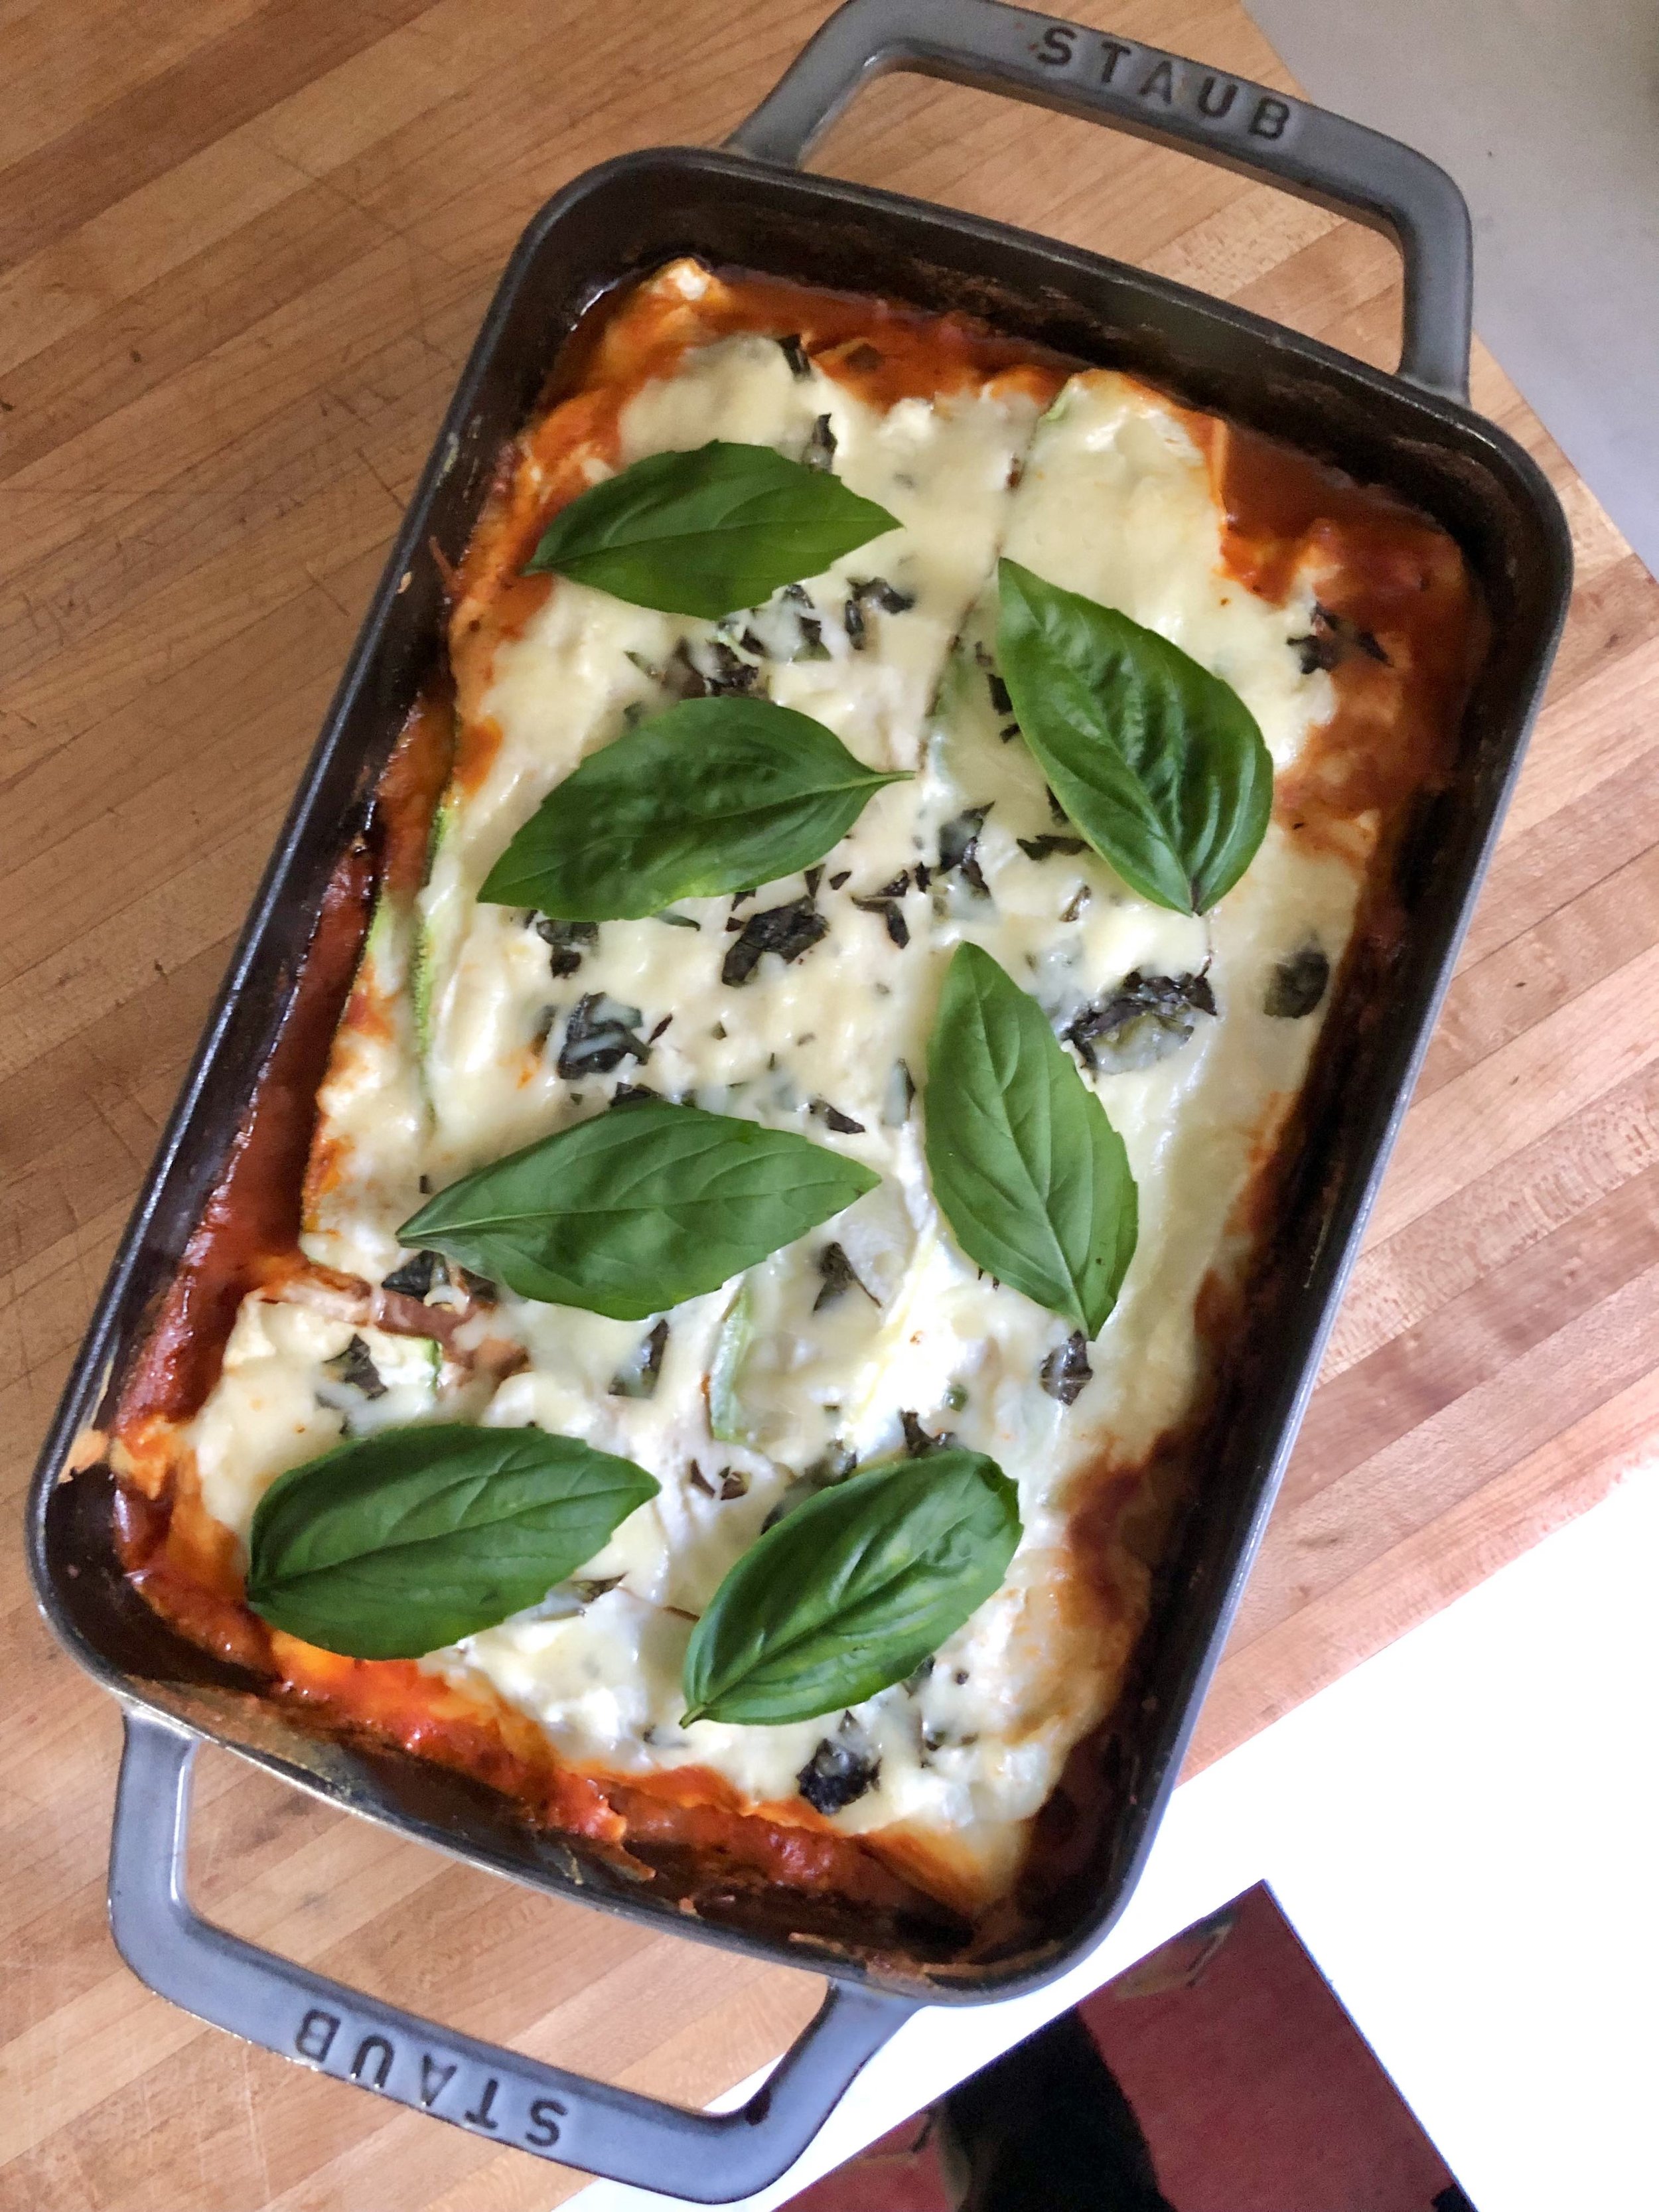
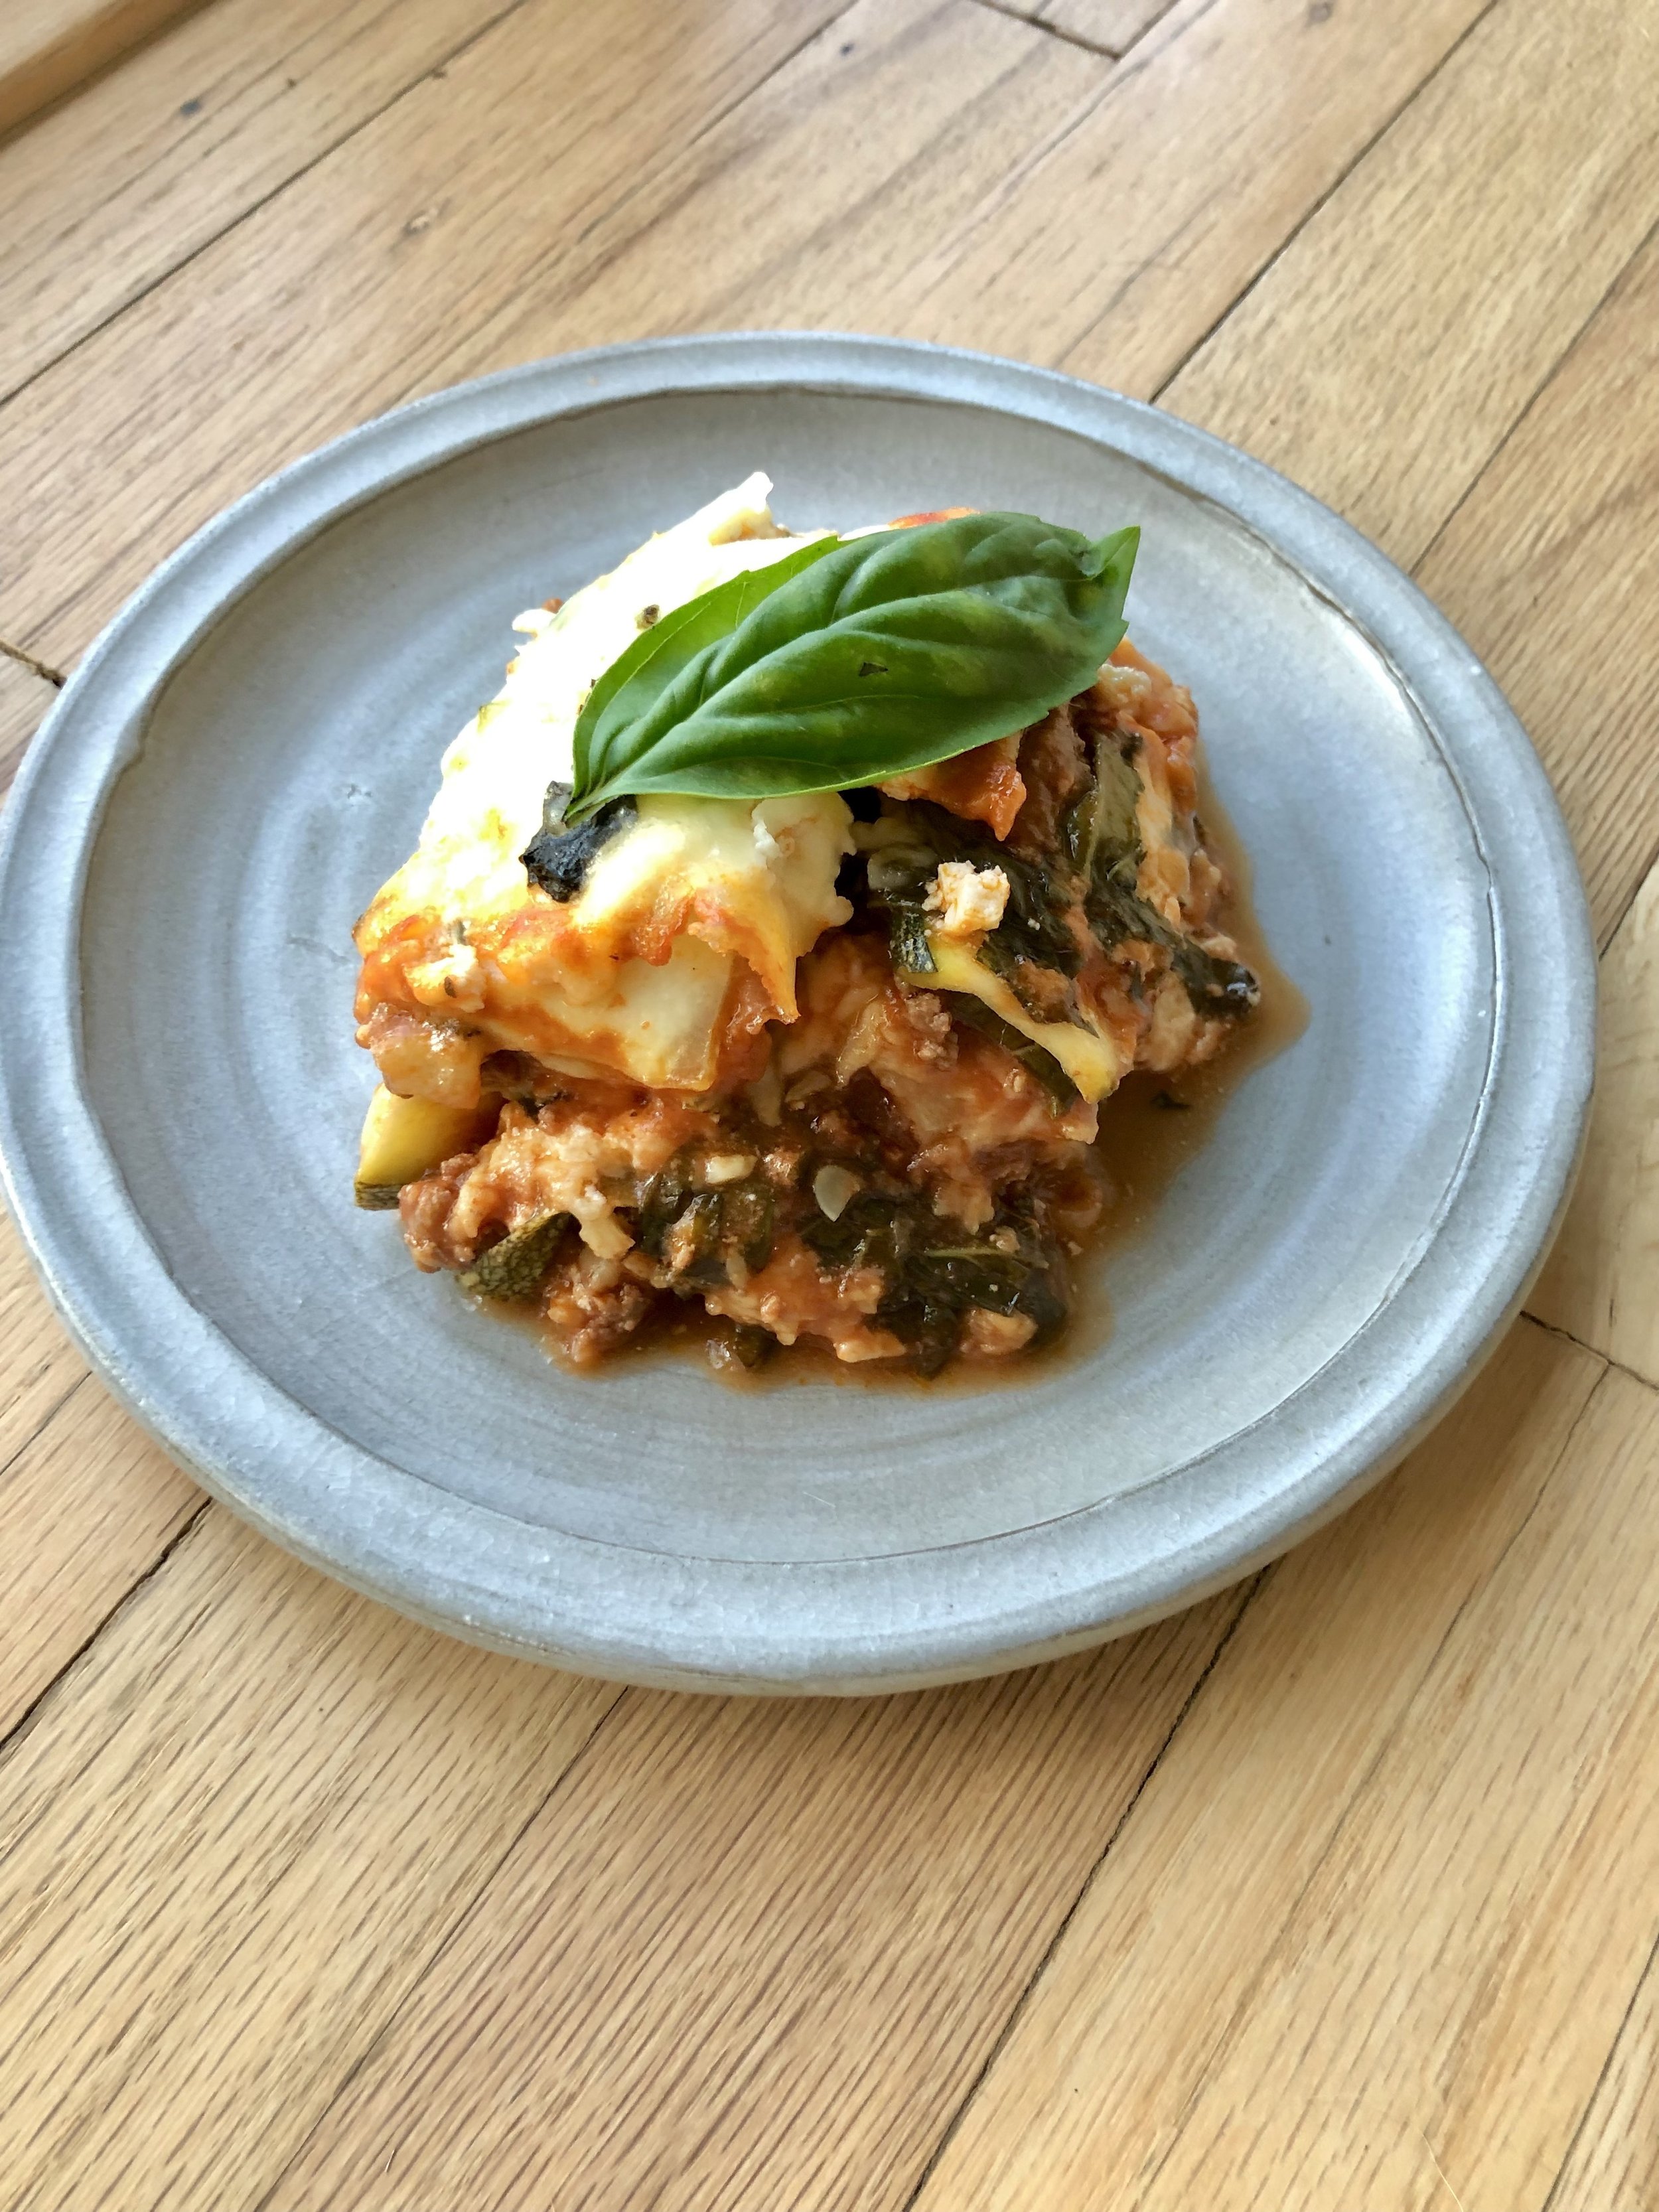
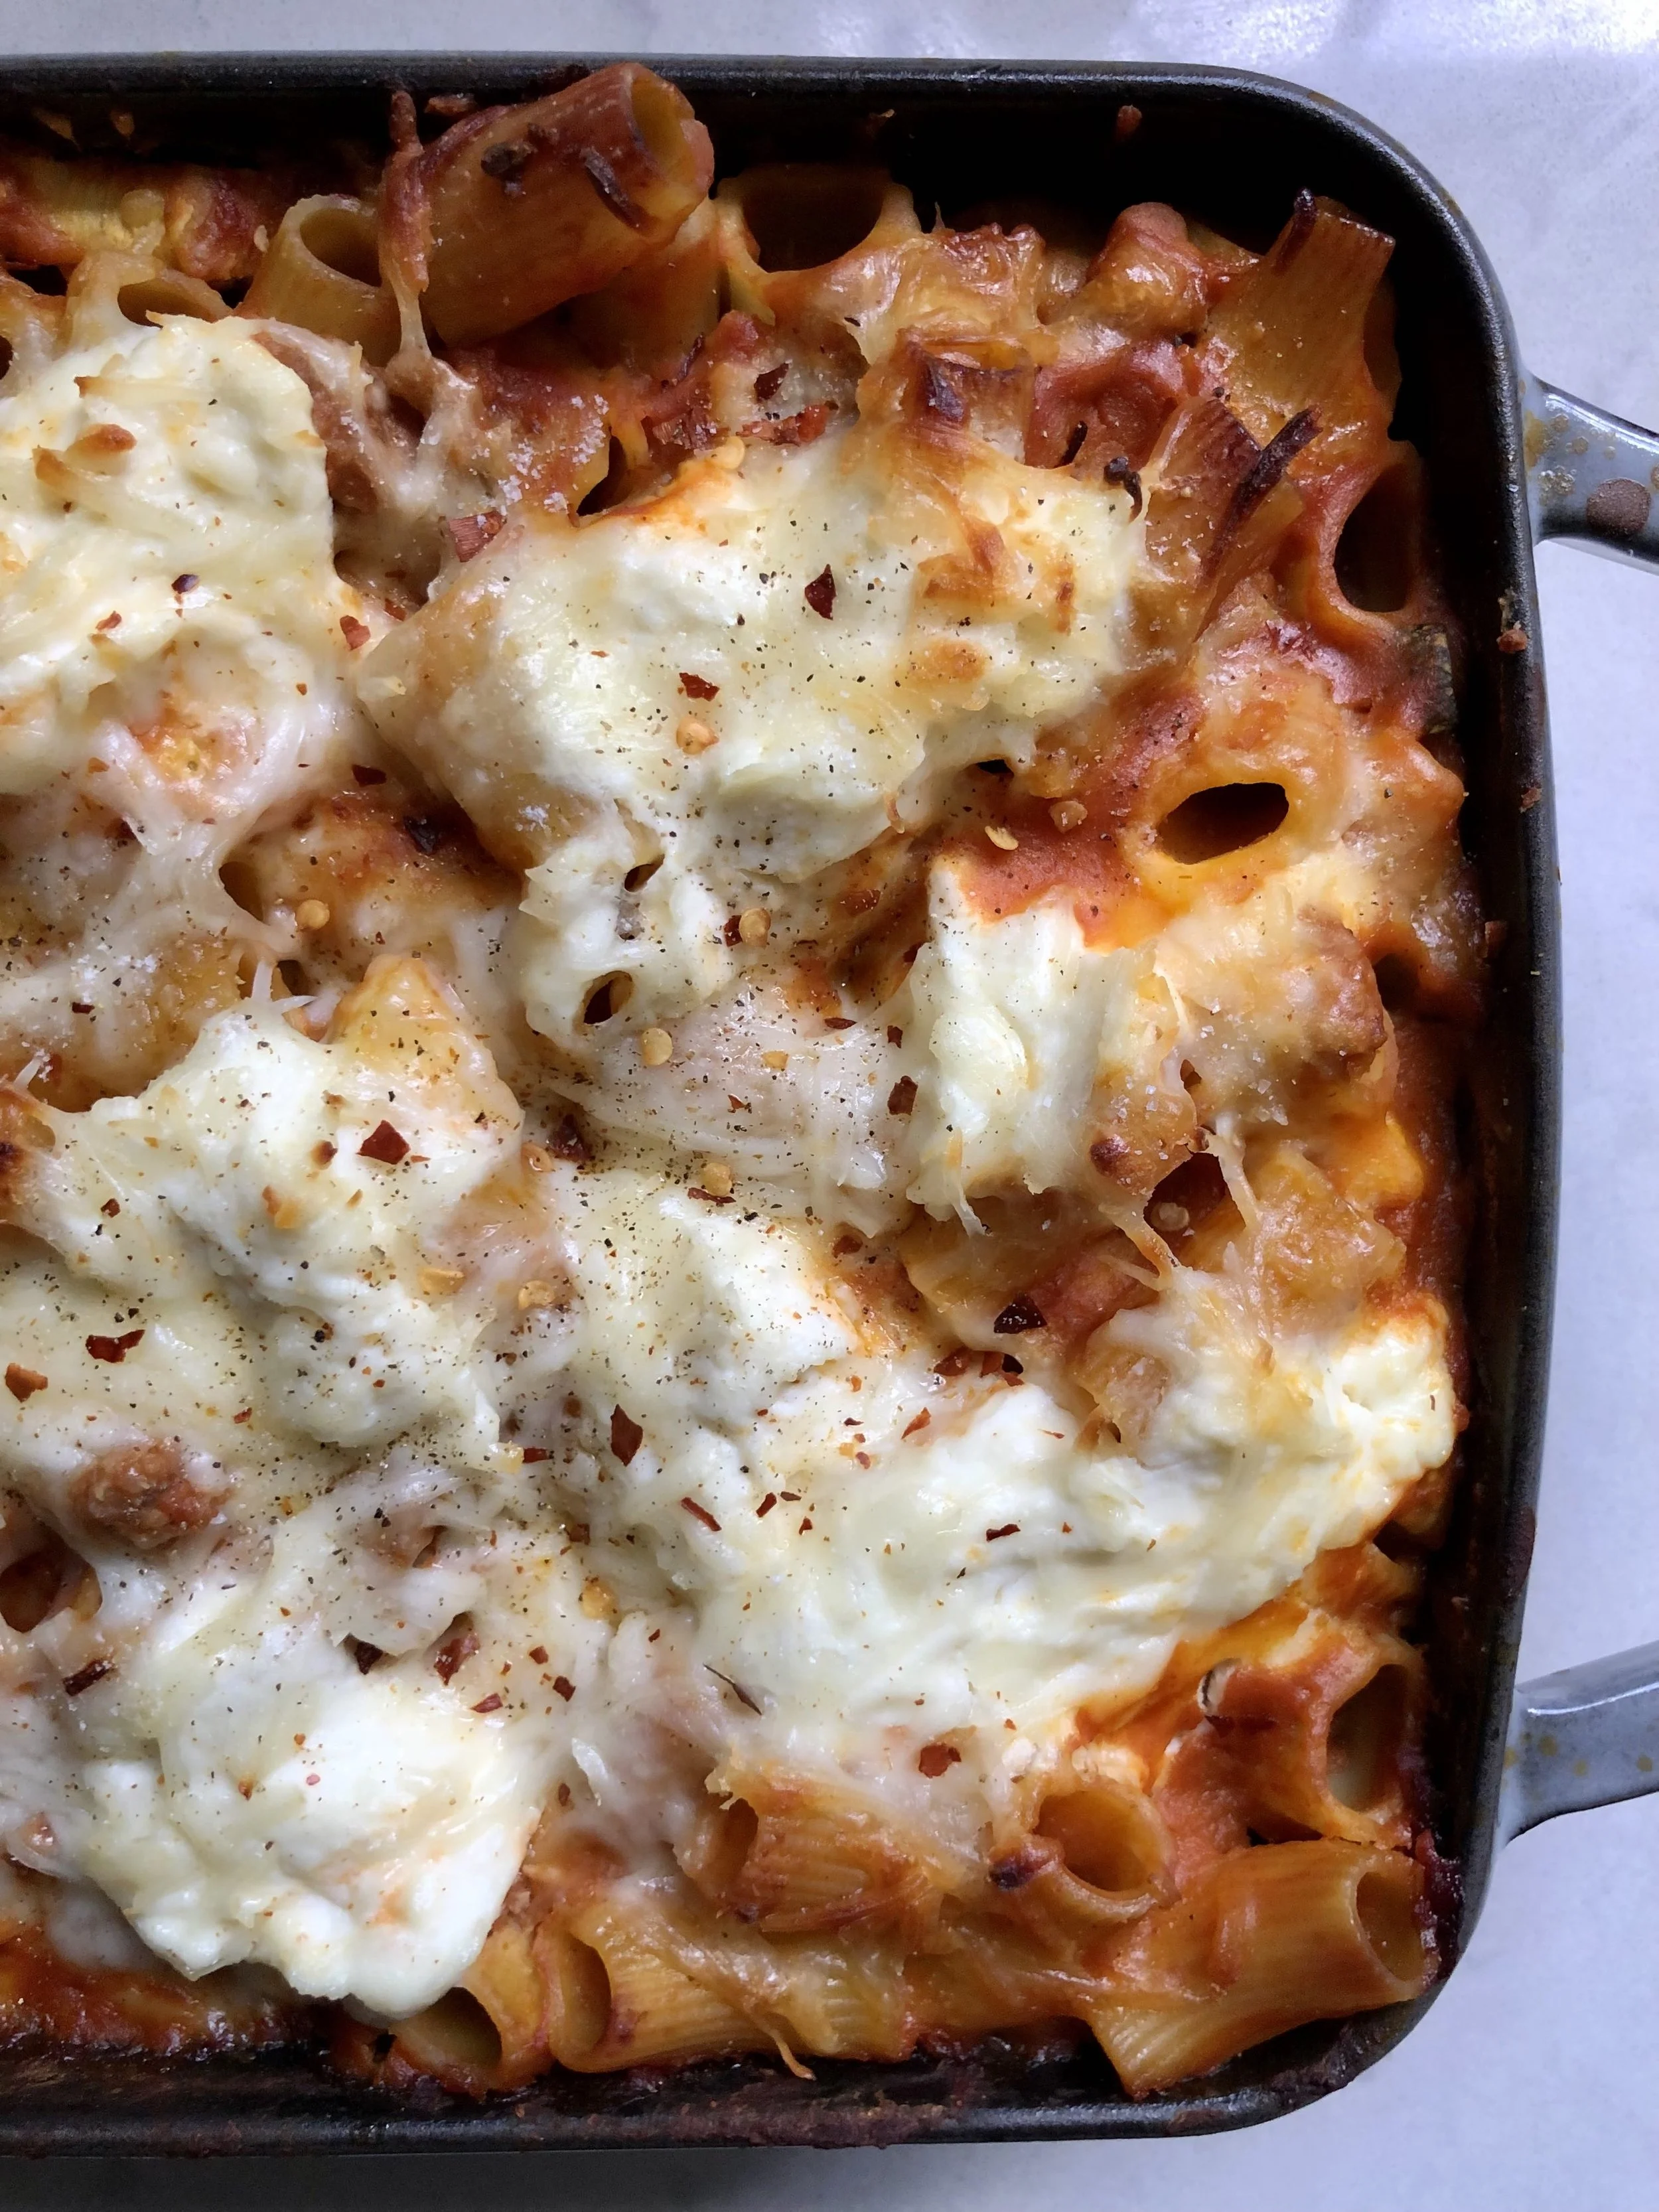
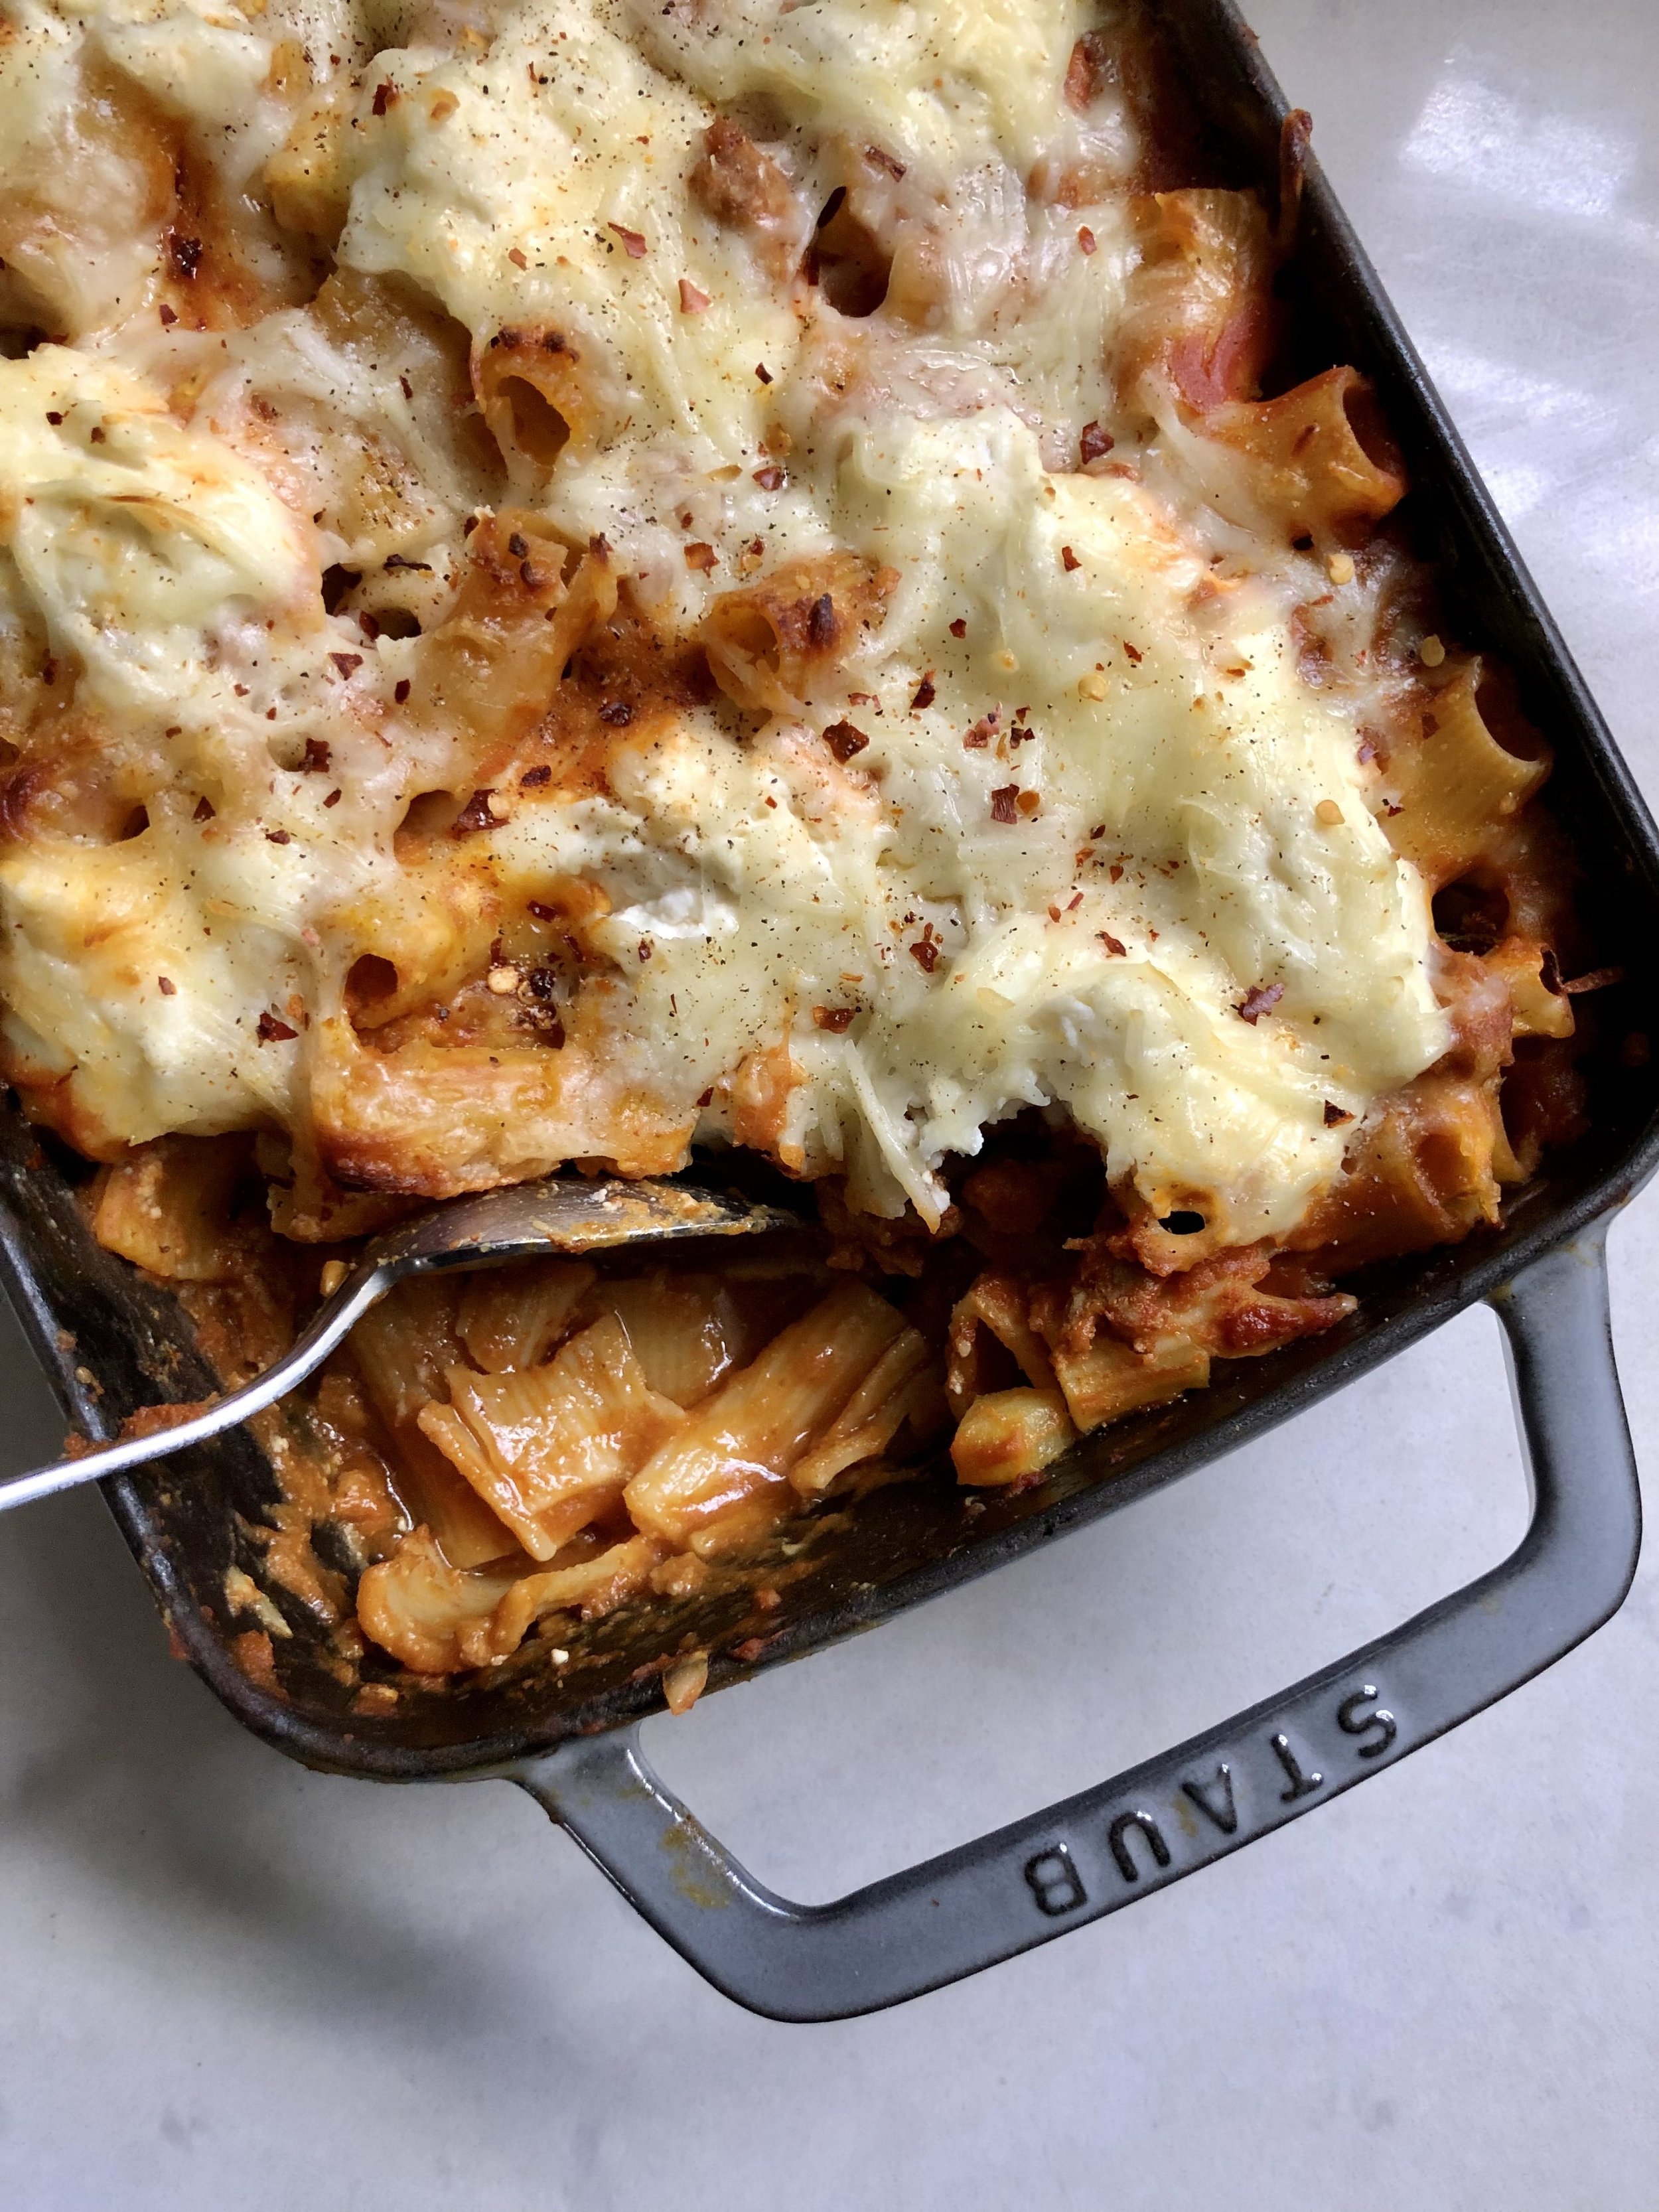
Before zucchini season was over, I just had to share a dish I’ve been making that’s both comforting and healthy. Zucchini lasagna has been pretty popular lately, and the idea is that you use thin slices of zucchini as opposed to pasta noodles. We have nothing against good ol’ pasta in this house- it’s very likely my husband’s favorite thing to cook- but I also love sneaking in extra veggies to our diets whenever I get the chance ;) This lasagna is still packed with homemade or store bought tomato sauce, lots of tasty cheeses, and fresh basil, so it’s super flavorful and delish! One important tip- make sure to salt your zucchini strips and let them set about 15 minutes to draw out moisture. Blot them dry before layering them into your dish as this will ensure you don’t end up with a soggy lasagna mess, but rather nicely cooked zucchini “noodles”! Enjoy!

Zucchini Lasagna:

  • 4 large zucchini, sliced thin lengthwise

  • 1 pound ground beef or pork (omit for vegetarian option)

  • 1 yellow onion, diced

  • 2 cloves garlic, minced

  • 2 28 oz cans San Marzano tomatoes (alternatively use store-bought pasta sauce)

  • 1 6oz can tomato paste

  • 1 tsp dried oregano

  • 1/2 cup red wine, optional

  • 15 oz ricotta cheese, whole milk or part skim

  • 1 large egg

  • 2 cups grated mozzarella cheese

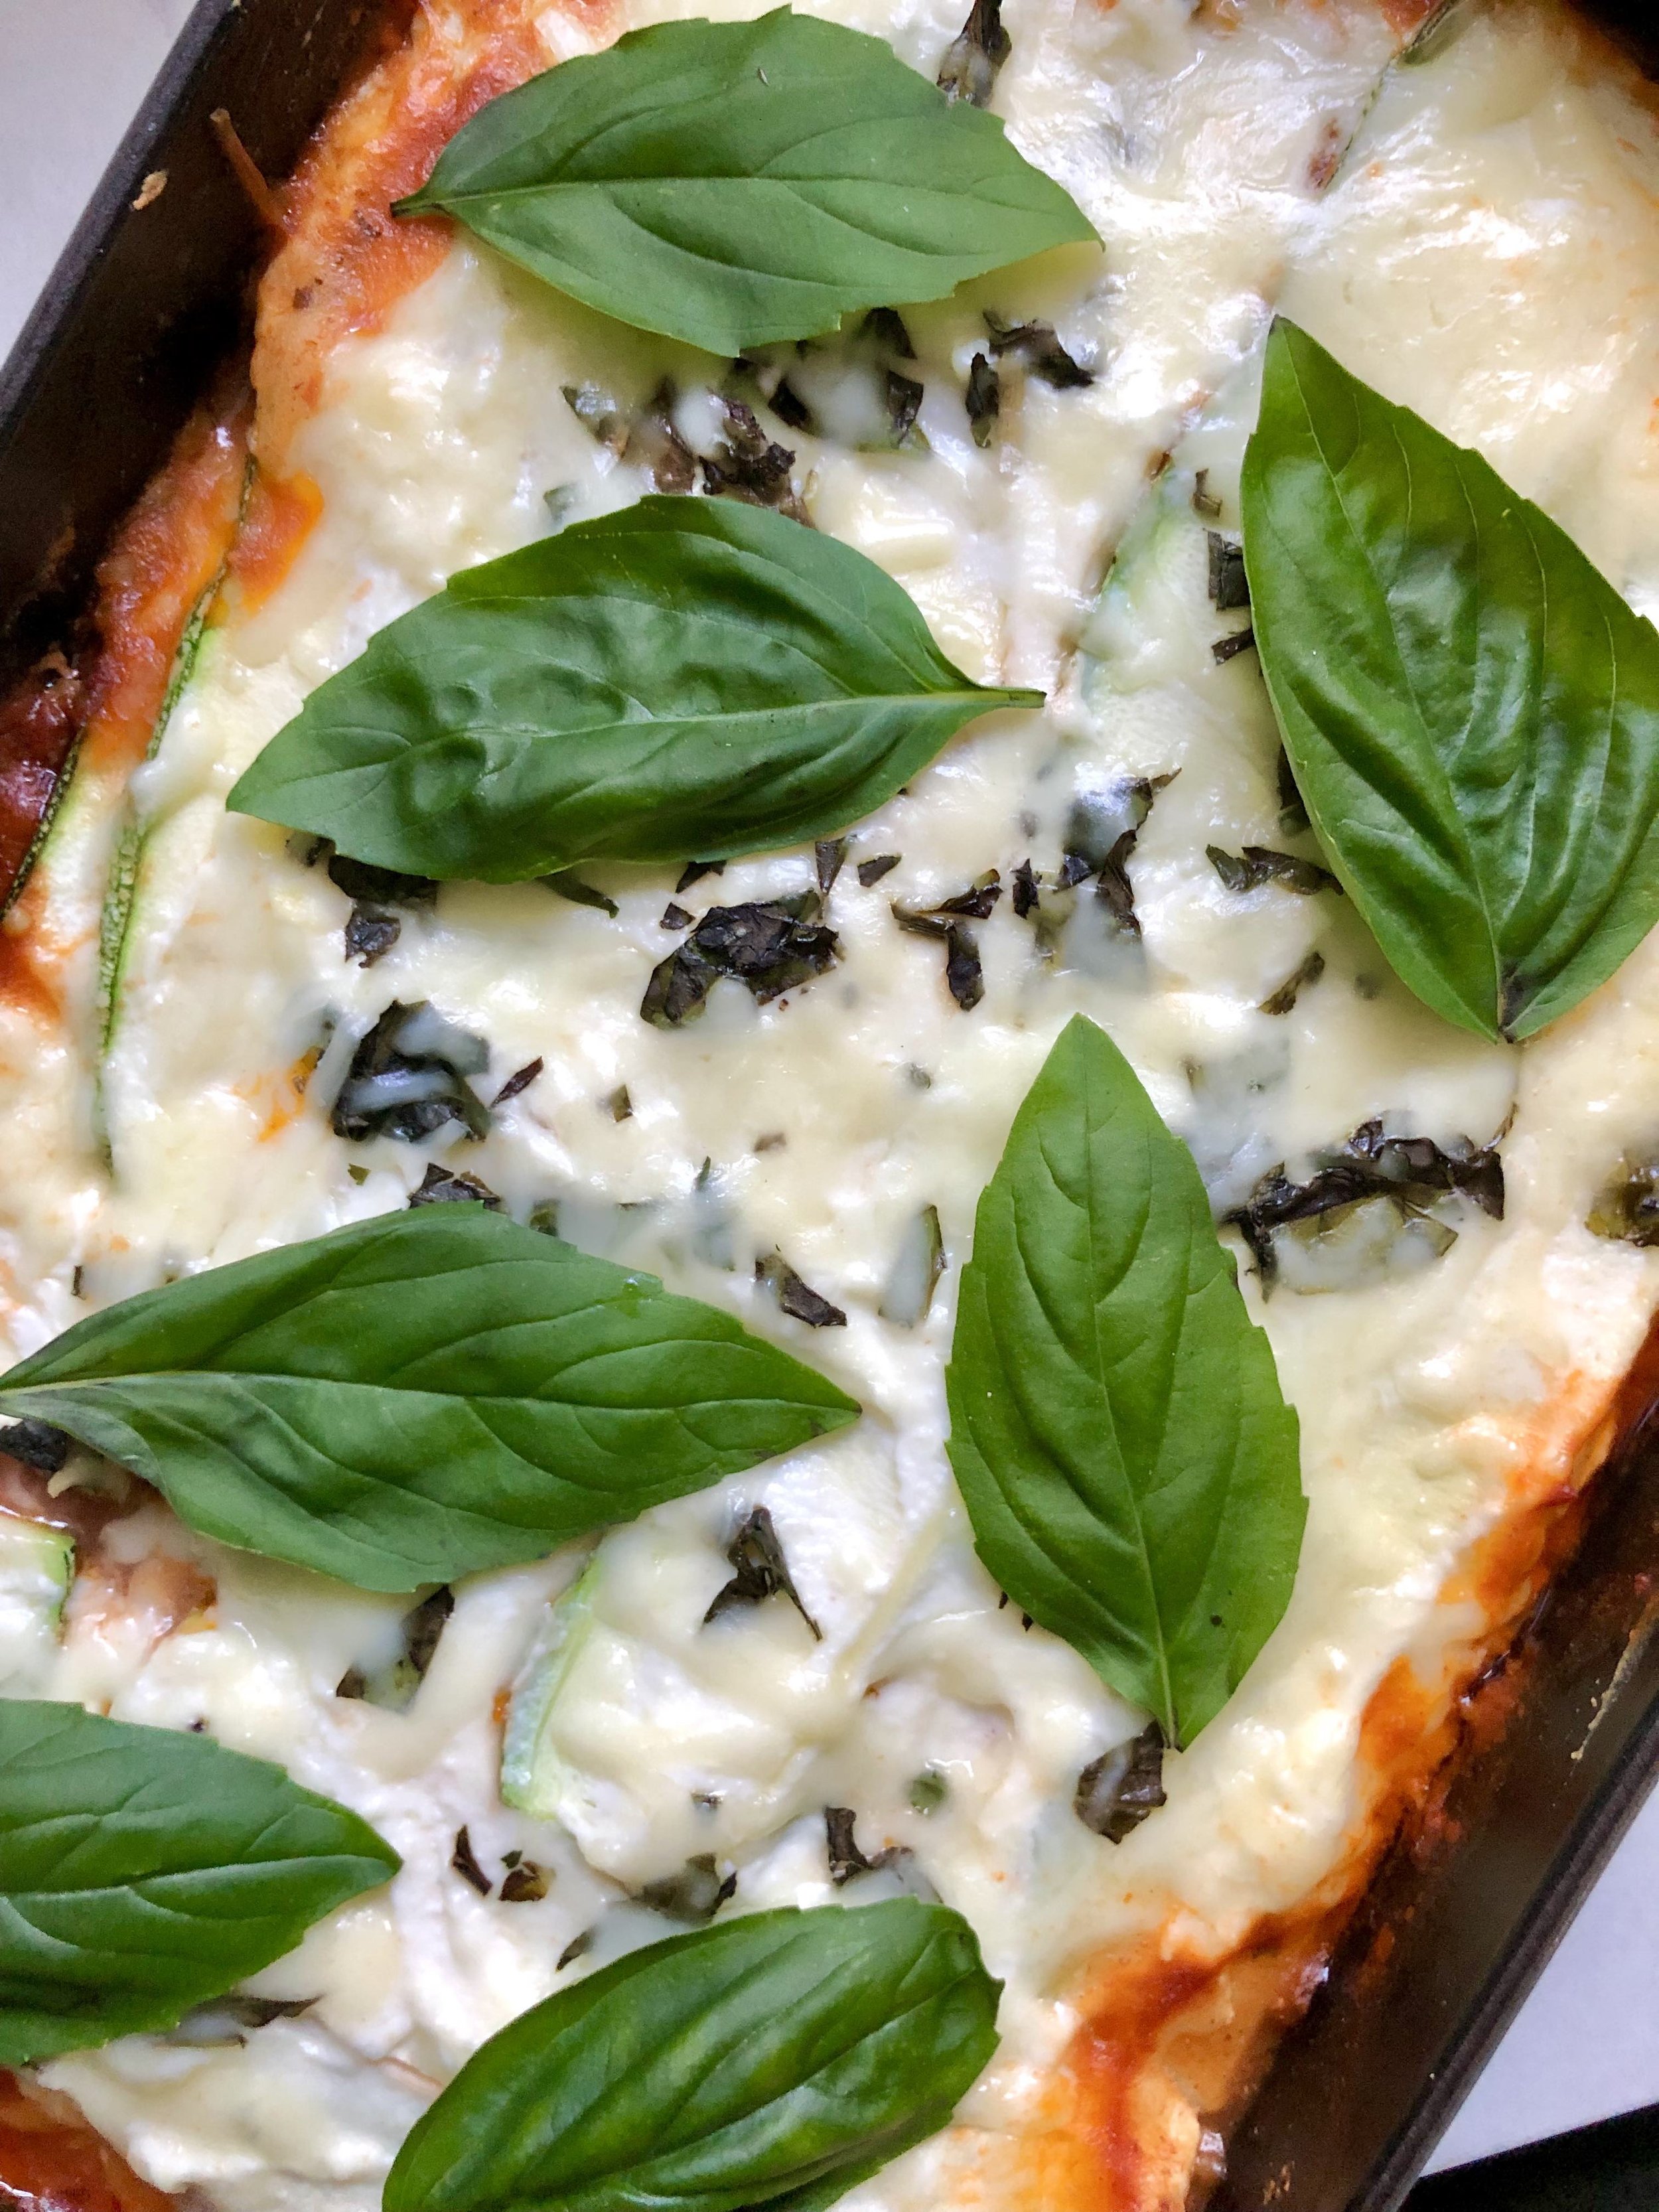
  • 1-2 bunches fresh basil, chopped (leave some whole leaves for garnish)

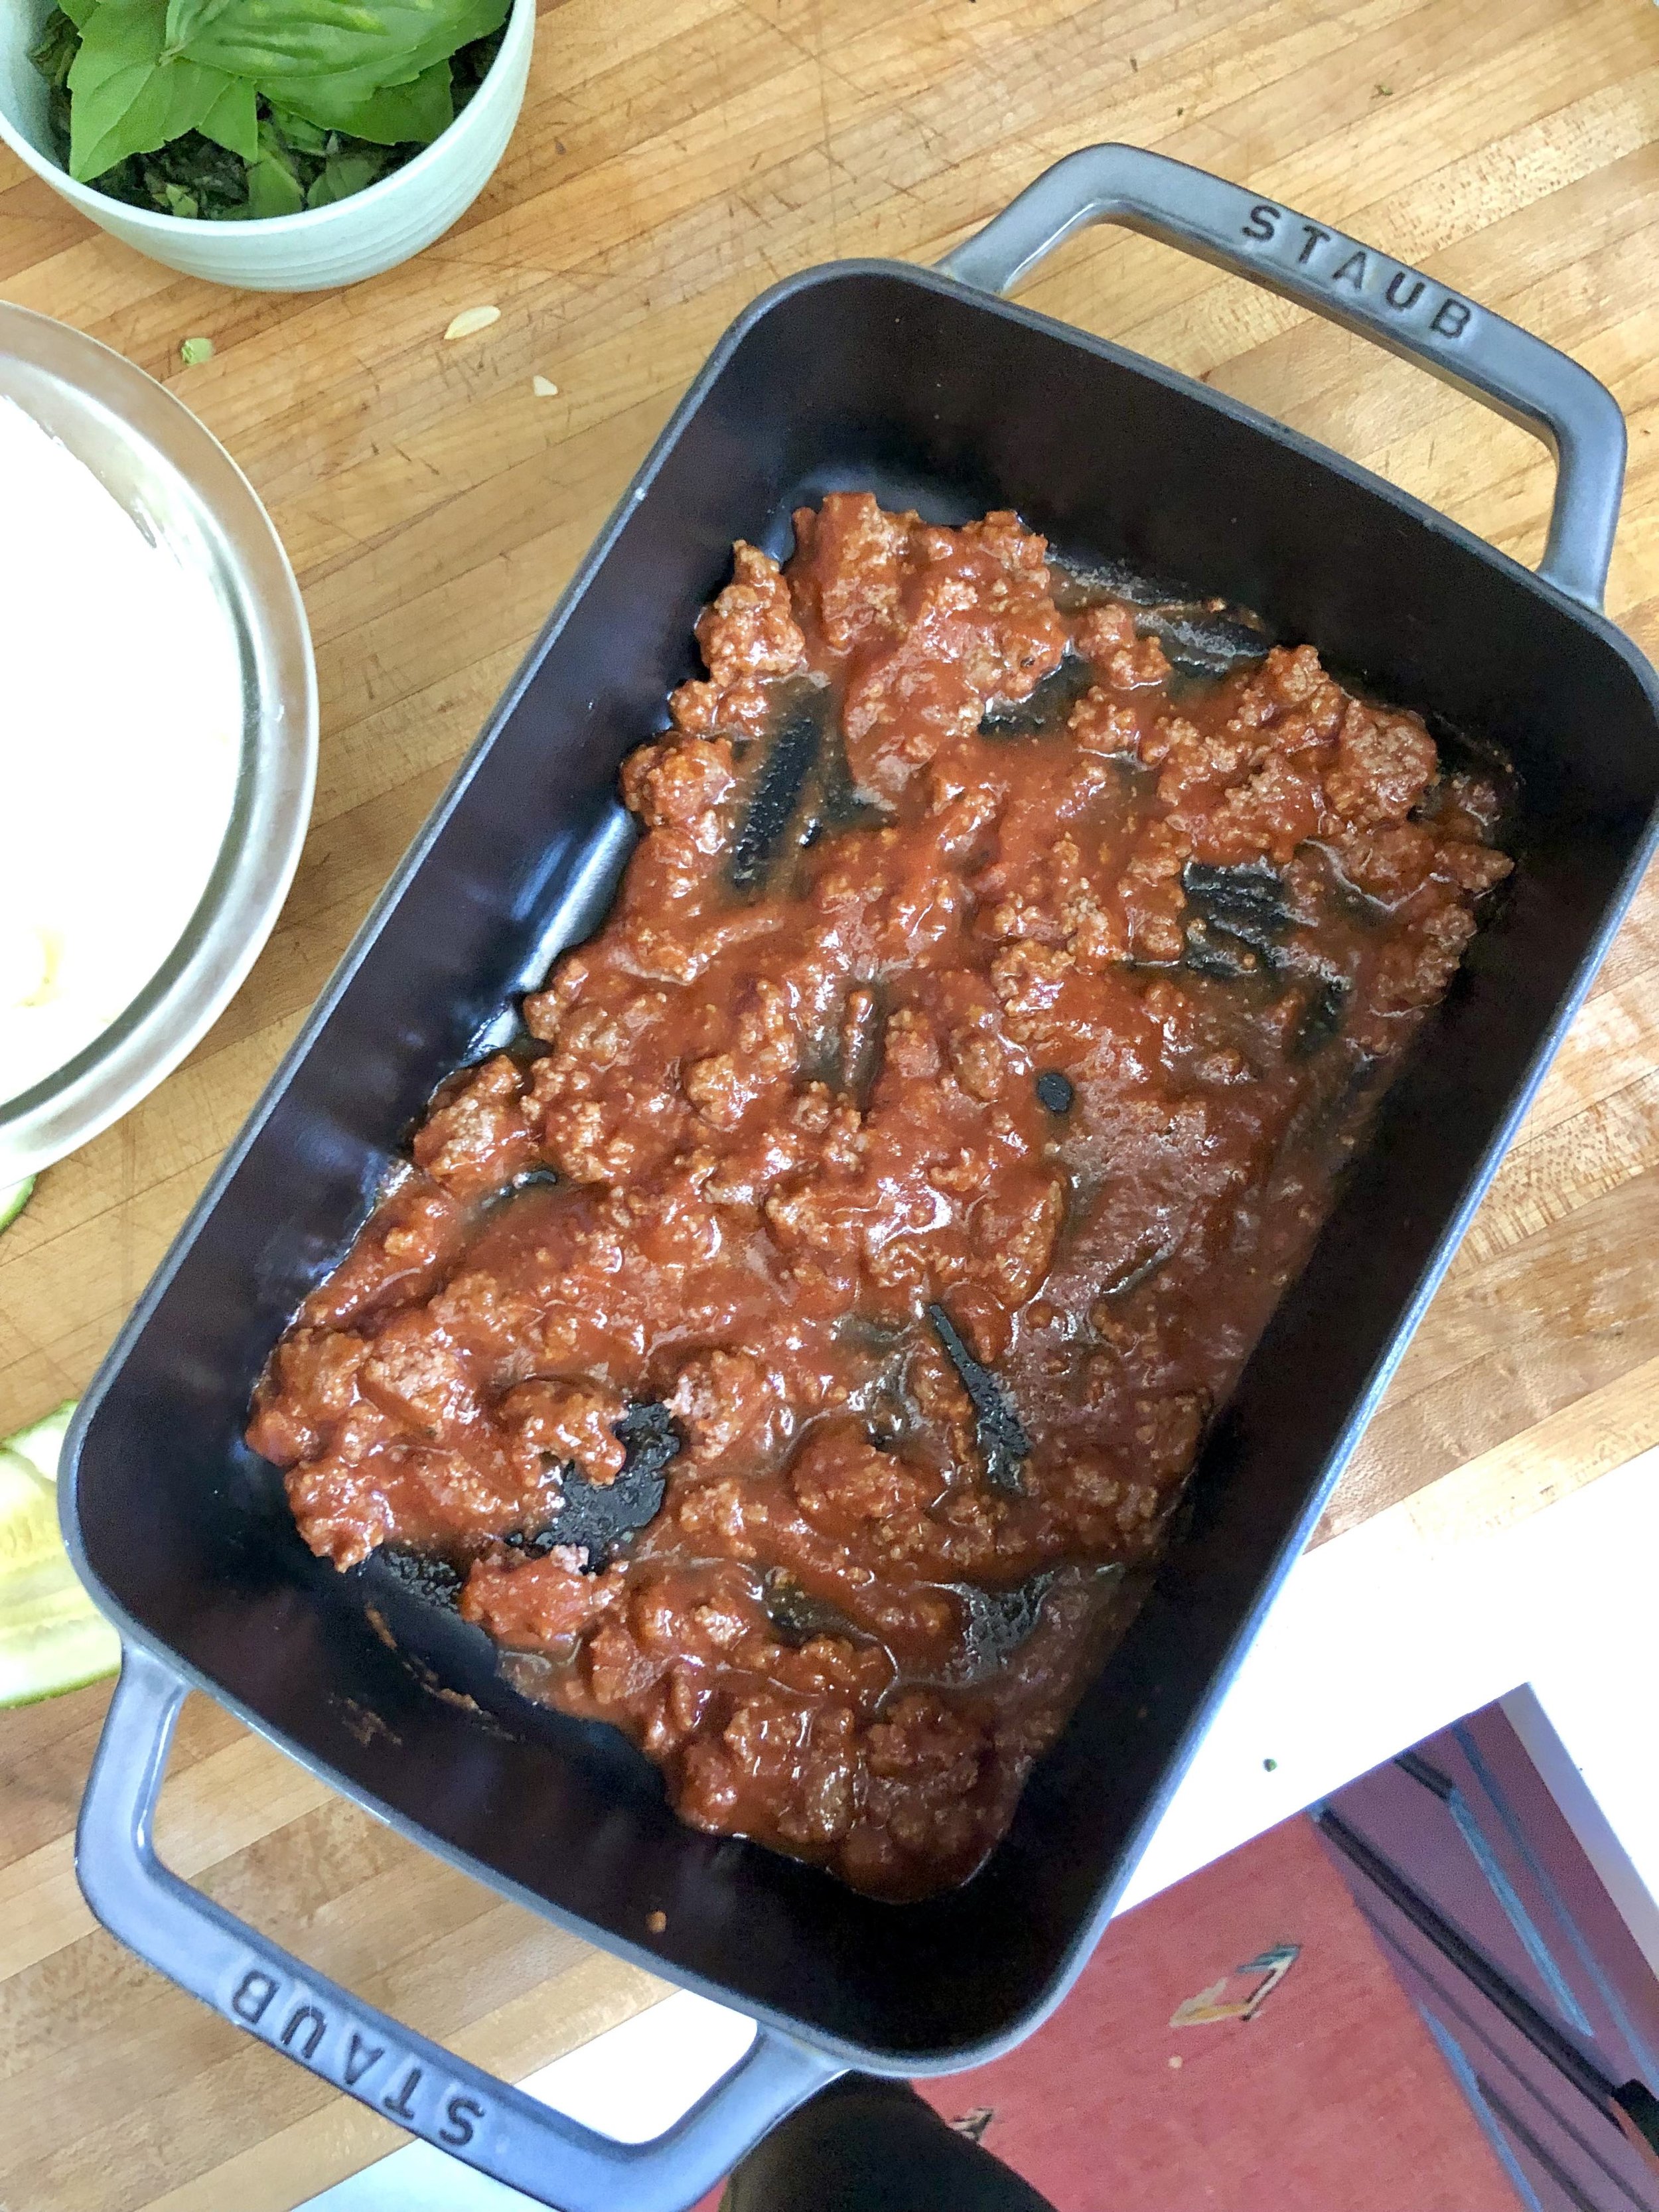
Make your tomato/meat sauce- this can be done ahead of time, to allow it to simmer and develop flavor). Add the ground beef to a large pan over medium high heat, and season with salt & pepper. Brown the meat until no longer pink, and then remove it from the pan. Add a bit of olive oil to the pan if needed, and saute the onion for a few minutes. Then add garlic and cook for a few more minutes, making sure to season with salt & pepper at each step along the way. Add the stewed tomatoes, breaking them up a bit, along with the tomato paste, dried oregano and red wine (if using), and bring your sauce to a simmer. Return the ground beef to the sauce, and reduce the heat to low, allowing it to cook for a couple of hours if possible. Be sure to not let it reduce too much!

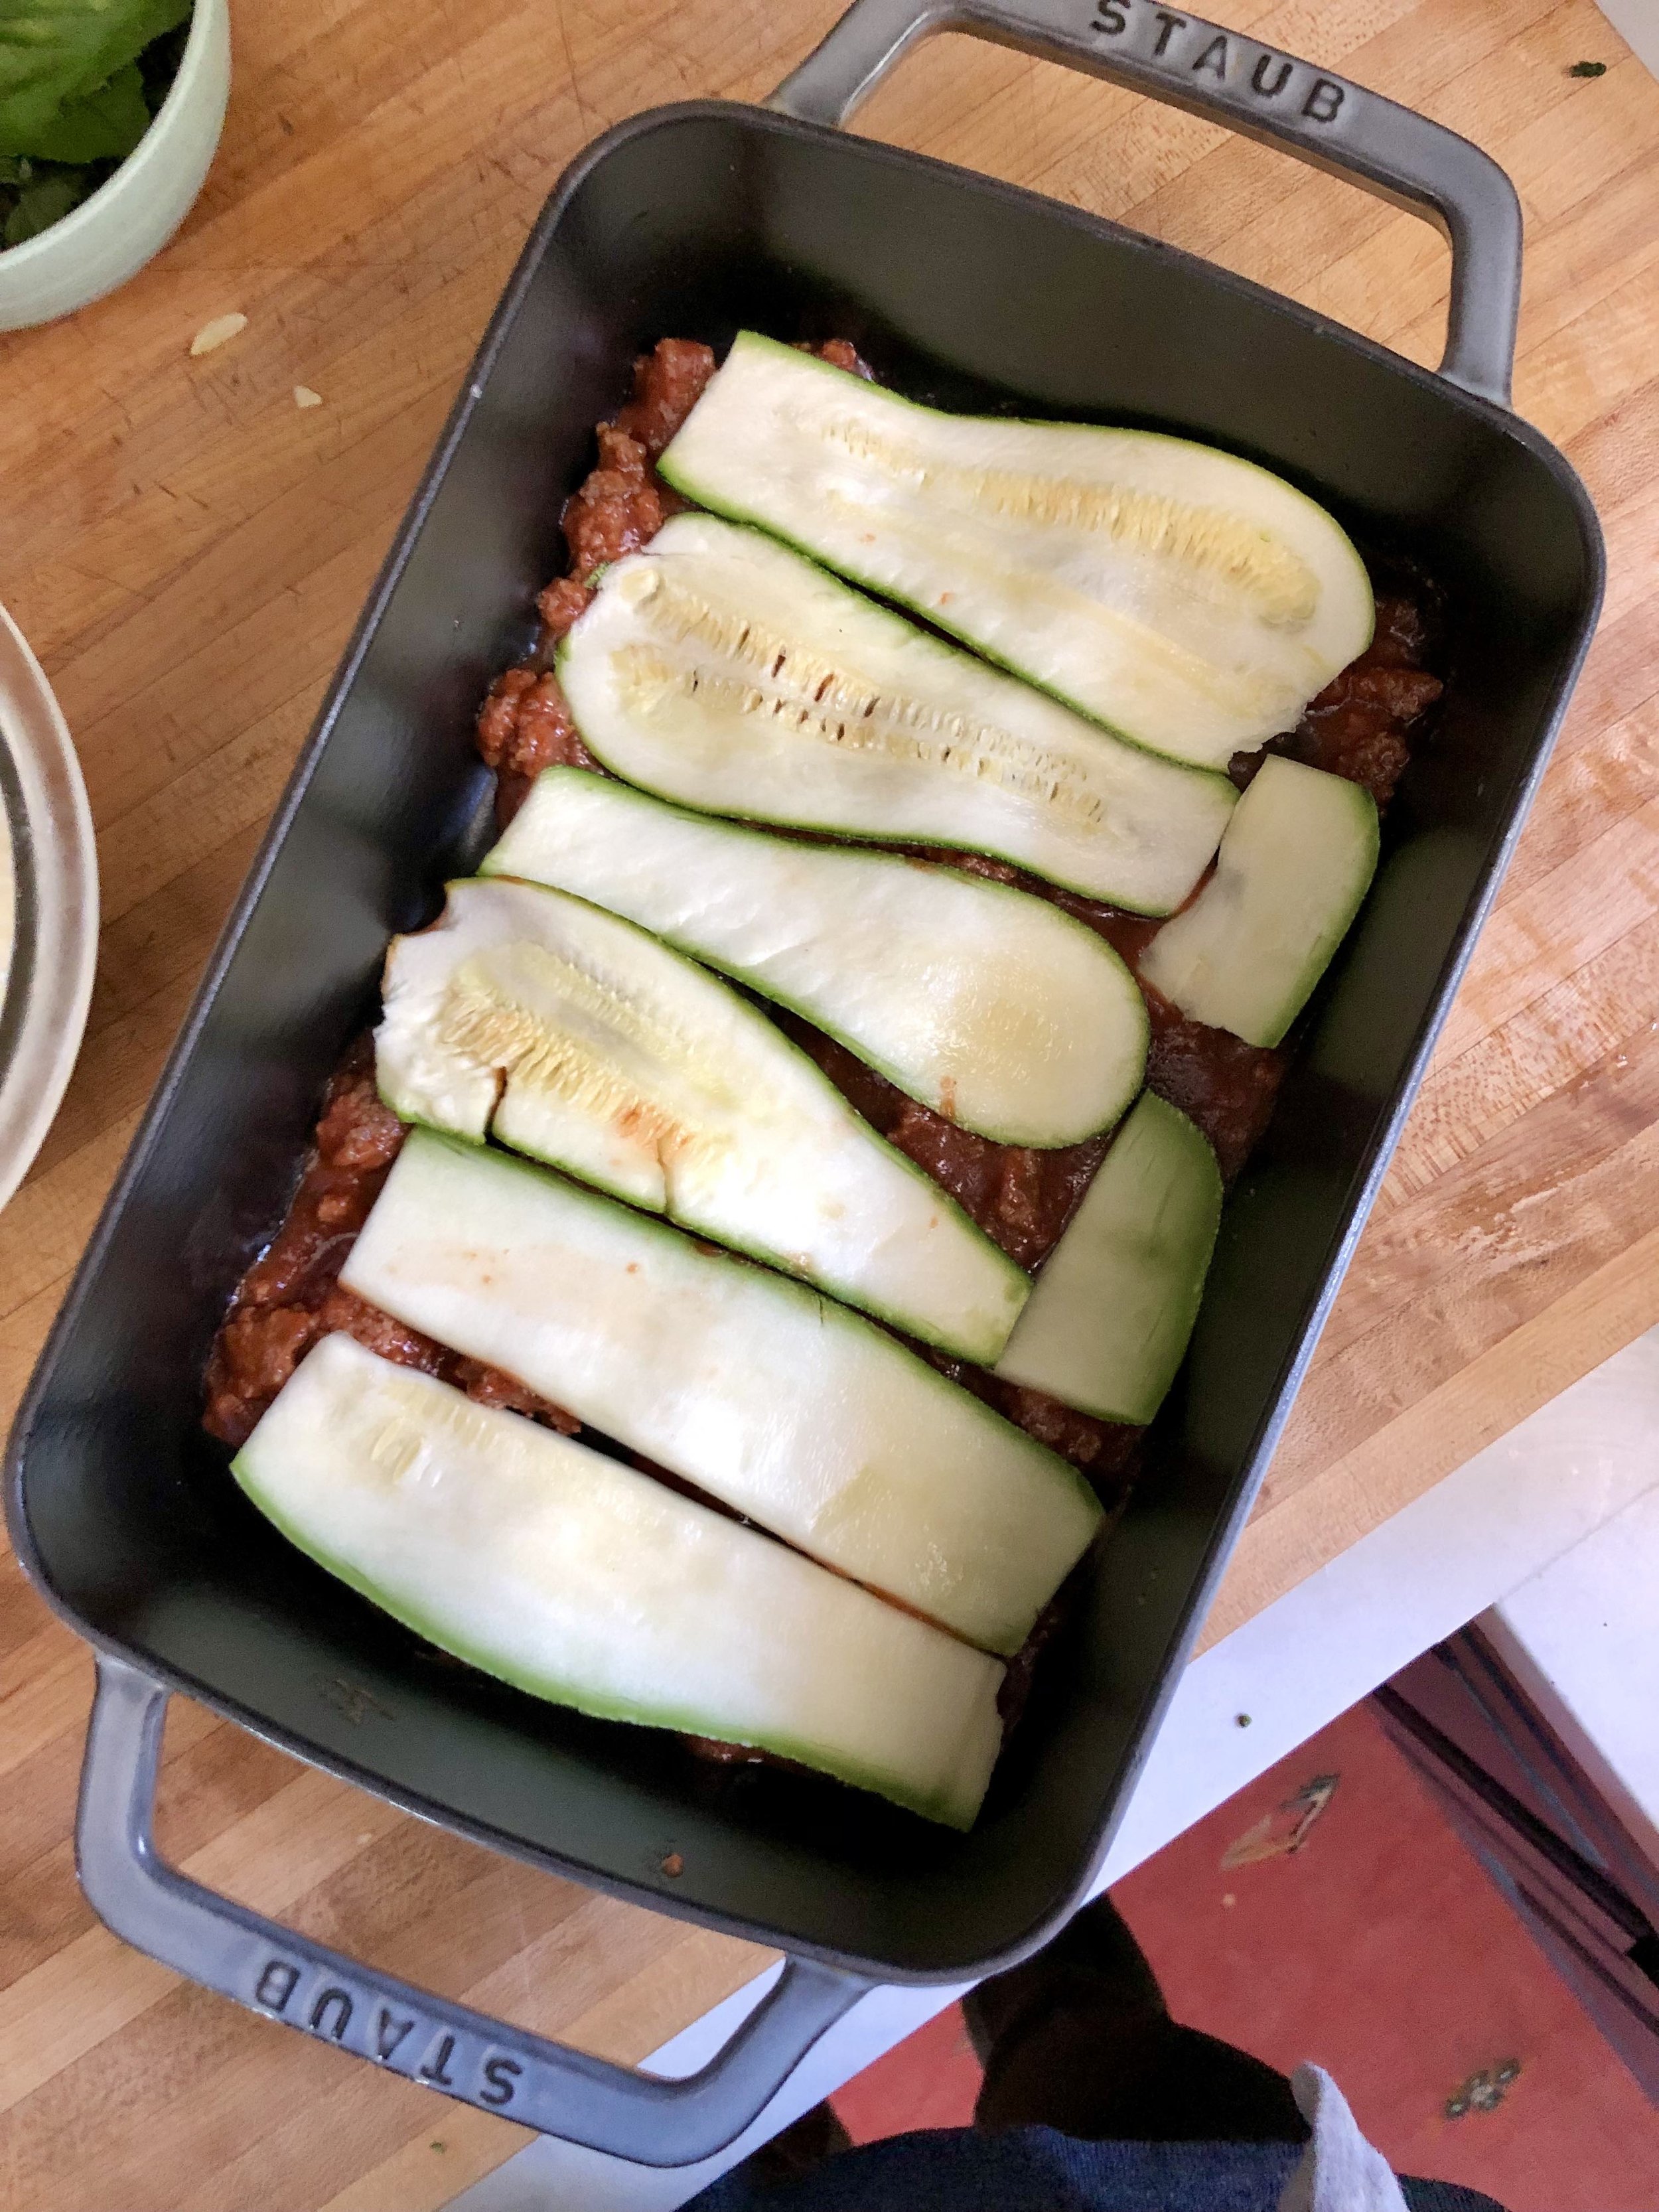
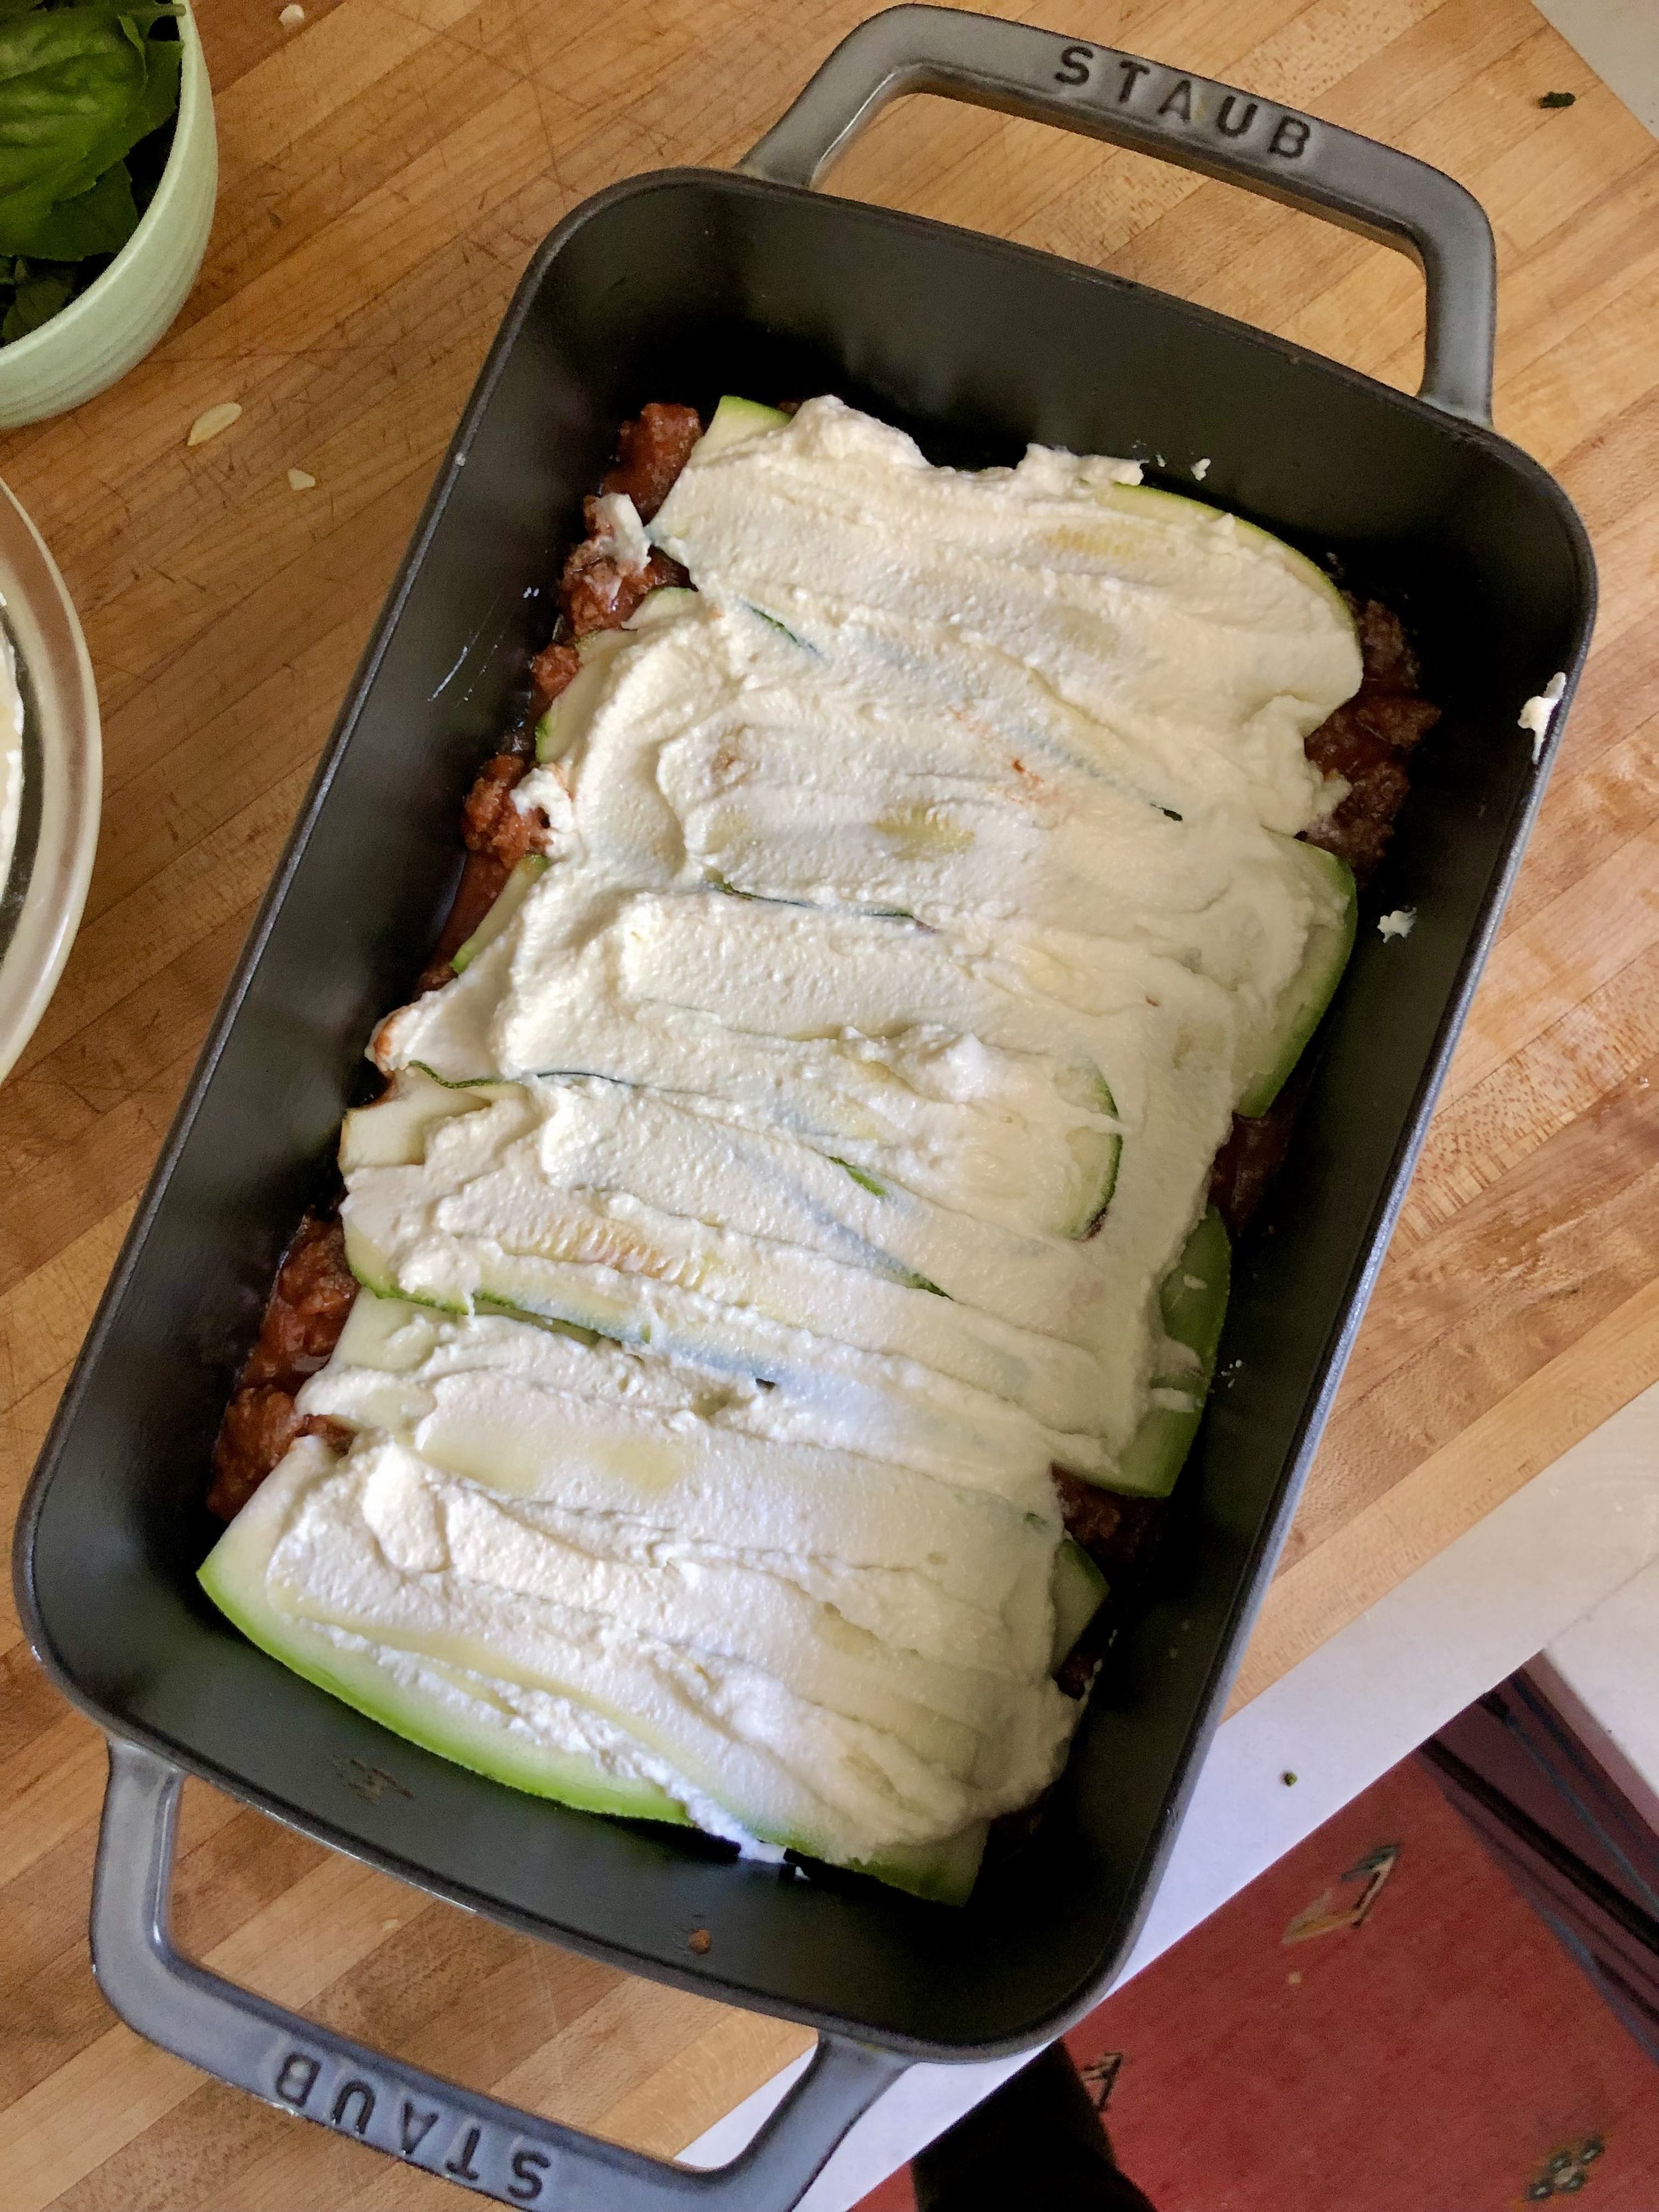
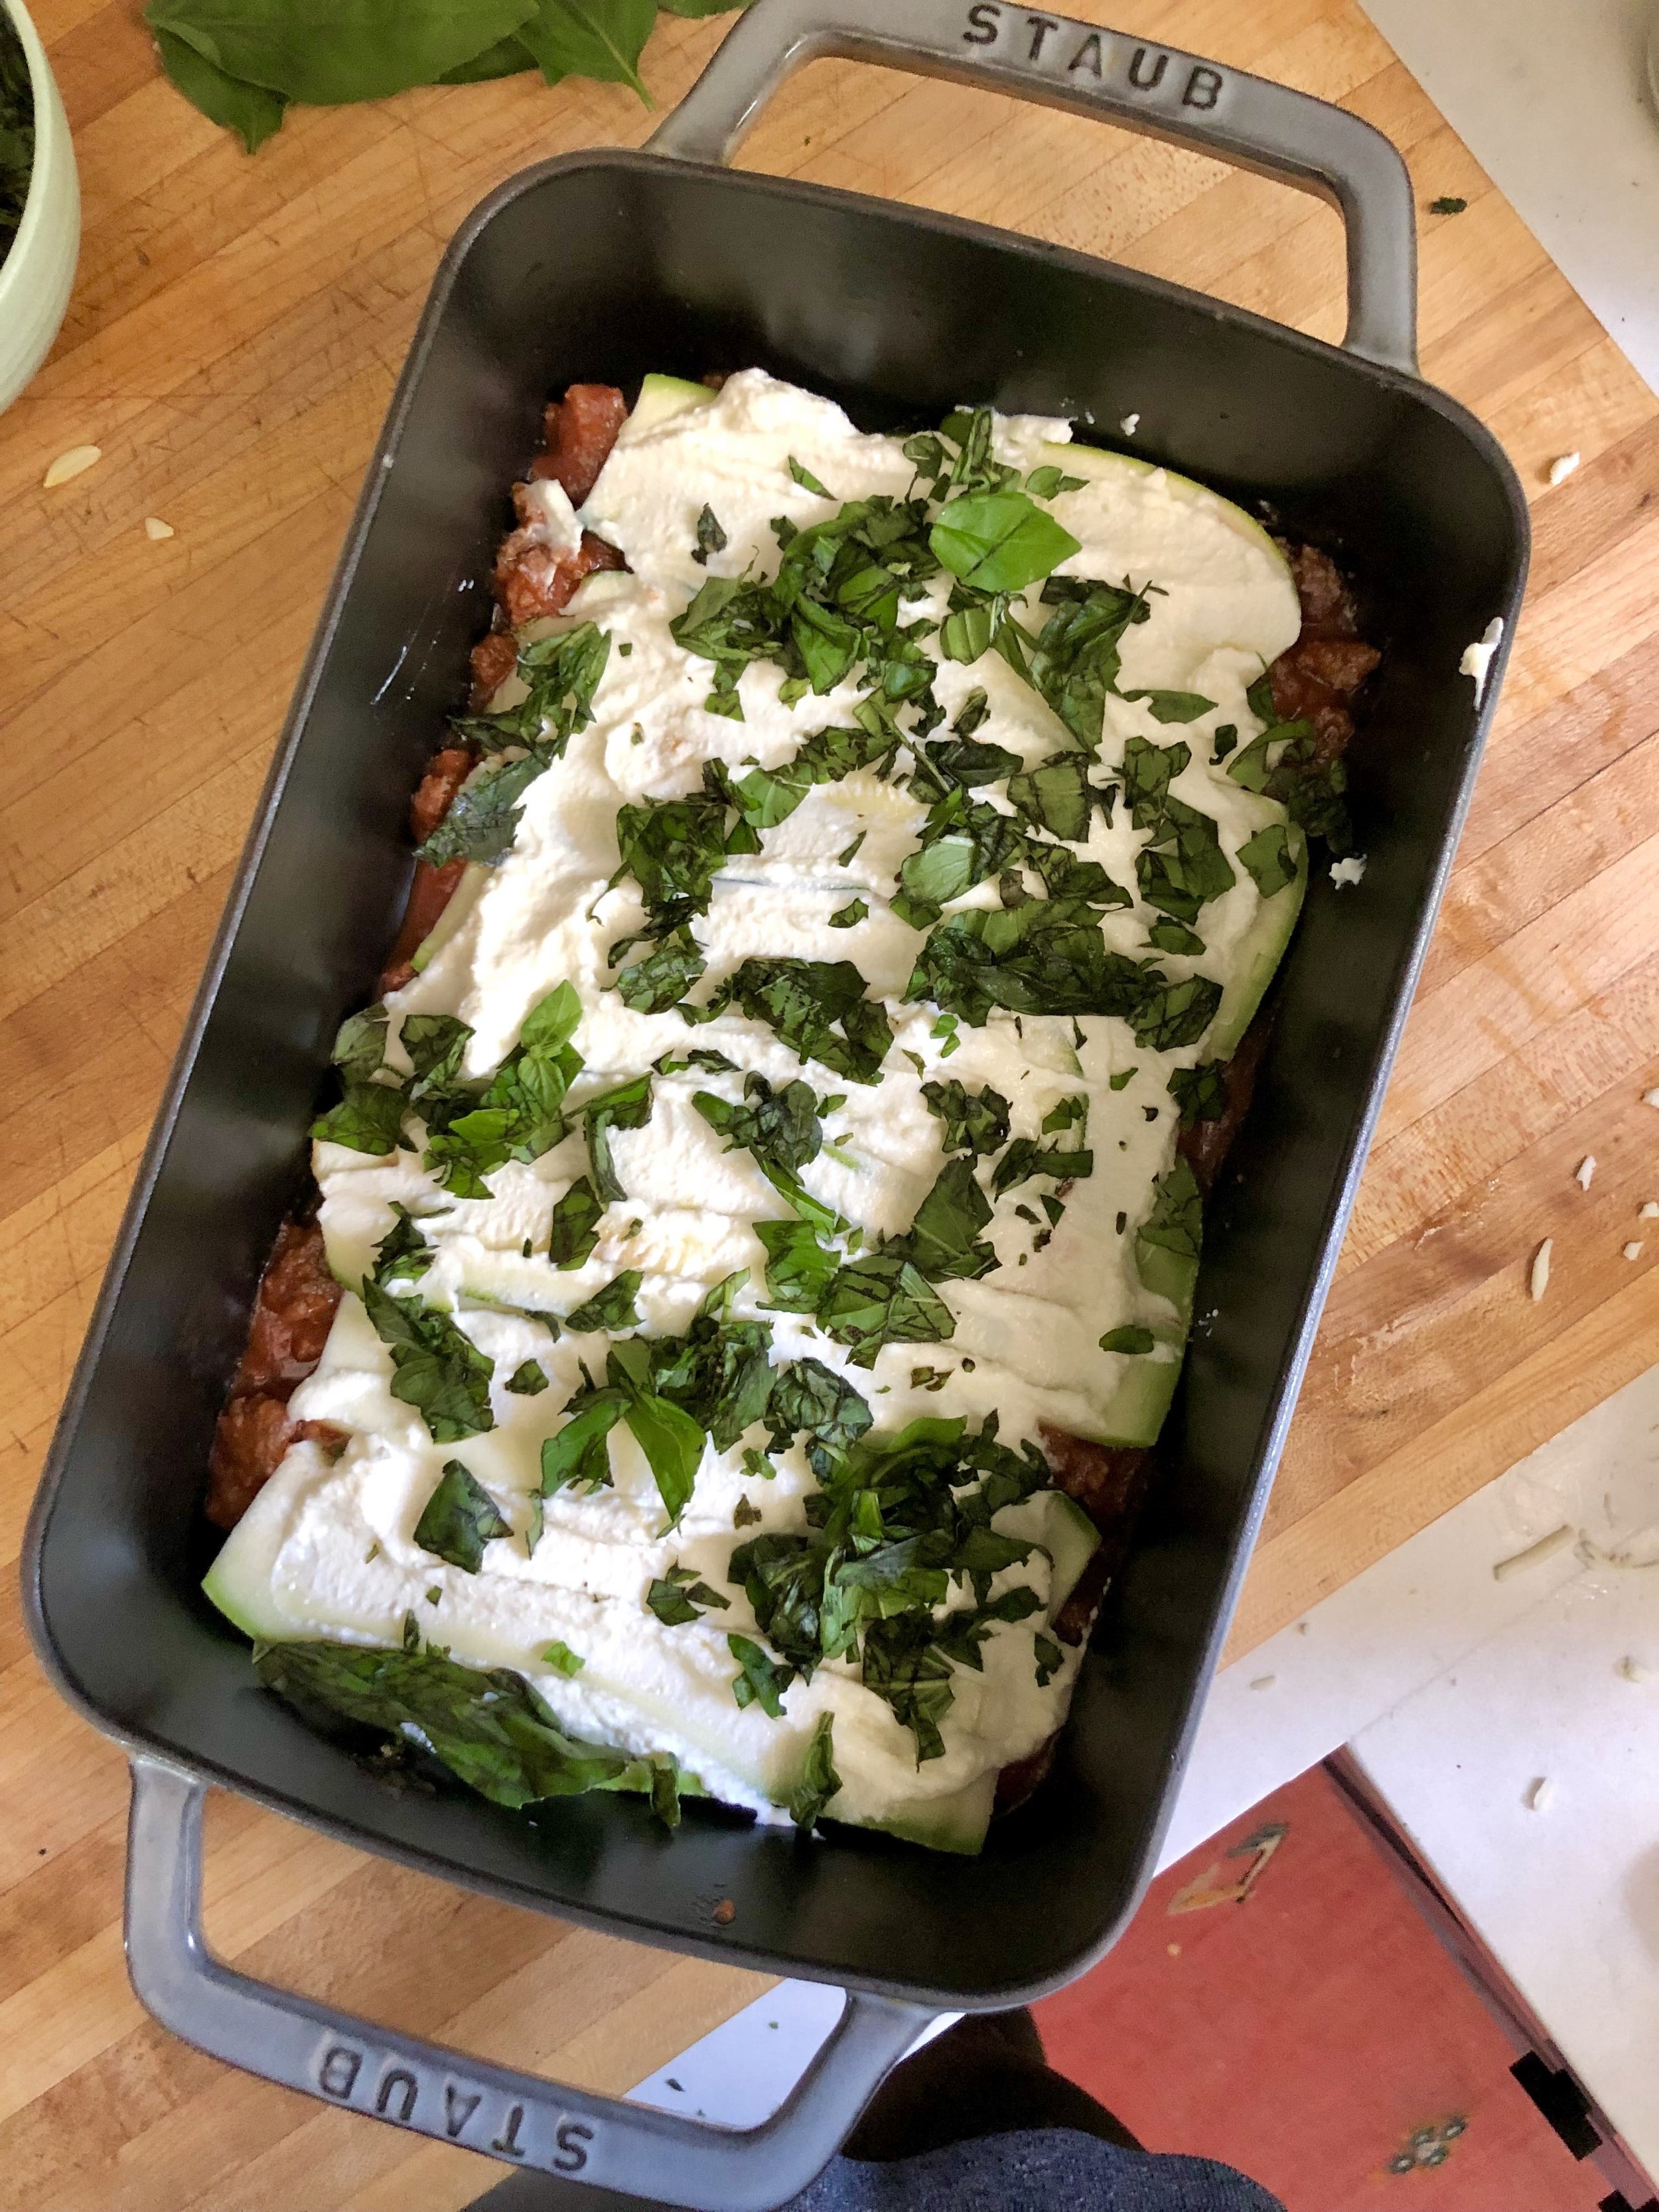
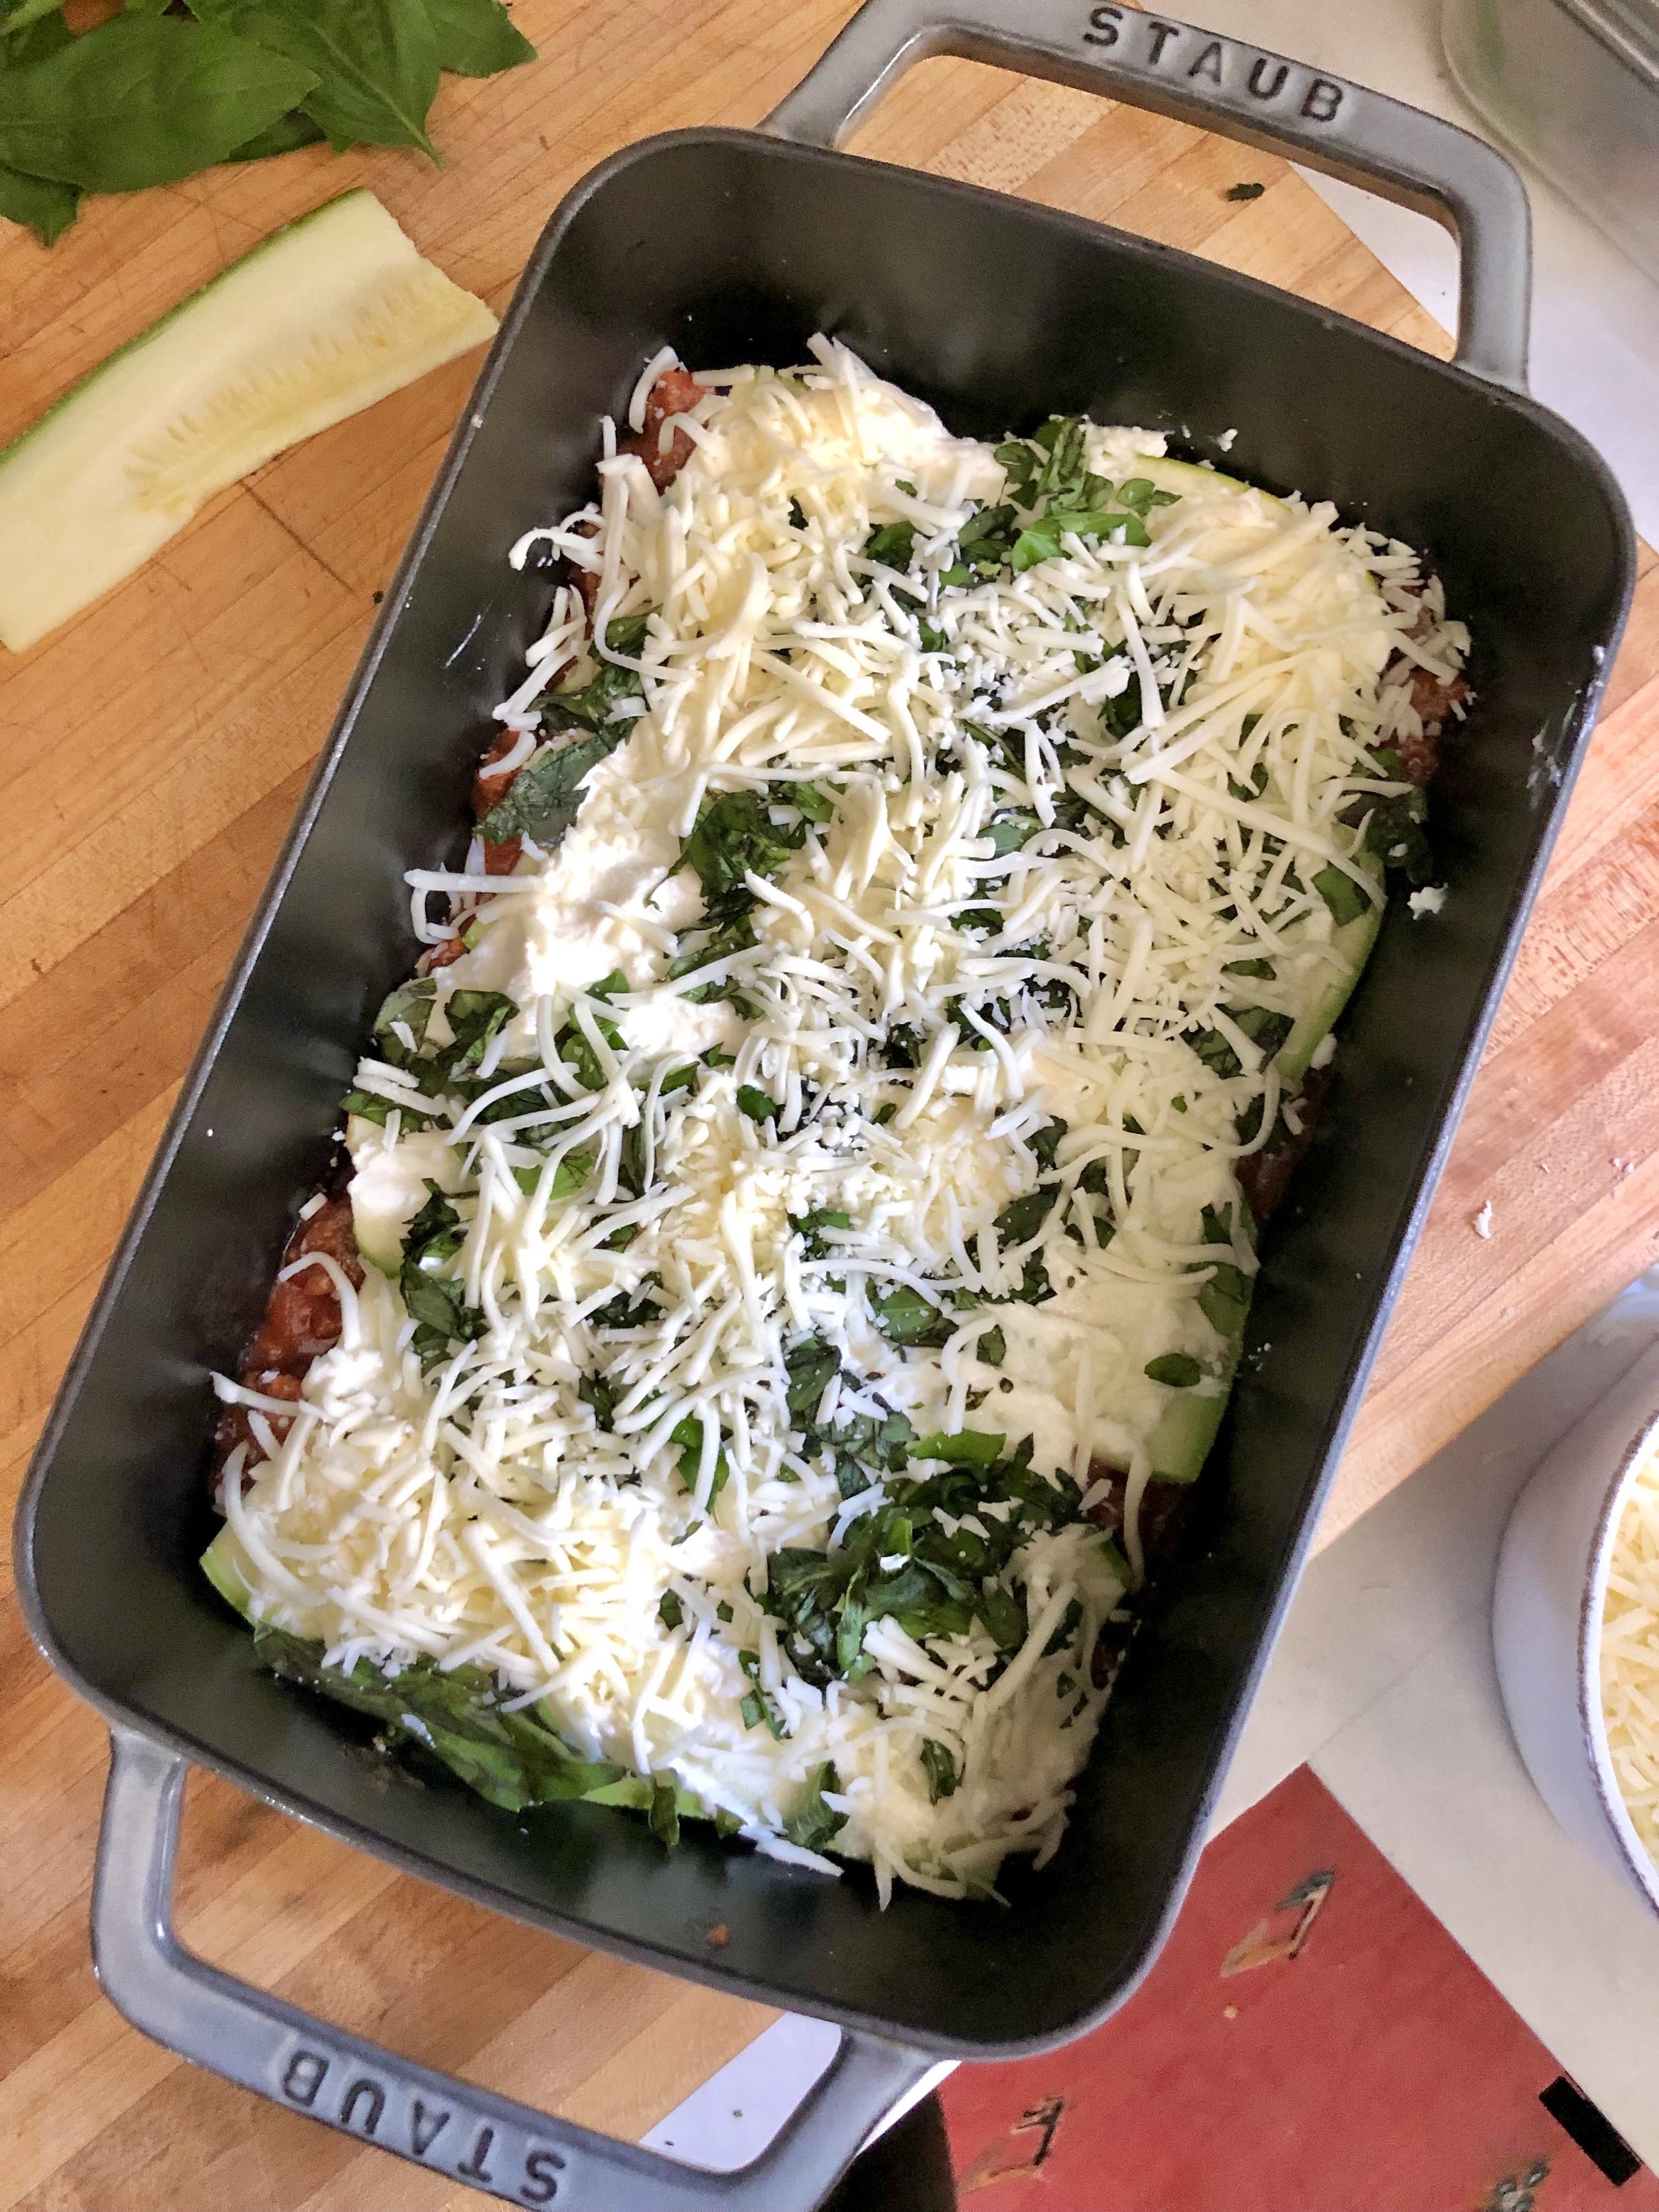
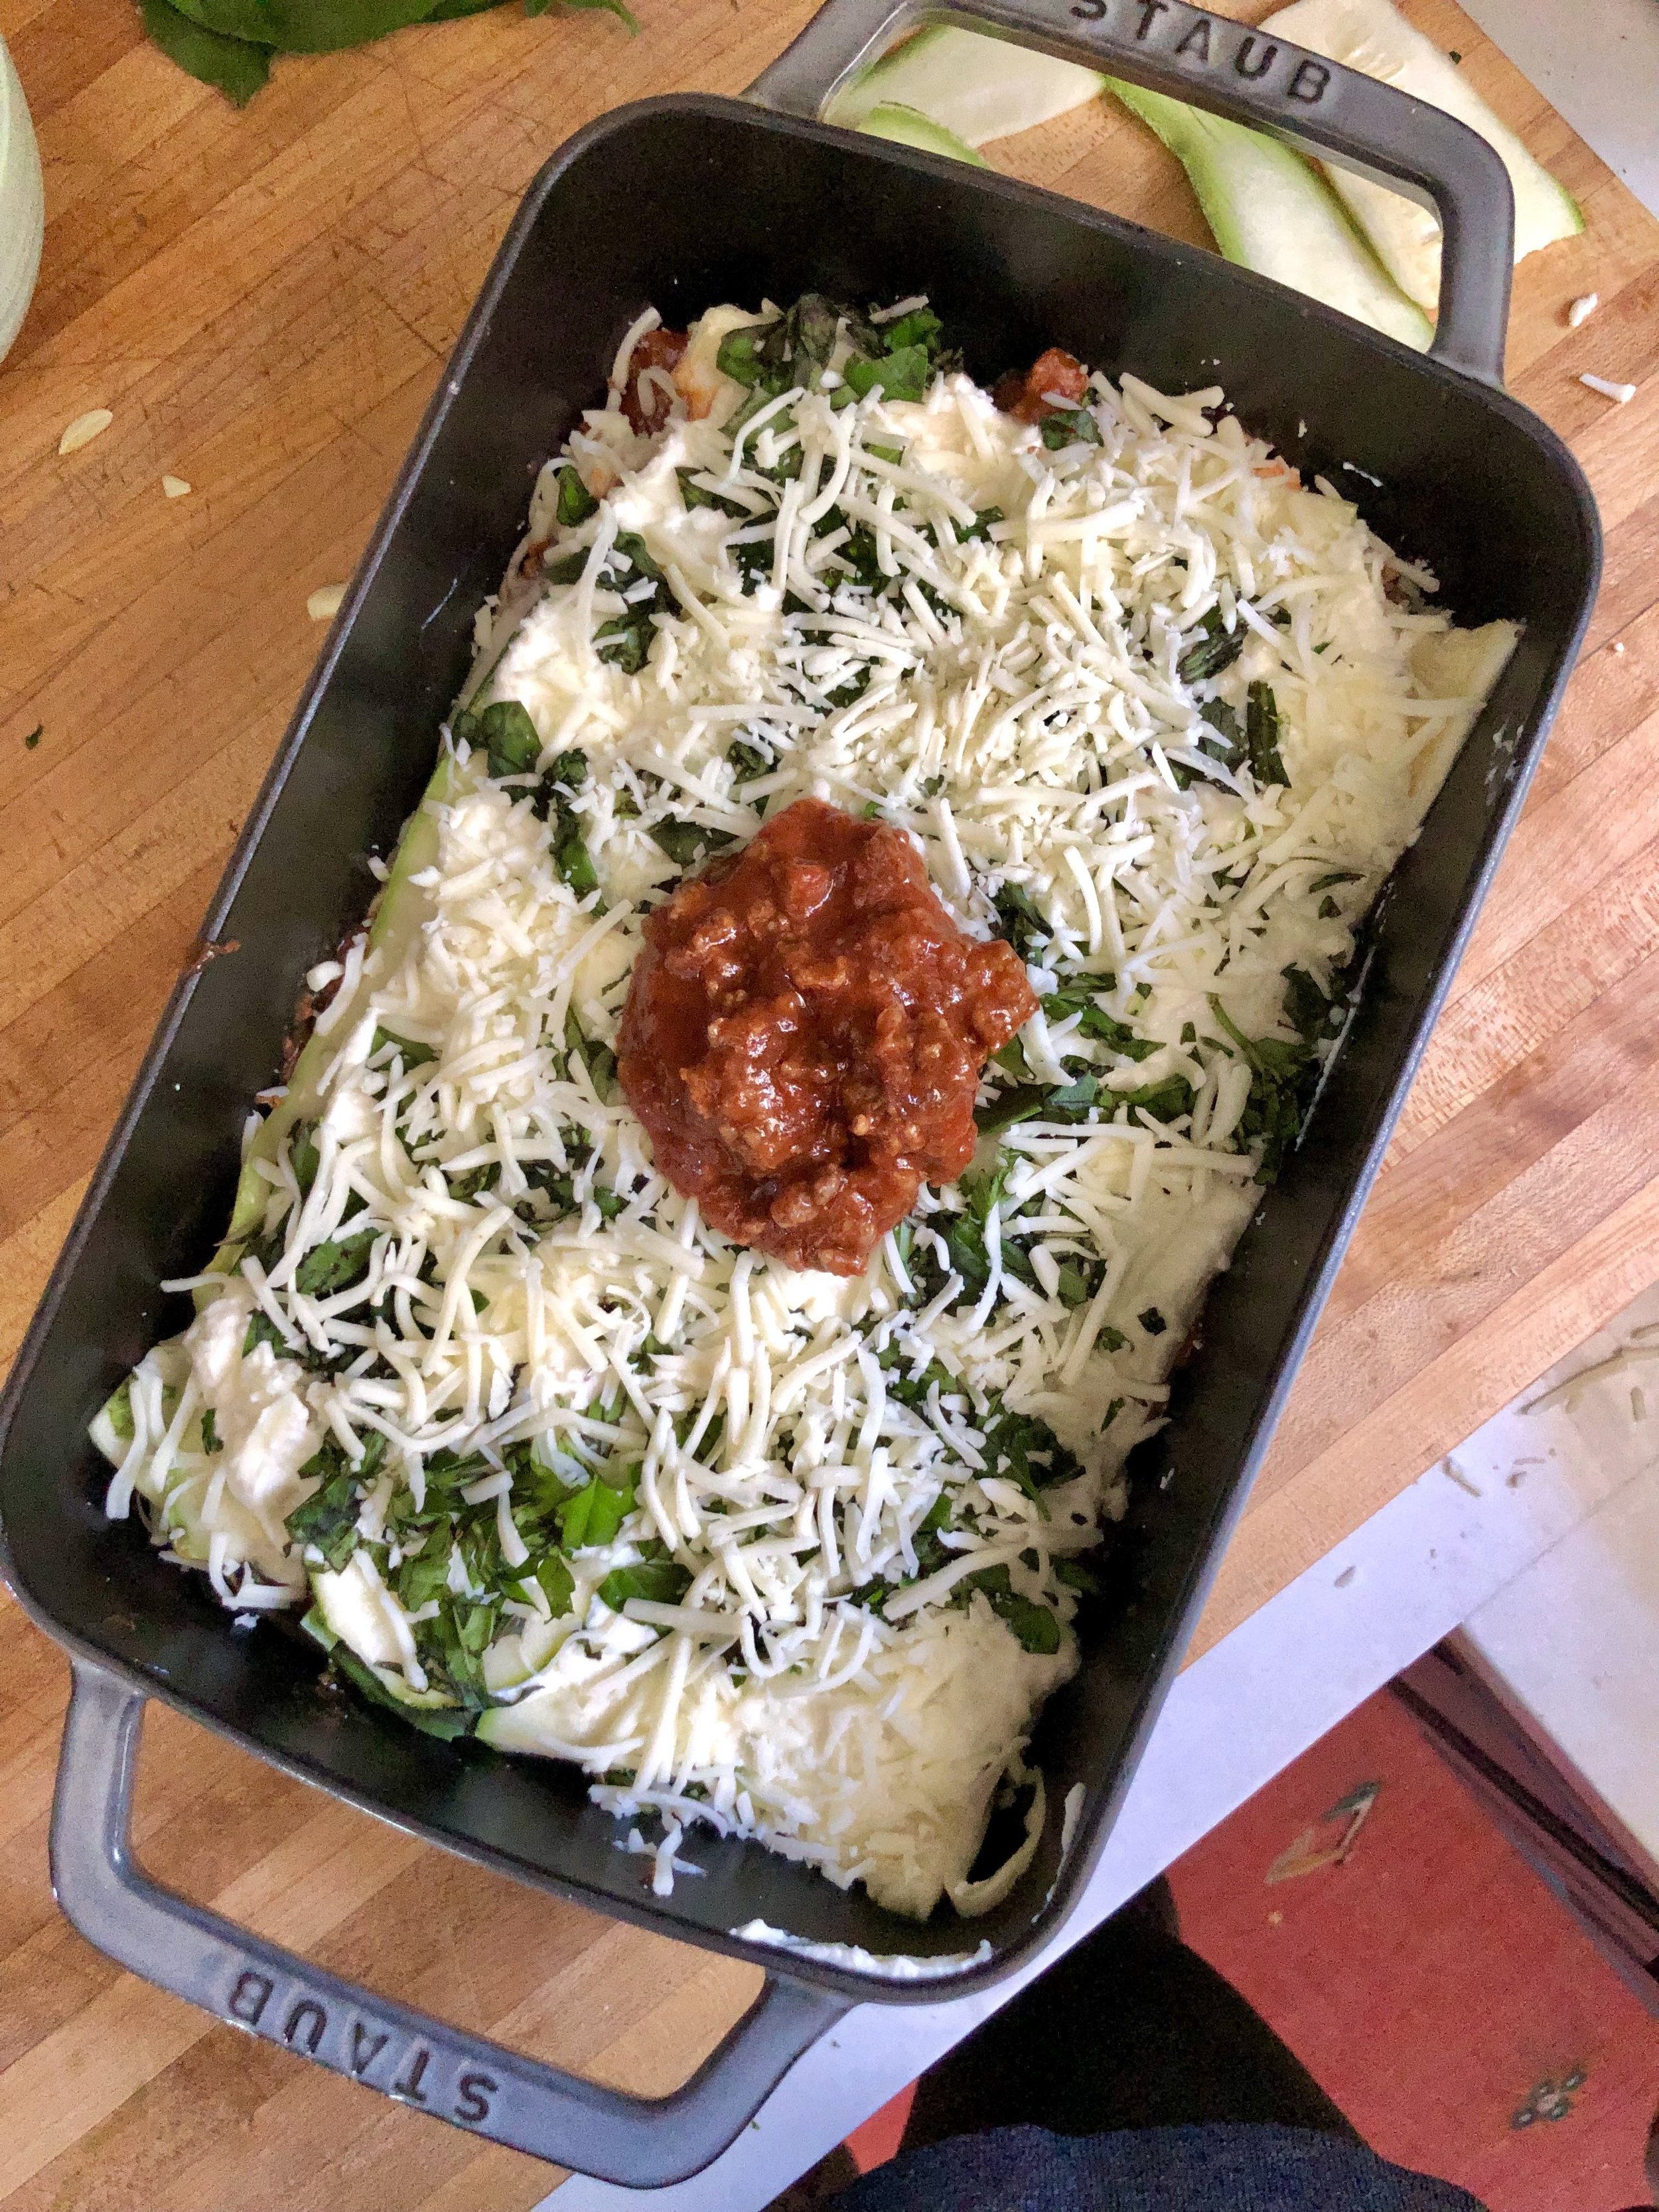
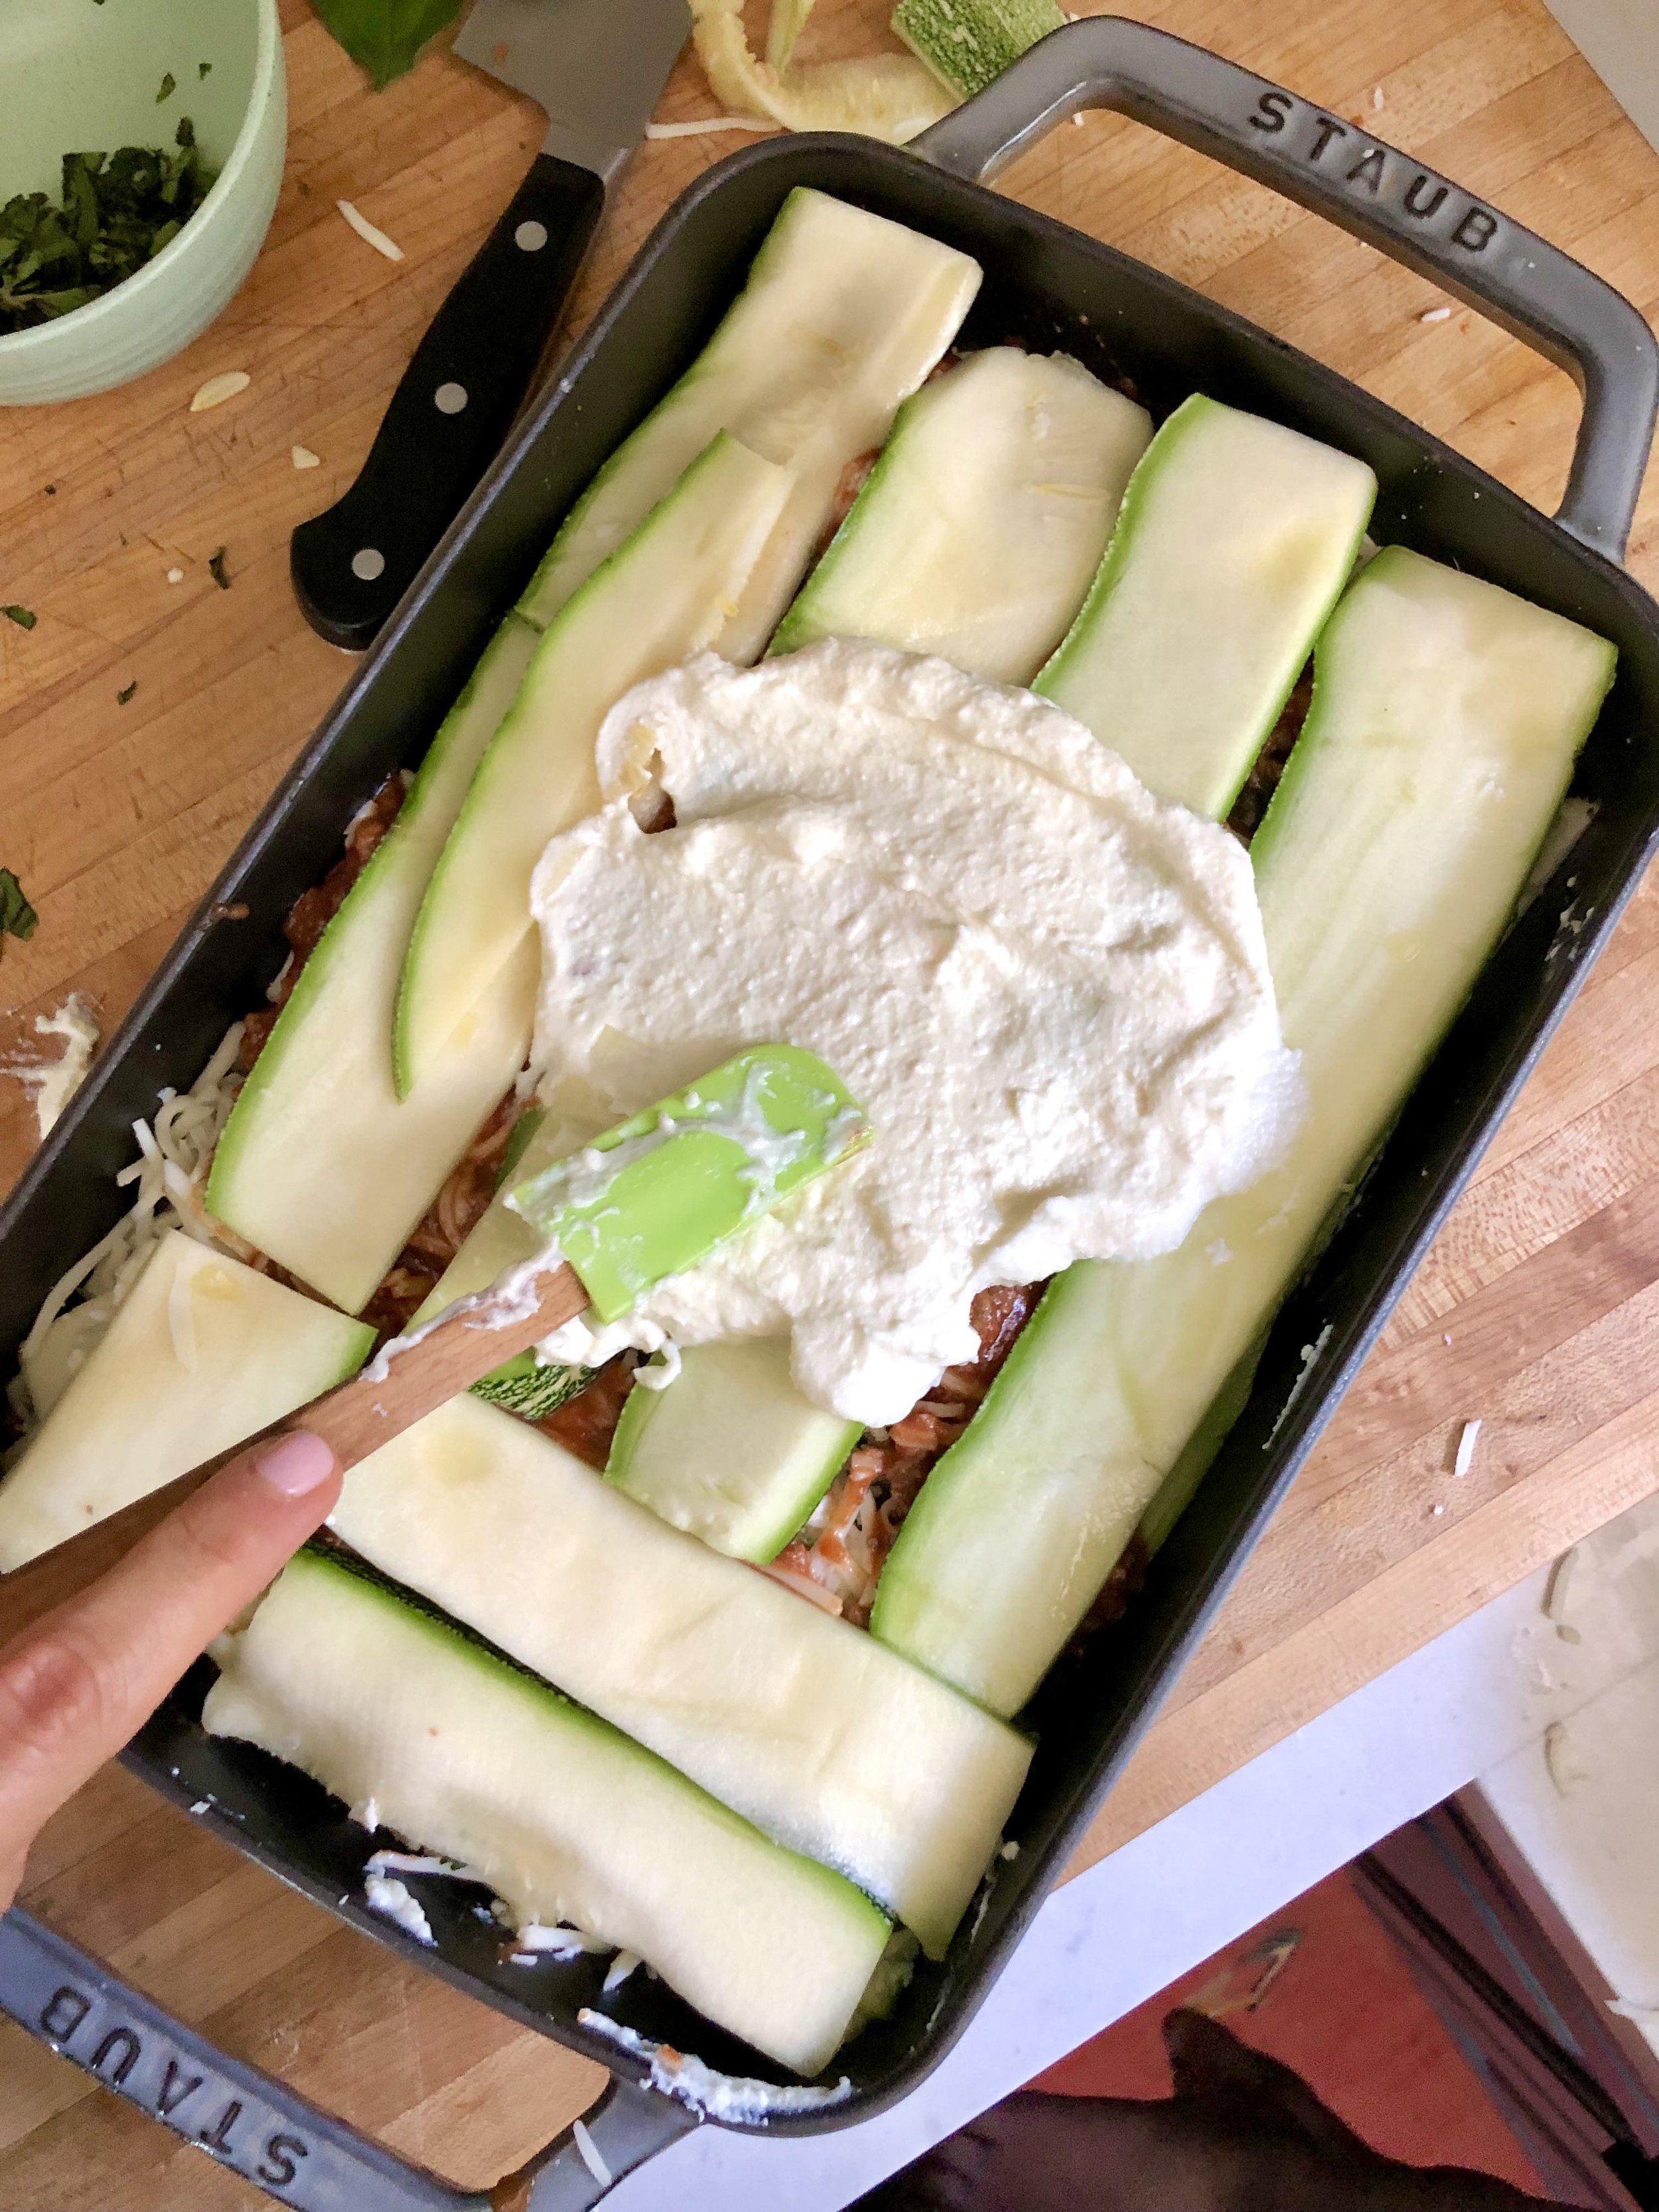
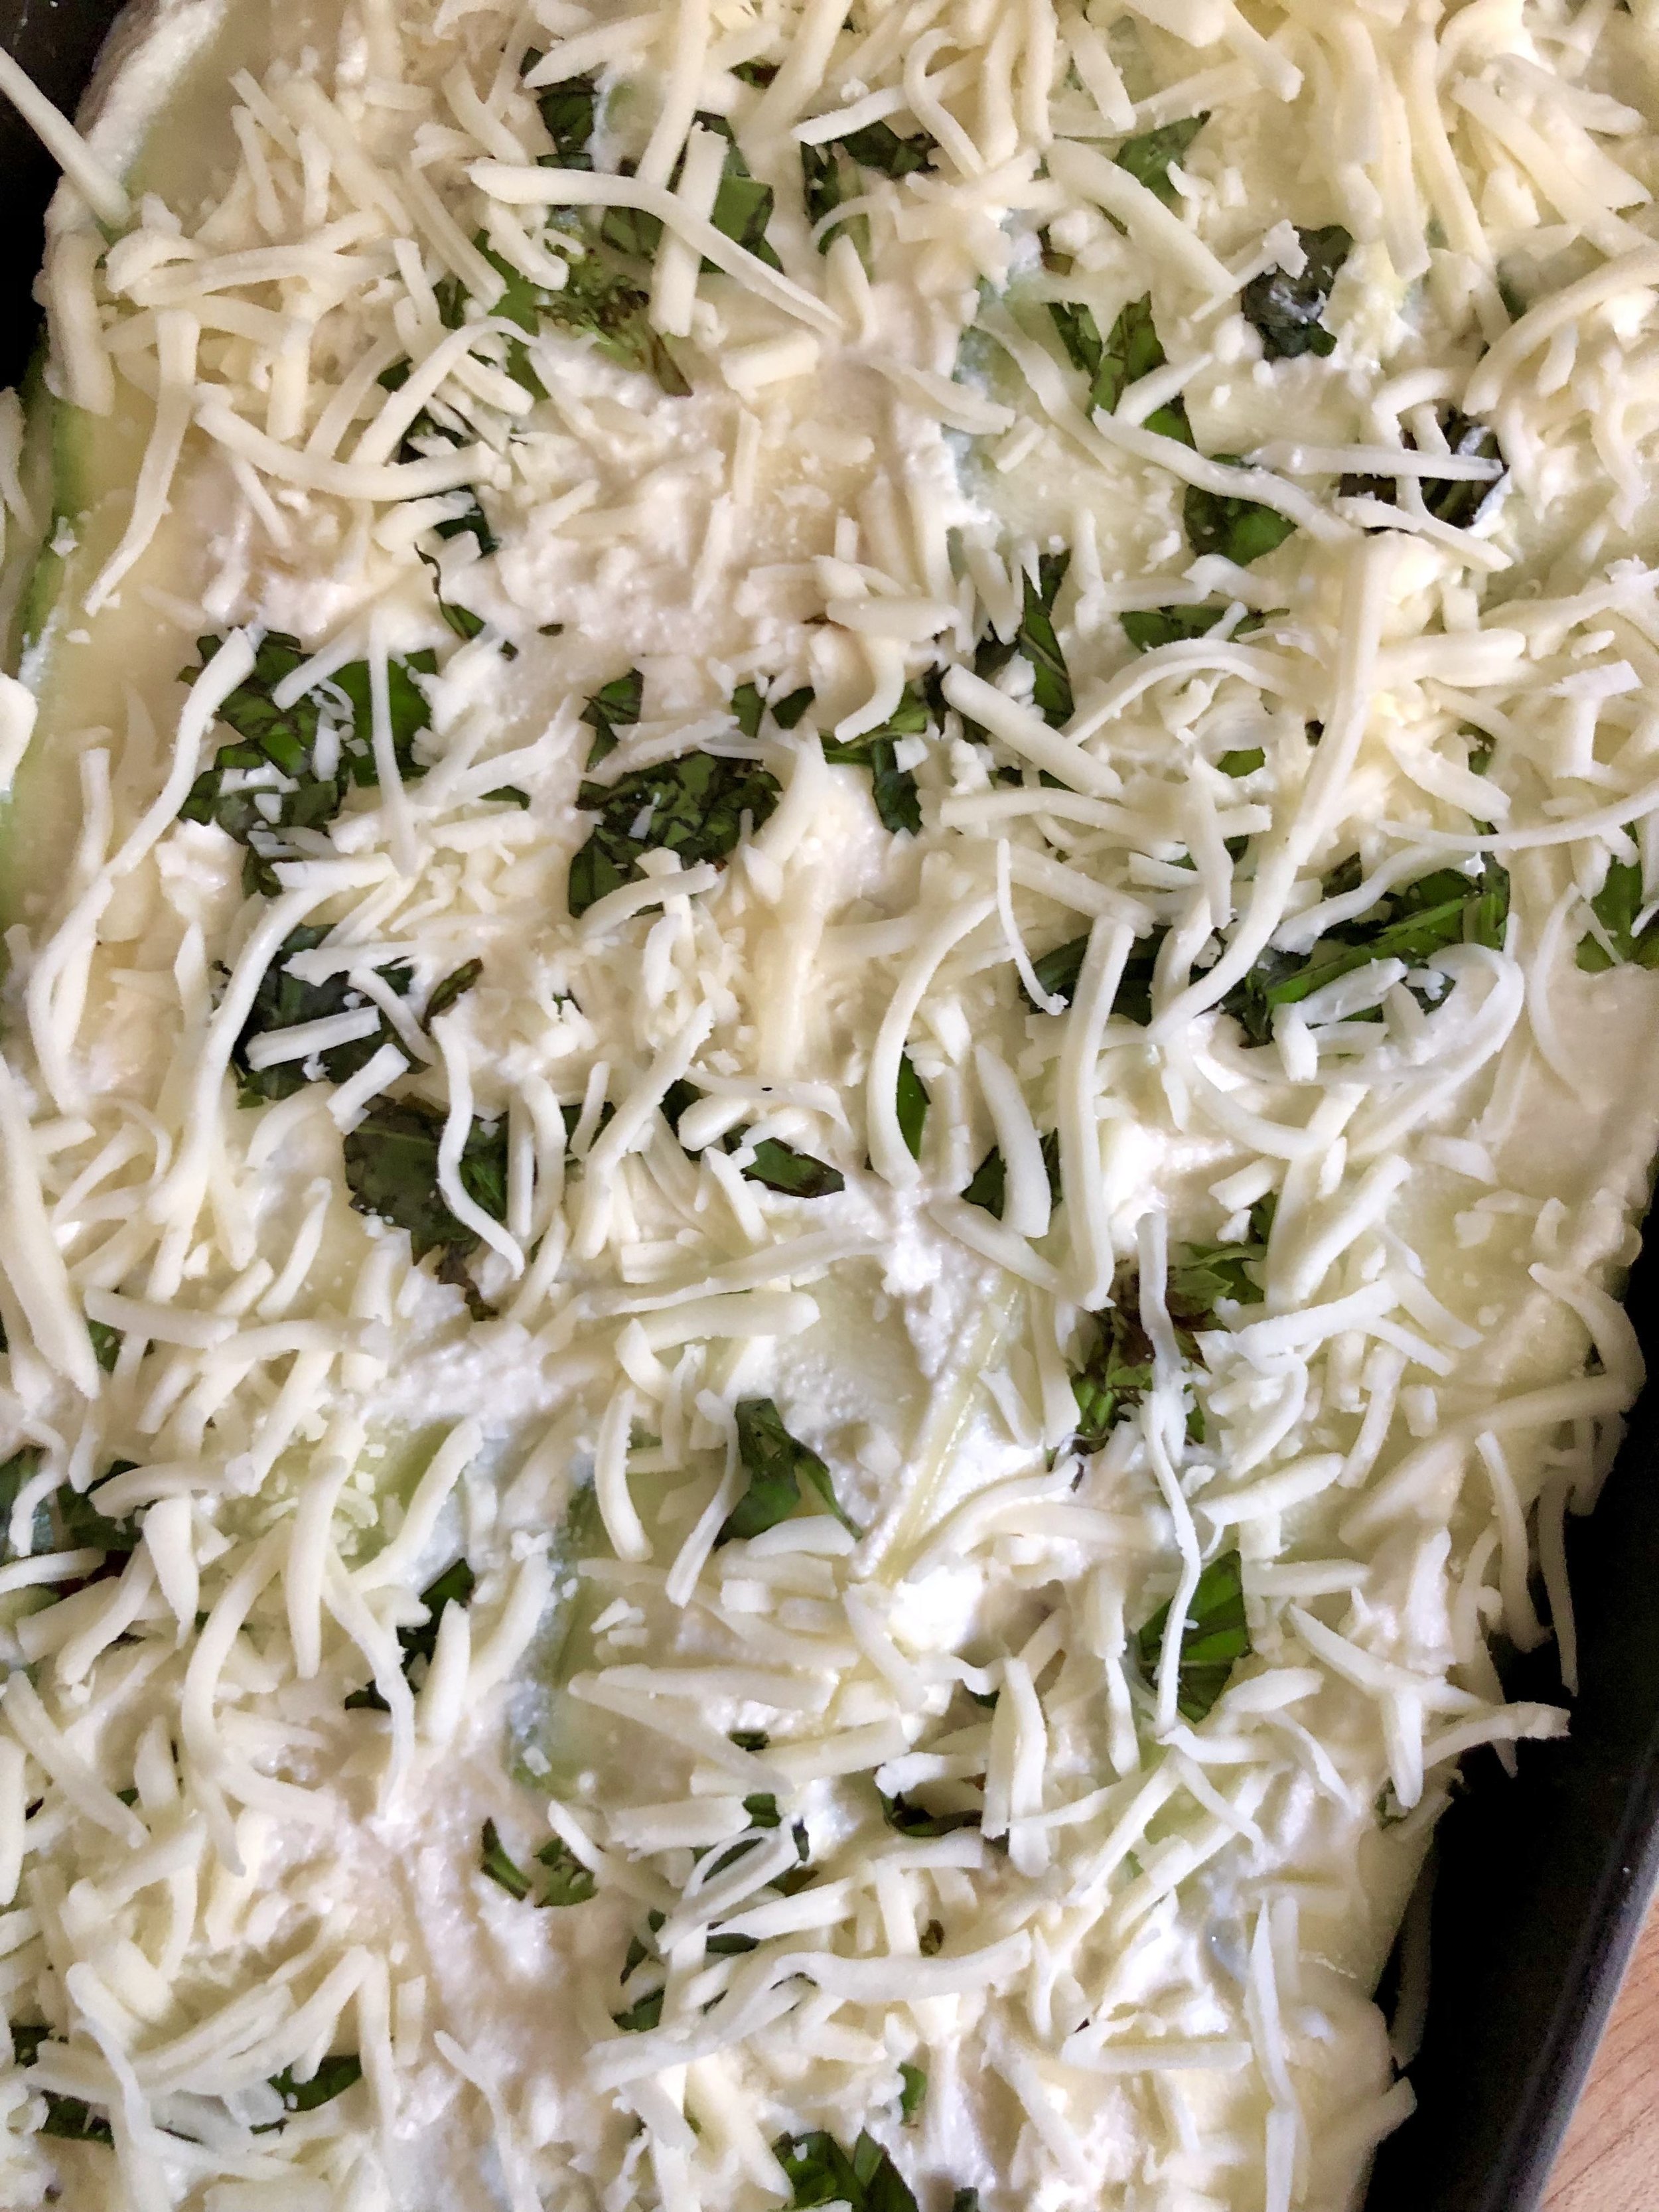
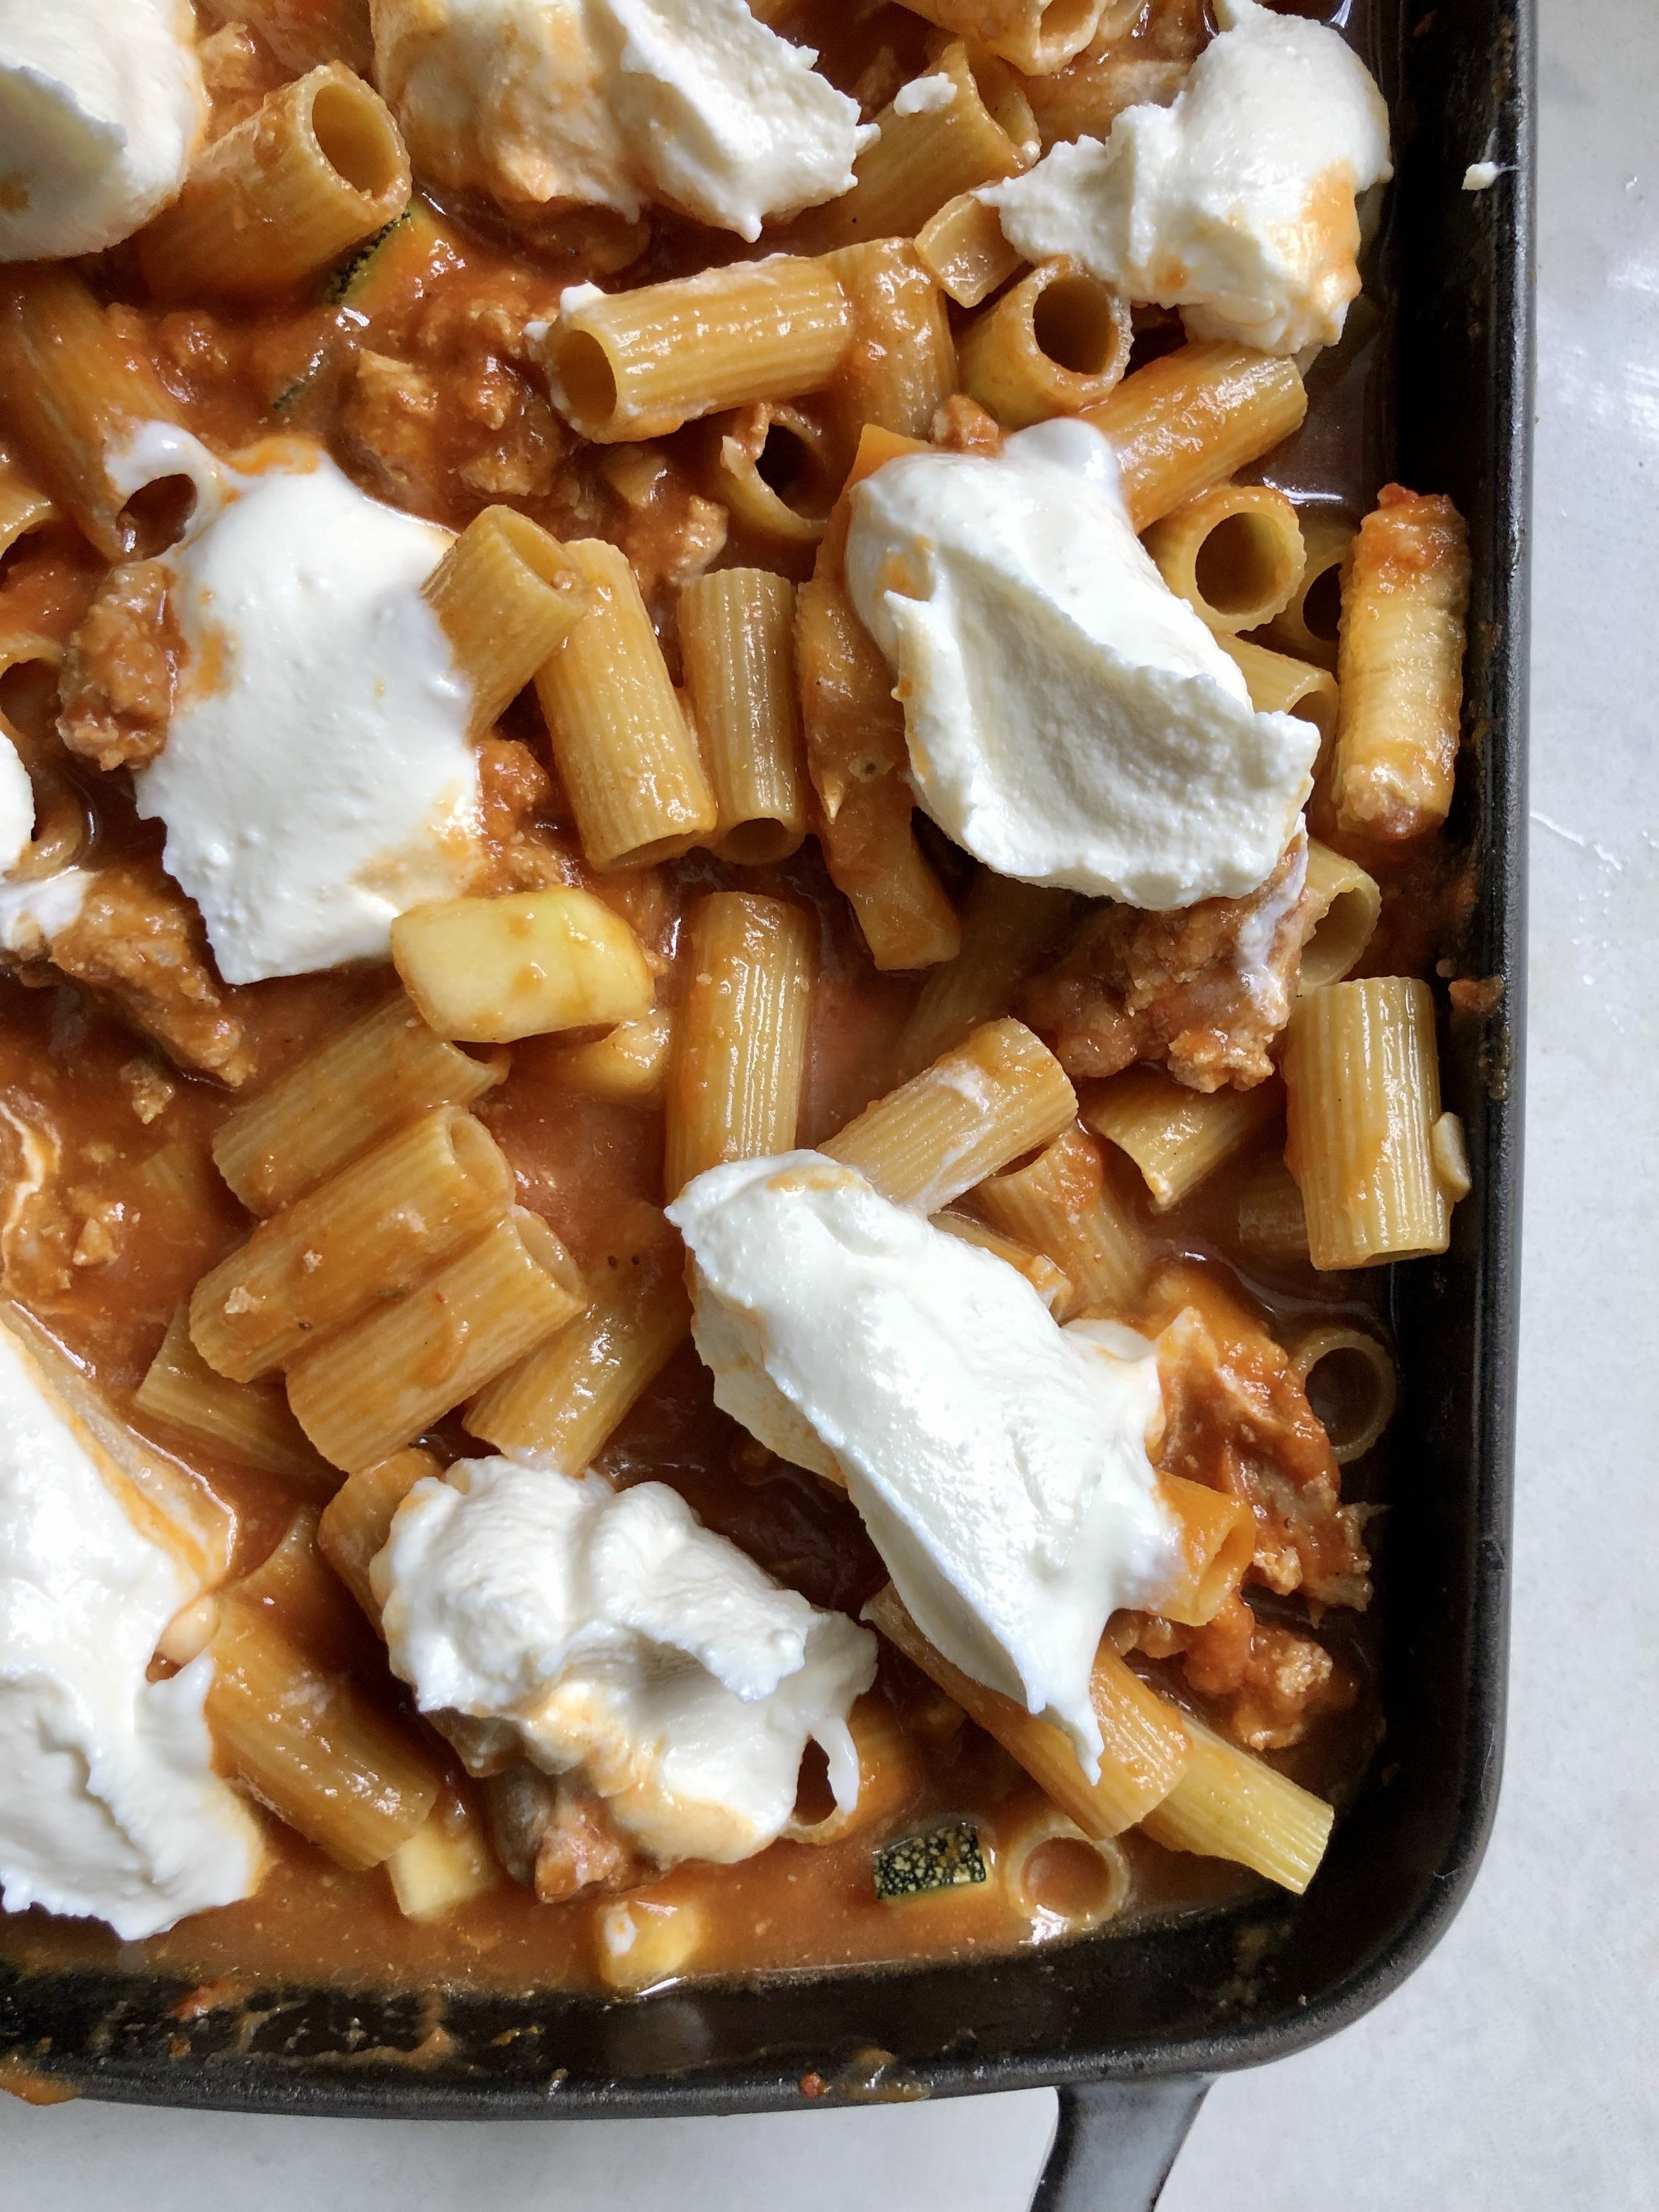
Preheat oven to 400 F. Slice your zucchini into thin slices lengthwise using a knife or mandolin, and lay them out on a paper towel. Sprinkle with salt and allow to sit for approximately 15 minutes to draw out the moisture. Blot them dry to absorb any excess moisture. Mix the ricotta cheese with an egg in a bowl. Start assembling your lasagna: ladle sauce in the bottom of the pan, add zucchini slices to cover it, spread ricotta & egg mixture evenly on top, sprinkle with fresh basil, and then top with shredded mozzarella. Repeat this process with all remaining ingredients (you may have extra meat sauce to freeze or use elsewhere!), reserving some fresh basil for garnish. Place the lasagna in the oven and cook for 40-45 minutes, broiling for a couple of minutes at the end to get a nice golden, bubbly top. Garnish with whole basil leave, pour yourself a glass of wine, and serve!


baked rigatoni with ground turkey, pumpkin & ricotta

As the weather gets cooler, I find myself craving warm, comforting meals. Even better if they come together and bake up in one pan! This baked rigatoni with ground turkey, pumpkin and ricotta makes for a delicious dinner this time of year, and is enjoyed by kids and adults alike! I use ground turkey, but feel free to use beef if you prefer. It can also easily be made vegetarian by omitting the meat entirely! I love the added dose of veggies from the (entire can of) pumpkin, as well as some sneaky zucchini we had from our garden. Just a pinch of ground nutmeg imparts a wonderful depth of flavor- I highly recommend it! And don’t skimp on the cheese, either. We use a mix of whole milk ricotta and shredded mozzarella while baking, and freshly grated parmesan to serve! Top with red pepper flakes for a spicy kick! This can also be made ahead, and is great reheated, or even frozen and defrosted! Did I mention you don’t even have to boil the pasta before cooking? Talk about an easy, satisfying dinner!

Baked Rigatoni with Ground Turkey, Pumpkin & Ricotta:

  • 1 pound ground turkey (or beef)

  • 1 yellow onion, finely chopped

  • 2 garlic cloves, finely chopped

  • 6oz. can tomato paste

  • 15oz. can pumpkin puree

  • 1/4 tsp ground nutmeg

  • 1/2 tsp dried herbs (I like sage, oregano & thyme)

  • 1 large zucchini, cubed or shredded

  • 3 cups vegetable (or beef/chicken) broth

  • 16oz box rigatoni pasta

  • 1 cup ricotta cheese

  • 1 1/2 cups shredded mozzarella cheese

  • red pepper flakes, fresh parmesan cheese, fried sage leaves- optional garnish

Preheat the oven to 400 degrees. In a wide, oven-safe skillet (or casserole dish), brown the ground turkey for a several minutes until no pink remains, seasoning with salt & pepper as it cooks. Remove from pan, and saute the onion and garlic for a few minutes until they start to caramelize, careful not to burn the garlic. Add the turkey back to the pan, as well as the tomato paste, pumpkin puree, ground nutmeg and dried herbs, stirring to combine. Remember to season with salt & pepper at each step, and let the sauce simmer/cook together for a few minutes so that the flavors can develop. Add zucchini or other veggies, if using, until fully mixed together. Then, add the broth and pasta, and stir to combine. Add dollops of the ricotta throughout the pasta, by the large spoonful. Mix some salt & pepper and lemon zest into the ricotta before adding to the pasta if you want to elevate the flavor even more. Sprinkle shredded mozzarella cheese over the top. Cover and cook for about 40 minutes. Then uncover and cook for about 5 more minutes until cheese is bubbly. Let cool, and sprinkle with red pepper flakes. Serve with freshly grated parmesan cheese. Enjoy!

*Adapted from No Boil Pumpkin & Sausage Baked Ziti by Inspiralized.


grain-free pecan pie bars

I can’t believe the holiday season is soon upon us. This year has really flown by! One of the first things that comes to mind when I think holidays is holiday baking! From festive pies at Thanksgiving to cookie exchanges at Christmas, I’m truly here for it all! Pecan pie is a southern fave for good reason- that gooey caramelized filling, with candied pecans, and a buttery shortbread crust is hard to beat. But to be honest, many pecan pies can be sickeningly sweet, and I’m not a huge fan of the corn syrup filling that is traditionally used. I also understand pies can be a bit of an overwhelming undertaking, and so I love the approach of somewhat more casual pecan pie bars! These in particular are made with a coconut milk and date filling, along with a butter and almond flour based crust. Plus lots of gooey pecans!

These are equally as delicious as their pie-counterpart, but can be eaten with your hands! Served in a bowl topped with a big scoop of ice cream ain’t bad either, just sayin’. My bestie Rachel Mcconn at Rachel Mcconn Wellness (who I’ve baked with before & also loves a good sweet treat) developed this grain, gluten, and refined sugar- free pecan pie bar recipe, and asked me to test out the recipe for her. Okay, fine, twist my arm ;) These turned out super tasty- not to mention made the house smell absolutely fantastic- and I think they’d make a perfect addition to any holiday table. She has offered to share the recipe with my readers- so head on over to her site for the recipe! As always with RMW recipes, these are free of all gluten, grains, and refined sugars, so those with any allergies or restrictions can still indulge freely as well. Hope you enjoy, and happy holidays!


brown butter peanut butter pretzel rice krispie treats

brown butter peanut butter pretzel rice krispie treats

I love a sweet and salty treat- it’s such an addicting and comforting combo for me. I can’t help but reach for more! Add in a delicious, childhood goodie like rice krispie treats, and you’ve got yourself quite the tasty (yet easy!) dessert! I’d been craving rice krispie treats lately, and while there’s nothing wrong with the tried and true classic, I wanted to shake things up a bit. Since I love adding mix-ins to my baked goods, I figured I’d toss in some creamy peanut butter and crunchy pretzels to take these to the next level. Plus, I browned my butter before adding the marshmallows to the pot, which really kicks things up a notch. That nutty, caramel flavor from the brown butter is just oh so good in these rice krispie treats. Feel free to swap out a different nut butter if you’re not into peanuts, or use gluten free pretzels if you need. I kept things classic in this case, and I must say- they’re super delish! The peanut butter glaze is just a lil extra somethin’ somethin’ on top. Totally not necessary, but a welcome addition for sure :) A few lil tips and tricks to pass along to make these extra tasty: 1) Instead of melting all the marshmallows into the browned butter, save 1-2 cups to mix in at the end with the cereal. This ensures you get ooey gooey pockets of marshmallow goodness in your finished product! 2) Use your empty butter wrapers or a greased spatula when spreading the treats into the pan, to prevent them sticking to everything! 3) Be careful not to pack down the rice krispie treats too hard in the pan! Just a gentle press, otherwise you’ll end up with thin, hard treats, and no one wants that! I hope you enjoy :)

Brown Butter Peanut Butter Pretzel Rice Krispie Treats:

Peanut Butter Glaze:

Line a 9×13 inch baking pan with parchment paper & grease with butter or cooking spray. Melt the butter over medium heat in a very large pot. Once melted, continue cooking for a few more minutes, constantly stirring. Mixture will bubble and foam, and you’ll know it’s browned when it’s a golden color and smells nutty. Careful not to burn it! Add all but 1 cup of marshmallows, and stir until completely melted.

Remove from heat, then immediately stir in the peanut butter, vanilla extract and salt. Lastly, fold in the Rice Krispies cereal, crushed pretzels, and remaining marshmallows. Make sure everything is evenly coated in the peanut butter marshmallow mixture. 

Transfer mixture to prepared pan. Using a rubber spatula (or the butter wrappers), gently spread mixture to fit the pan, careful not pack it down too hard. Allow treats to set for at least 1 hour at room temperature before slicing. Make the glaze in the meantime, if using. Whisk all ingredients together until smooth. You may warm the peanut butter first if need be to get it to a runnier consistency. Lift the rice krispie treats out of the pan using the parchment paper, drizzle the glaze on top, and cut into squares. Enjoy! These are best the day they’re made, but will stay fresh in an airtight container at room temperature for a few days. 

brown butter peanut butter pretzel rice krispie treats

healthy nut & seed granola

Granola makes for a delicious breakfast or snack anytime of day, am I right? I’ve been known to enjoy it dry on its own, in a bowl with almond milk or Greek yogurt & fresh fruit, and even sprinkled on top of chia pudding or açaí bowls! And I have to say, it always hits the spot! Although it’s easy to buy granola pre-made, many store-bought versions are loaded with sugar and other unhealthy and unnecessary ingredients. At our house we tend to go through Costco-size bags of grain-free granola at a pretty rapid pace (it’s so addicting), and as I was finishing one off the other day, I decided to make some myself for a change! 

This recipe is super adaptable, so feel free to swap out other nuts and seeds if you prefer, or use what you have on hand. But do make sure to use plenty of them since they are the star- and super important for that tasty crunch! No one in my household avoids grains, so I did include rolled oats as well, since they make such a good base for granola. If you’d like to keep things gluten free, just make sure your oats are certified GF! My healthy nut & seed granola boasts a pretty impressive nutritional profile thanks to superfoods like chia & flax seeds, fiber-rich oats, and an extra dose of healthy fats from coconut oil. Plus, it’s lightly sweetened with pure maple syrup, which is much lower on the glycemic index than regular sugar and corn syrup, so it won’t spike your blood sugar! I definitely recommend adding pure vanilla extract and ground cinnamon for some added depth of flavor, but feel free to skip these if you prefer. You can also toss in some dried or freeze dried fruit after baking, if that’s your jam, as well. The options are endless! Homemade granola is so easy y’all- I don’t know why I haven’t done this more often, but I definitely will going forward! Not to mention it leaves your house smelling oh so delicious and fragrant! Enjoy!

Healthy Nut & Seed Granola:

healthy nut & seed granola

Preheat the oven to 300 degrees F. Line a half sheet pan or large cookie sheet with parchment paper. In a large bowl, stir together oats, nuts, seeds, cinnamon and salt (keep coconut separate for now). Set aside. In a separate bowl, heat the coconut oil and maple syrup until melted. Stir in vanilla extract. Pour over dry ingredients and mix well until oat mixture is completely coated.

Spread the granola on the baking sheet in an even layer and press down evenly with a spatula. Bake for about 35 minutes, until golden brown. Sprinkle coconut flakes on top, and return to oven for a few more minutes, until just toasted. Granola should be nice and fragrant. Remove from the oven and allow the granola to cool on the baking sheet for 10-15 minutes to set. Feel free to break it into clumps or clusters if you prefer. Transfer to an airtight container or large mason jar.

Useful Tools:


tahini chocolate chip blondies

tahini chocolate chip blondies (gluten free, paleo, refined sugar free)

I’m obsessed with any and all things tahini. I eat it multiple times a day, whether it’s drizzled over roasted veggies and lamb meatballs for dinner or spooned into Medjool dates with chocolate chips for a sweet treat, tahini is the jam. It also makes for a delicious baking ingredient! Its creamy, fatty, smooth texture makes it a wonderful butter, oil, and/or nut butter alternative in many recipes. Plus, tahini and chocolate is such a tasty combo. This recipe uses wholesome, nutrient-dense ingredients, but still tastes oh so rich and decadent. Tahini chocolate chip blondies that are gluten & grain free, paleo, and refined sugar free as well? Sign me up!

Tahini Chocolate Chip Blondies:

Preheat oven to 350 degrees Fahrenheit. Line an 8x8 inch square baking pan (double recipe for 13x9 inch pan) with parchment paper and grease with coconut oil or nonstick cooking spray. In a large bowl or base of a stand mixer, whisk together eggs, maple syrup, tahini, and vanilla extract until smooth. In a separate bowl, mix together almond flour, coconut flour, baking soda and salt. Slowly stir dry ingredients into wet ingredients until just incorporated, careful not to over mix (it will be thick!). Fold in the chocolate chips. Add batter to the prepared pan and spread evenly. Bake for about 25-26 minutes until edges are just slightly golden, but center may seem slightly underdone. Check using a cake tester- if it comes out mostly clean, they should be ready. Don’t overbake as grain-free baked goods will continue to set in the pan. Let blondies cool in pan for about five minutes before removing and allowing them to cool completely on a cooling rack. Sprinkle with flakey sea salt and drizzle with tahini, if desired. Cut into bars and enjoy!

*Adapted from Paleo Chocolate Chip Tahini Blondies by Ambitious Kitchen.