peach crisp à la mode

peach crisp à la mode

Crisps and crumbles are some of my favorite homey, comforting desserts any time of year. They’re equally as perfect in the summer with berries or stone fruits as they are in the winter with apples and pears! Did you know that although many people use the words interchangeably, crisps and crumbles are actually different? Crisps tend to use oats and nuts (in addition to flour & butter) in their topping, whereas crumbles usually contain more of a streusel-like topping with butter and flour only. Both are delish, but I tend to prefer crisps for all that added texture thanks to the oats and nuts! I was super lucky this summer, because my mom brought me some of the tastiest peaches from back home in the Texas Hill Country (thanks mom!). They were frozen to maintain freshness, so I just thawed them and reserved the juice (makes for a great bellini!) before baking, but you can also use fresh fruit here if you have access to it. I love baking crisps in my Staub cast iron skillet- it somehow looks rustic and fancy all at the same time, and also makes serving a breeze. Just grab a large spoon and dig in. I must say this summery dessert pairs perfectly with a crisp (get it, haha) glass of Lorenza Rosé enjoyed out on the deck. Whatever you do- don’t forget the vanilla ice cream!

Peach Crisp:

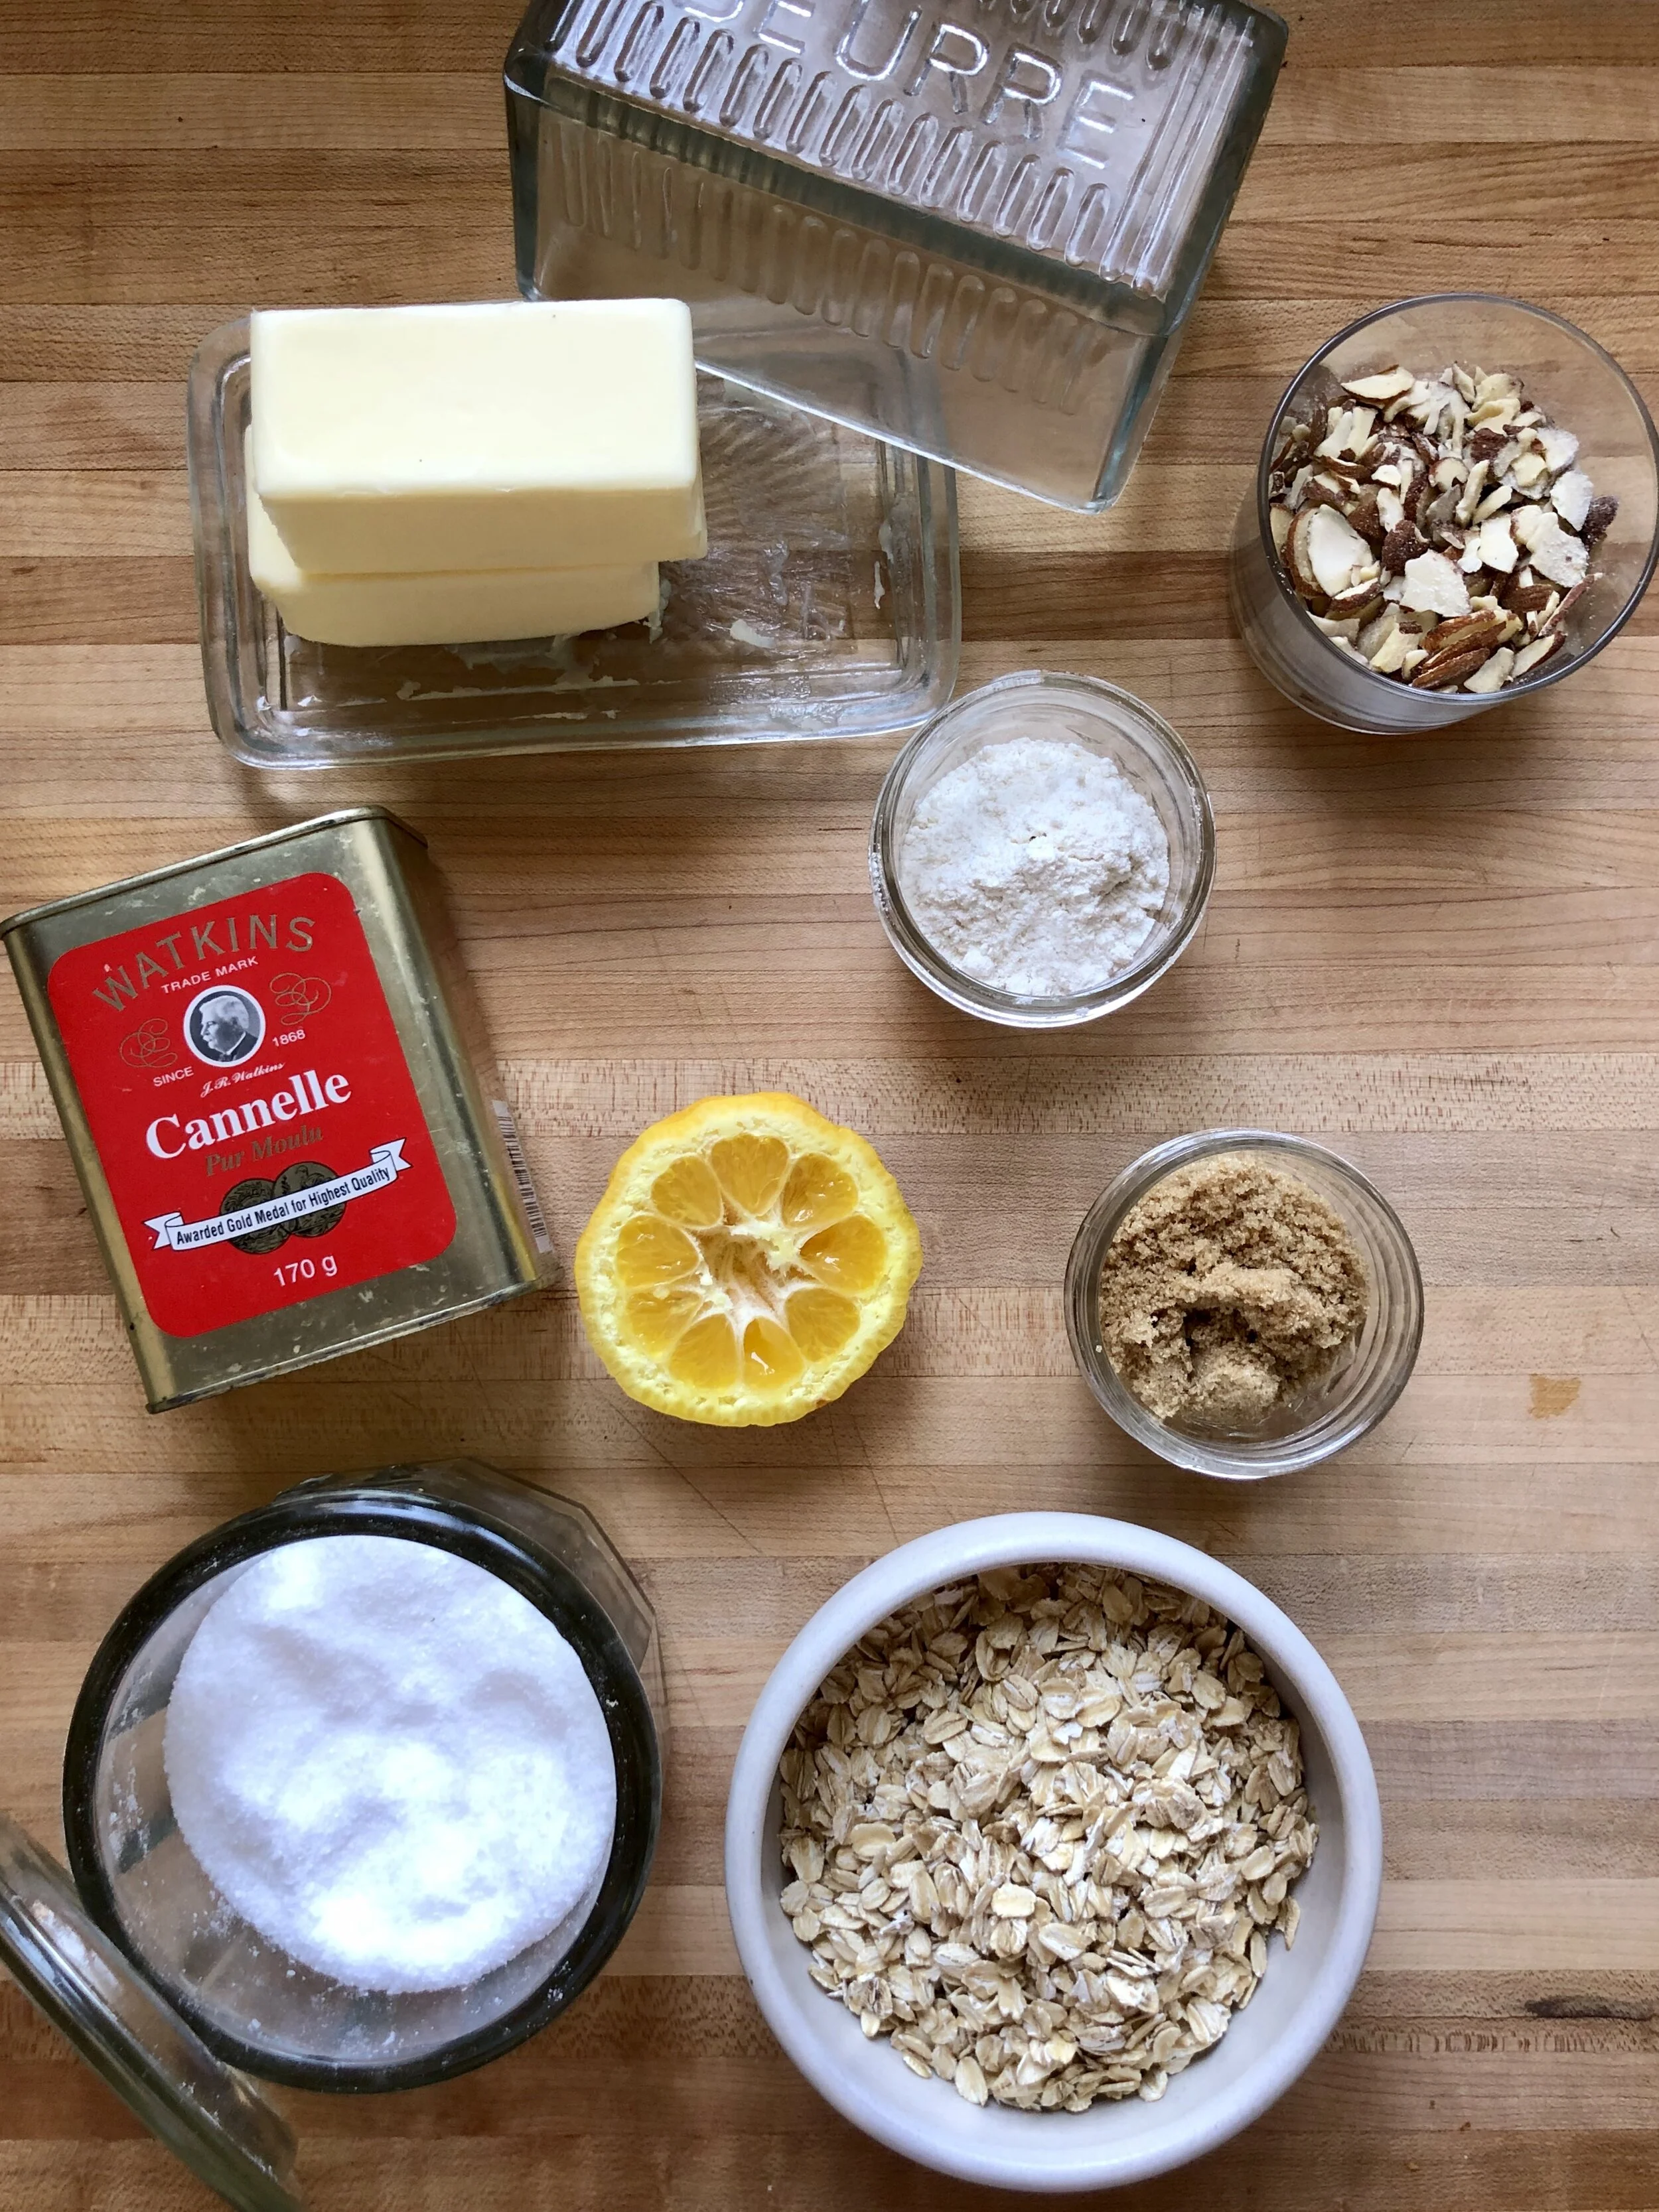
  • 6-8 cups sliced peaches (fresh or frozen)

  • 2 tbsp granulated sugar

  • 2 tbsp lemon juice

  • 1/2 tsp pure vanilla extract

  • 1/3 cup all-purpose flour

  • 1 cup old-fashioned oats

  • 1/2 cup slivered almonds

  • 1/3 cup dark brown sugar (or more if your peaches aren’t super sweet)

  • 1/2 tsp ground cinnamon

  • 1/2 tsp kosher salt

  • 1/2 cup (1 stick) cold, unsalted butter

  • vanilla ice cream, for serving

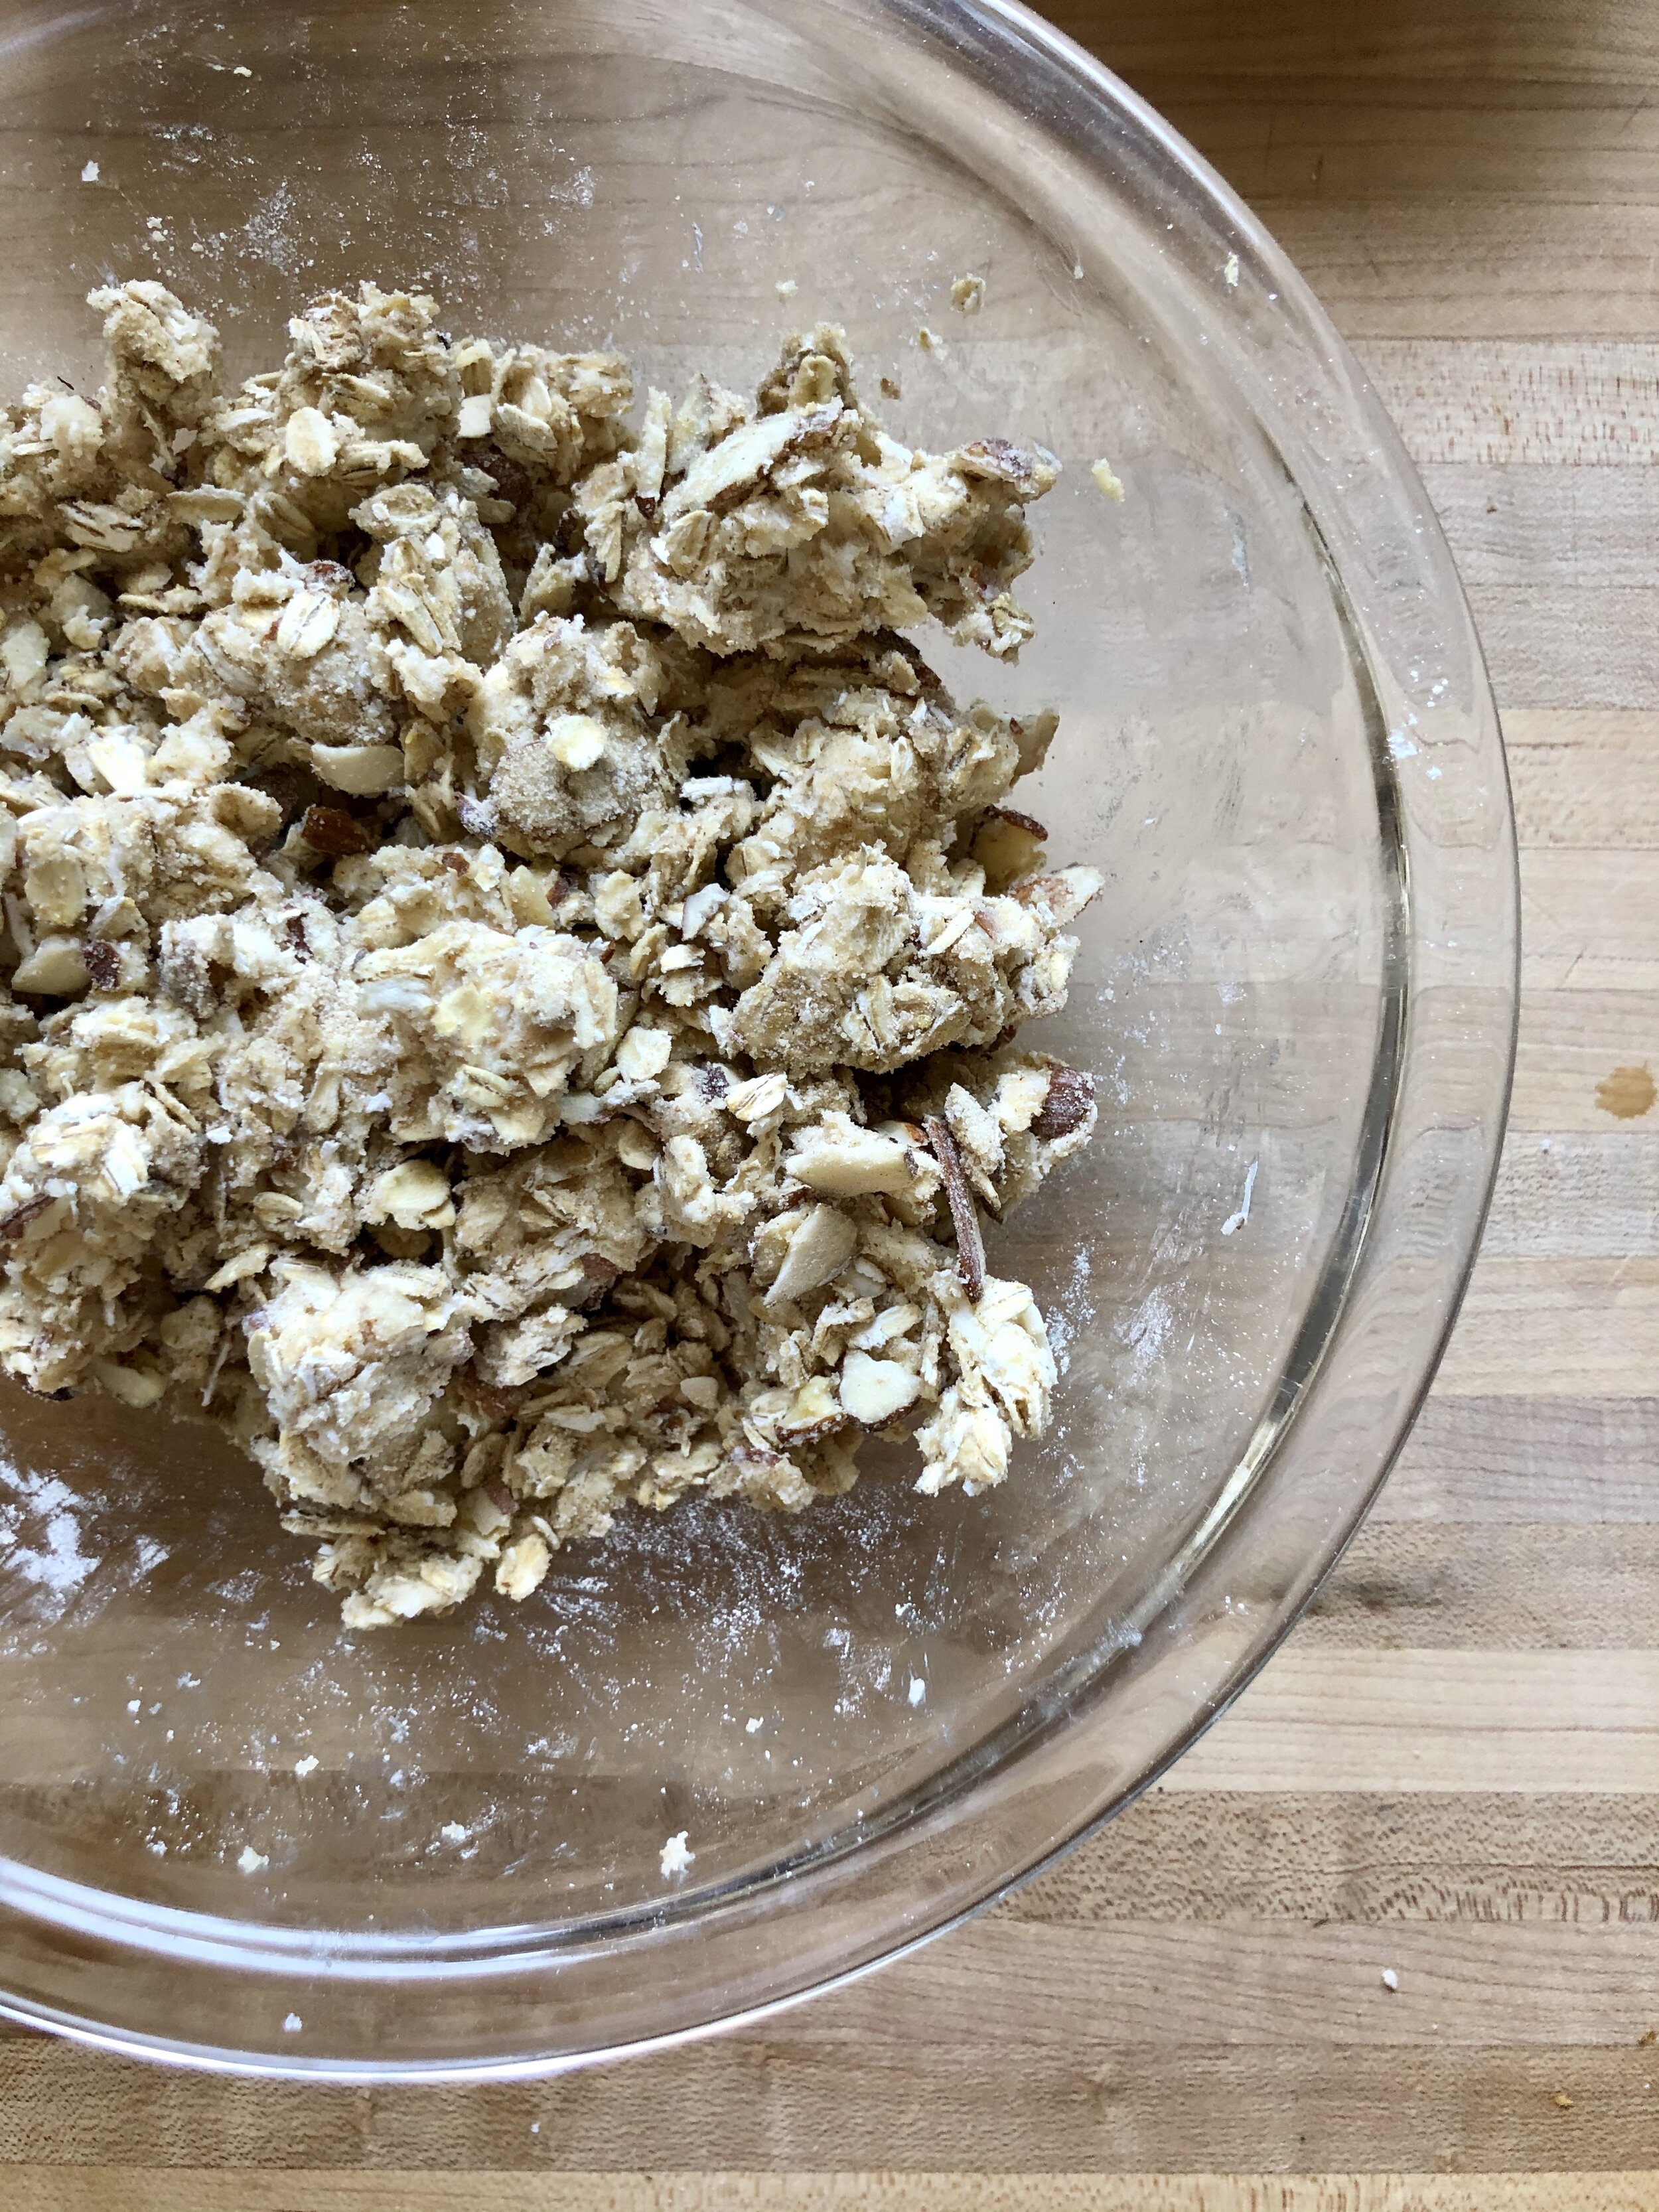
Preheat oven to 375°. In a large bowl, add peaches (thawed and liquid drained if using frozen), granulated sugar, lemon juice, and vanilla extract, stirring to combine. Pour peach mixture into a cast iron skillet, and place on a large sheet tray (to catch any spillage!). In a large bowl, whisk together flour, oats, slivered almonds, brown sugar, cinnamon, and salt. Using a pastry cutter (or your hands), incorporate butter into flour mixture until you have a clumpy mixture. Scatter crisp topping over the peaches, and bake until peaches are bubbling and crisp is golden, about 1 hour. Let cool 10 minutes before serving with vanilla ice cream.

*Adapted from Perfect Peach Crisp by Delish.

Useful Tools:

peach crisp à la mode

first birthday smash cake

I’m sure it’s no surprise to anyone that I was super excited to bake my son Dylan’s first birthday cake. Typically called “smash cake”, it’s a birthday cake for a one year old that they can essentially smash, play around with, eat, dig in, throw, whatever. Anything goes! And extra cake for me to eat? Yes please! While researching recipes, I knew I wanted something on the healthier side- not too much added sugar for sure. Fresh fruit like bananas are a great way to add a natural sweetness to your cakes without having to add a bunch of cane sugar. I also used a combination of coconut oil (healthy fats!) and applesauce, which keeps the cake nice and moist. Oat flour is a healthy alternative to all-purpose, and I made mine by grinding up rolled oats in a food processor. Super easy! If I’m honest, I didn’t even pulverize the oats into total flour consistency, and left it a bit coarser to give the cake some texture. Whatever you prefer! Plus, if you use certified gluten-free oats, this cake is completely gluten-free as well. In terms of frosting, which can all too often be a huge sugar bomb, I went the Greek yogurt route, with just a touch of maple syrup for sweetness! Make sure you strain it so it’s extra thick for frosting purposes. Feel free to decorate however you desire- a more “naked” frosted cake or spread all-over, and top with berries or natural sprinkles. I was assembling this away from home, without my usual tools and decorating accessories, so it didn’t end up being the prettiest cake out there (I essentially threw sprinkles at it to cover up a messy frosting job), but it was still super fun to make! Just don’t forget the first birthday candles! I’m happy to report Dylan dug right in and ate quite a few handfuls (mostly frosting). Thankfully, he even shared with his mama ;) Happy baking!

First Birthday Smash Cake:

  • 3 cups oat flour

  • 2 tsp baking powder

  • 1/2 tsp salt

  • 6 tbsp coconut oil, melted and slightly cooled

  • 6 tbsp unsweetened applesauce

  • 1/4 cup pure maple syrup

  • 3/4 cup mashed banana (about 1.5 large bananas)

  • 1/4 cup unsweetened almond milk

  • 4 large eggs

  • 2 tsp pure vanilla extract

  • fresh berries or sprinkles, for topping

Greek Yogurt Frosting: 

  • 3 cups whole milk greek yogurt

  • 1 cup cream cheese

  • 1/4 cup pure maple syrup

  • 1 tsp pure vanilla extract

Place greek yogurt in a mesh sieve or fine-mesh strainer lined with a paper towel with a bowl underneath. Let sit for a couple hours (or overnight in the fridge). Transfer the yogurt to a bowl and stir in maple syrup and vanilla extract. You may add more maple syrup if you prefer it sweeter. Refrigerate until ready to use.

Preheat the oven to 350 degrees F. Grease three 6-inch cake pans (you can alternatively use two 9-inch cake pans, but baking time will need to be adjusted), line each with parchment paper, and then grease the parchment as well. In a medium bowl, whisk together the flour, baking powder, and salt. In a large bowl or base of a stand mixer, whisk together melted coconut oil, applesauce, maple syrup, mashed banana, almond milk, eggs, and vanilla until smooth. Slowly add the flour mixture, mixing until just combined. Divide the batter evenly between prepared cake pans, and bake for about 22 minutes, or until a toothpick or cake tester comes out clean. Remove from oven and place pans onto a wire rack to cool for 15 minutes before removing cakes from pans to cool completely.

To assemble, level off any dome shape on your cakes, so you have flat surfaces. Place one cake on your cake stand, (you can also use cake boards and a revolving cake stand if you’d like!), and top with frosting, spreading it in an even layer just past the edges. Add the second, repeat with frosting, and then repeat with the third cake . Use an offset spatula or knife to scrape off the frosting overhang for a “naked” cake look, or use additional frosting to coat the entire cake. Top with berries or sprinkles, and enjoy!

*Adapted from First Birthday Smash Cake with Yogurt Frosting by Yummy Toddler Food.


superfood green smoothie

I love smoothies- for one, they’re delicious, but they’re also a great way to pack a bunch of nutritional ingredients into your diet in a jiffy! Plus they’re oh so refreshing any time of year. My superfood green smoothie boasts an exceptionally healthy profile thanks to fresh greens & spirulina, chia & flax seeds, plus fresh ginger & medjool dates, among other things. It not only tastes delicious, but is uber nourishing for your body as well. It’s perfect for those days when you feel you need some extra “health” in your life- maybe you’ve been noshing on a bit too much sourdough bread or pasta, and need to up your greens game, stat! Not to mention, it’s a great way to sneak veggies into your toddler’s diet if they’ve started to become a bit, ahem, particular…. Superfood smoothie to the rescue! I find smoothie recipes to be pretty forgiving, so feel free to make swaps and use what you have on hand. This one gets the majority of its sweetness from fresh fruit, but feel free to add a couple medjool dates or a spoonful of honey if you prefer things a bit sweeter. If I want to up my protein game, adding a serving of Sakara Organic Protein & Greens Super Powder to my smoothie to really kick things up a notch. I like my smoothies on the thicker side, where you could eat it out of a bowl with a spoon if you feel so inclined. But my husband, on the other hand, prefers a much thinner, easy-drinking smoothie, so feel free to add as much liquid as you prefer to get to your desired consistency. I’m happy to say that this smoothie satisfies not only myself, but also my husband AND baby! Winning! If you’re jonesing for more smoothies, definitely try my matcha coconut smoothie and turmeric sunrise smoothie as well! Enjoy :)

Superfood Green Smoothie:

  • 1.5 cups frozen banana slices

  • 1.5 cups frozen pineapple chunks

  • 2 cups almond milk (add more as needed)

  • 1 cup coconut water (or water)

  • 1/2 cup greek yogurt (or coconut yogurt)

  • 2 cup fresh or frozen greens (spinach or kale)

  • 1/2 cup fresh or frozen veggies (cucumber, cauliflower, carrot)

  • 1-2 tbsp nut butter (I like Nuttzo!)

  • 2 tbsp chia, flax, and/or hemp seeds (mix it up!)

  • 1 small nub fresh ginger, peeled

  • 1 tsp spirulina, optional

  • 1 serving protein powder (I like Sakara!), optional

  • 2 medjool dates (pitted) or 1 tbsp raw honey

  • ice, optional

To make your smoothies, add all ingredients to your blender (a high-powered Vitamix works best!) and blend away! Add protein powder for an extra protein boost, and extra dates/honey if you prefer a sweeter smoothie. More milk or water can be added to thin the smoothie to your desired consistency. Makes 2-3 smoothies. Enjoy!

Useful Tools:


lemon olive oil cake with polenta & rosemary

We are currently living through some crazy, uncertain, difficult, and stressful times. I don’t know about you, but in times of uncertainty, I find peace in the ritual of baking. I love the routine of it all, and the fact that some things do remain constant, even when so much else is unknown. We are lucky enough to have an abundance of lemons on our tree right now, so I took the opportunity to pick a bucket full. We use lemons pretty regularly, but even so, had more than we knew what to do with. It had been quite a while since I’d made an olive oil cake, but I do find them to be super comforting, and the perfect thing to nosh on while spending all this extra time at home, so it seemed like the perfect excuse! Plus, fresh citrus (zest & juice!) takes it to a whole other level. Using a top-notch quality olive oil for this as opposed to your typical store-bought variety is of the utmost importance here. I recommend Extra Virgin Olive Oil from Central Coast Family Farm for its crisp, pure olive flavor, which will keep your cake nice and moist. This olive oil cake is also entirely gluten-free, if that’s your thing- I find the hearty flavors and textures of almond flour and polenta complement the dense cake nicely. I also prefer to keep the cake itself not too sweet, as I typically serve it with assorted sweet toppings (like candied lemon peels, lemon marmalade & whipped cream) to balance things out. This baby will stay fresh wrapped in an airtight container at room temperature for several days, but you may also store it in the fridge if you prefer. It’s equally delicious at room temperature with a dollop of honey sweetened greek yogurt for breakfast as it is warmed in the oven and served with ice cream for dessert! You can bake this in a simple 8” cake pan, or use a springform pan for easy release of the sides! Whichever way you go about it, I hope that it brings you joy during this time. Stay safe, y’all!

Lemon Olive Oil Cake with Polenta & Rosemary:

  • 2 1/2 cups almond flour

  • 1 cup coarse ground polenta

  • 1 tsp baking power

  • 1/2 tsp kosher salt

  • 1 sprig fresh rosemary, finely chopped

  • 1 cup extra virgin olive oil

  • 1/3 cup honey

  • 1/3 cup cane sugar

  • 3 large eggs

  • 4 lemons, zested & juiced

  • 1 tsp vanilla or almond extract

  • powdered sugar, candied lemon peels & fresh rosemary sprigs, for topping

  • lemon curd & whipped mascarpone, yogurt, or ice cream, for serving

Preheat oven to 325° F. Grease an 8” round cake pan, line with parchment paper, and grease the paper as well. In a medium bowl, mix together almond flour, polenta, baking powder, rosemary, and salt, then set aside. In a large bowl, whisk together olive oil, honey, sugar, eggs, lemon juice & zest, and vanilla/almond extract until smooth. You may alternatively use a stand mixer if desired. Gradually fold in the dry ingredients until just combined.

Transfer the batter to the prepared cake pan, making sure it’s level and evenly distributed. Bake for approximately 40 minutes, or until a cake tester comes out clean. Remove from the oven and let cool in pan for about 5 minutes, and then flip out onto a wire rack to cool completely. Dust cake with powdered sugar and top with candied lemon peels and fresh rosemary. Serve with a heaping dollop of lemon curd or marmalade, and maybe some ice cream or whipped mascarpone as well. Enjoy!

*adapted from Orange Polenta Cake from Ottolenghi: The Cookbook

Useful Tools:

 * This post may contain affiliate links. If you buy something through one of these links, it won’t cost you a penny more, but I’ll earn a small commission. This allows me to continue to generate content for you, and helps keep the site up and running. Thanks for your support! 


turmeric rye banana bread

Honestly, who doesn’t love a good banana bread?? I feel like it’s one of life’s simple, but oh so delicious pleasures, and always nice to have on hand. It can be made as healthy or as decadent as you want, but I tend to love the heartier loaves chock full of good-for-you ingredients like whole grains, nuts, and seeds. My husband and I have been on a bit of a banana bread kick, and he recently whipped up such a unique & tasty version, I just had to share. Fresh ground turmeric really shines through in both flavor and appearance, giving this moist loaf a beautiful golden hue, and rye flour lends a hearty, but not overpowering hand. The pecans, hemp hearts, and chia seeds add a lovely texture, and the raw honey creates just the right amount of sweetness. It’s damn near perfect on its own, but lightly toasted with a pat of butter (or carrot cake jam, as pictured above), and it’s absolute heaven!

Turmeric Rye Banana Bread:

  • 7 oz whole wheat flour

  • 3 oz rye flour

  • 1 tsp ground turmeric

  • 1/8 tsp black pepper

  • 1/2 tsp ground cinnamon

  • 1 tsp baking soda

  • 1/2 tsp salt

  • 4 oz butter, melted

  • 4 oz raw honey

  • 2 large eggs

  • 4 extra ripe bananas (2 mashed, 1 chunky, 1 sliced)

  • 4 oz almond (or other non-dairy) milk

  • 1 tsp pure vanilla extract

  • 1/2 cup pecans, toasted & chopped

  • 1/4 cup hemp hearts

  • 1/4 cup chia seeds

Preheat the oven to 350 F. Sift both flours, baking soda, turmeric, black pepper, cinnamon, and salt into a large mixing bowl. In a separate bowl, mix the butter and honey together until smooth. Add the eggs, mashed bananas, almond and vanilla extract to the butter mixture until well combined. Then add in the chunky banana pieces as well. Fold in the flour mixture, then gently add the pecans, hemp hearts, and chia seeds. Grease a loaf tin, and pour in the batter, smoothing and evening out if necessary. Top with reserved sliced bananas. Transfer to the oven and bake for about 50-60 minutes, or until the top is golden-brown and bananas are lightly caramelized. Remove from the oven and cool in the tin for a few minutes, then turn out onto a wire rack to cool completely before serving.

*Adapted from Banana Bread from BBC.

Useful Tools:


salty nutty cereal cookies

Who doesn’t love holiday baking? I’m all about a cookie exchange, and these salty & sweet ones are sure to be a crowd pleaser. They don’t necessarily scream holidays, per se, but I think they fit in perfectly with a platter of otherwise festive cookies. And they’re super delicious, so who really cares? My mom has been baking up batch after batch of them this past week, and I have to say, I’m a huge fan. I love a sweet & salty flavor combo, and the almond flour & pecans lend the perfect amount of nutty goodness. Feel free to use a simple flakey cereal of your choice, or mix it up with a crunchy granola! You could even make them gluten-free by subbing in your fave GF flour for the all-purpose. These babies are super versatile, so have fun with it, and enjoy! Happy holidays!

Salty Nutty Cereal Cookies:

  • 3/4 cup coconut oil or unsalted butter

  • 1 1/4 cup dark brown sugar, packed

  • 1/4 cup pure maple syrup

  • 3 large eggs, at room temperature

  • 1 tablespoon pure vanilla extract

  • 2 1/2 cups all-purpose flour

  • 1/2 cup almond flour

  • 1 ½ teaspoon baking soda

  • 1 ½ cup old-fashioned rolled oats, toasted

  • 2 cups flakey or crispy cereal (your choice!)

  • 1/2 tsp flaky sea salt, plus more for topping

  • pecan halves, for topping

Preheat oven to 350° F. Spread oats on a cookie sheet and toast for 10 minutes. Set aside to cool. Beat coconut oil, brown sugar & maple syrup together on a medium speed until well incorporated. Add eggs and vanilla, mixing until fluffy, about 5 minutes. In a separate bowl, stir together flours, oats, baking soda & salt. Slowly add to the butter egg mixture. Add cereal and mix until combined. Refrigerate dough for at least 4 hours (overnight is better, but feel free to bake off a few right away too!). Line cookie sheet with parchment paper or nonstick baking mat. Measure out heaping tablespoon-sized balls and spread evenly on cookie sheet. Flatten the cookies a bit with your fingers, top with a pecan half and sprinkle with flaky sea salt. Bake for 8-12 minutes, or until lightly golden brown. They will continue to harden a bit post-baking, so it’s okay if they look a tad underdone. Cool on cooling rack and enjoy!

*Adapted from Salted Oatmeal Corn Flake Cookies by sweetish.co.

Useful Tools: